Card Designer
- Print
- DarkLight
- PDF
Card Designer
- Print
- DarkLight
- PDF
Article summary
Did you find this summary helpful?
Thank you for your feedback!
The Design Card command allows users to customize the data that appear on the cards for most layers. For example, if there is a data field that you reference often but it doesn't appear on the summary card, it can be added to that card. You can even add/remove commands, remove a card altogether, or configure the card differently for specific property types.
Note:
Using the Design Card command to make user-level customizations has the potential to block future updates on the parcel card that are provided at the account-level, unless the user chooses to reset their parcel card back to default settings. This is due to account-level updates not being able to override user-level customizations.
See the section further below on how to reset the parcel card.
Warning : Resetting the parcel card will remove previously saved changes made while using Design Card back to default.
Adding a Field
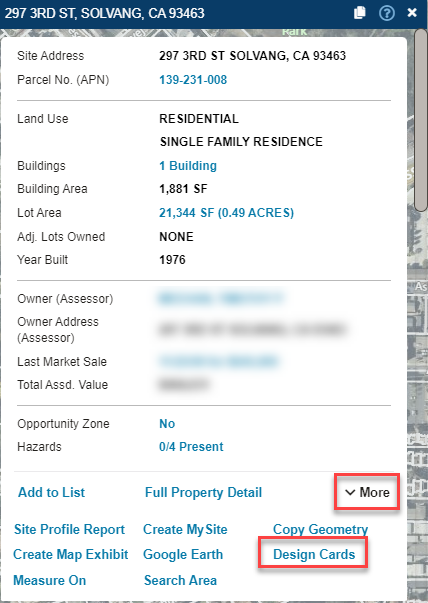
1. Open the Location Information Panel for the layer/card that you would like to design.
2. Click More on the summary card to open more commands.
3. Select Design Cards.
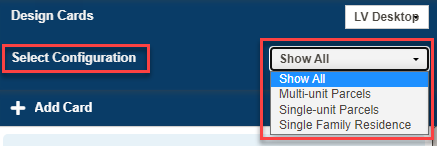
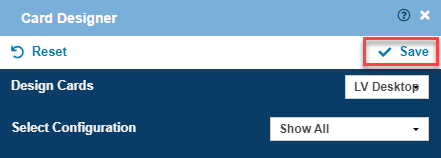
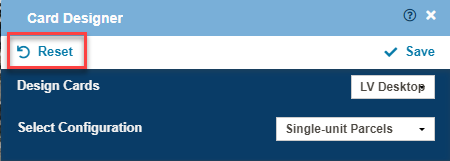
4. Under the Select Configuration you can set up the panel to be configured to specific property types.
- Choose Show All if you want all cards to reflect the changes
- Choose the other options (multi-unit parcels, single-unit parcels, single family residence) if you want your changes to only be visible on those kinds of parcels
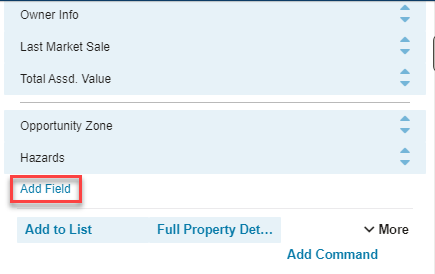
5. Click Add Field on the card that you want to add a new field. This will open a new window.
Tip:
You can add a field to any of the cards. The top card is the summary card but you can scroll down to edit the other cards as well.
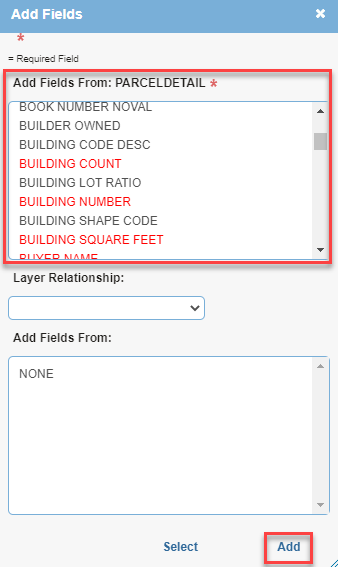
6. In the new window select the field to be added. Click the Add button and then close out of the window.
Note:
The fields highlighted in red are fields that are already located somewhere on the Location Information Panel. However, you can still add these fields to the summary card.
Tip:
You can select multiple fields by holding ctrl as you click on each field.
7. Close from the X in the top right corner of the Add Fields panel. Then click the Save button in the top right corner. At the next window, choose the Folder as USER and hit OK. Changes are now saved.
Removing a Field
1. Open the Location Information Panel for the layer/card that you would like to remove the field.
2. Click More on the summary card to open more commands.
3. Select Design Cards.
4. Click the field on the card that you want to remove.
5. Select Delete to remove the field

6. Click Save in the top right corner to save the changes
Reset Panel to Default Settings
1. Open the Location Information Panel that you would like to reset to the default settings.
2. Click More on the summary card to open more commands.
3. Select Design Cards.
4. Click Reset and OK at the prompt to reset all of the cards back to default settings/appearance.
Was this article helpful?