- Print
- DarkLight
- PDF
Building an ArcGIS Locator Using SmartFabric Addresses
- Print
- DarkLight
- PDF
SmartFabric is a dataset that can be integrated with and used within many different technologies. One integration pattern that LightBox supports is the ability to use SmartFabric within ArcGIS Locator. ArcGIS Locator is Esri’s geocoding technology that can be used for both desktop and server geocoding. Putting SmartFabric into a custom Locator can allow you to utilize an Esri geocoding pattern if that is what you are most familiar with.
The general workflow for creating a Locator is:
- Transform the SmartFabric data into a format that is ready for Locator ingestion.
- Run the Locator creation tools within ArcGIS Pro, or a supportive API.
- Test the Locator to ensure that it works.
Once a Locator has been built, it can be deployed in any way that ArcGIS supports. A SmartFabric Locator can be utilized as the primary geocoding dataset, the sole geocoding dataset, or configured as a fallback dataset.
Creating a Locator from SmartFabric
There are several methods to go about using SmartFabric Addresses to create an ArcGIS Locator that will be covered below.
For most examples the input for the locator is either a table in the format of a csv, dbf, feature class, or table within a PostGreSQL database.
If the data you are being delivered is in either CSV, DBF or FGDB format you can load the SmartFabric addresses data directly into ArcGIS without needing to ETL the data. If this is the case feel free to refer to the Creating Locator section below and follow those steps to creating your locator from CSV, DBF or FGDB and skip the data prep step listed below.
Data Prep
If the SmartFabric Addresses table (smart_fabric.address in this example) is in a postgresql database, it can be utilized to select the addressing information from the table and export it to a form that can be brought into ArcGIS, for this example, exporting to a .csv.
The data needed within the SmartFabric Address table to create a Locator is as follows:
- SELECT address, unit, city, state, zip, county, country_code, house_number, street_name, prefix_direction, prefix_type, suffix_direction, suffix_type, fips_code, ST_X(geometry) as x_coord, ST_Y(geometry) as y_coord FROM combined_fabric.address
If the geometries are preserved in the table (PostGIS), the ST_Y(geometry_column) or ST_X(geometry_column) function can be utilized to output an X,Y that can be used as input for the Locator.
The selection would look similar to: SELECT ST_X(geometry), ST_Y(geometry) FROM combined_fabric.address
A separate table can be created in the database as the above selection and can be exported as a .csv file with either of the following methods:
- Using the PGAdmin interface (right click on the table and hit Import/Export data)
- Using the PSQL Command Shell to export a csv.
Both examples are shown below.
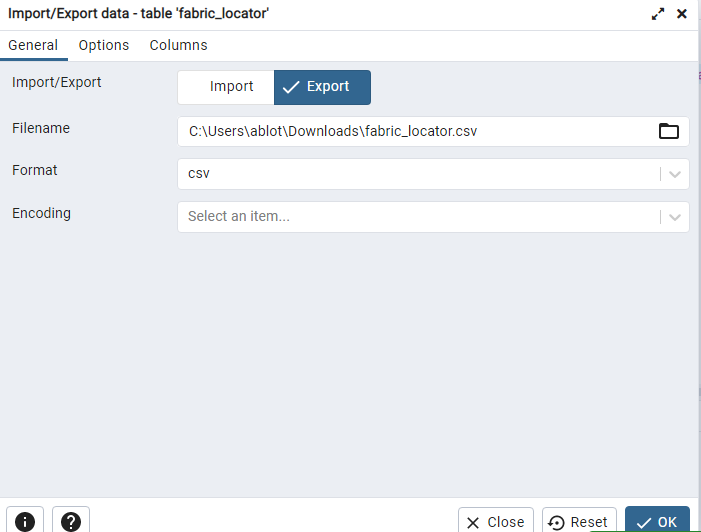

A .csv file will be exported that will create a Locator consisting of 100 addresses coming from the state of Arkansas utilizing the SmartFabric Addresses table.
Creating a Locator
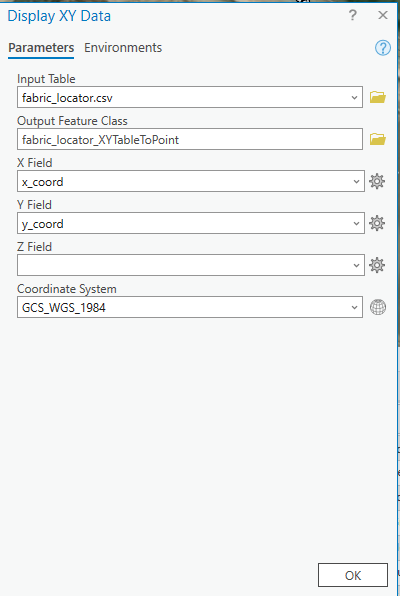
1. Once the .csv has been exported, it can now be opened in ArcGIS. If a Feature Class is needed to be created from the .csv to display the points onto a map, right-click the .csv and select the "Display X,Y" options.
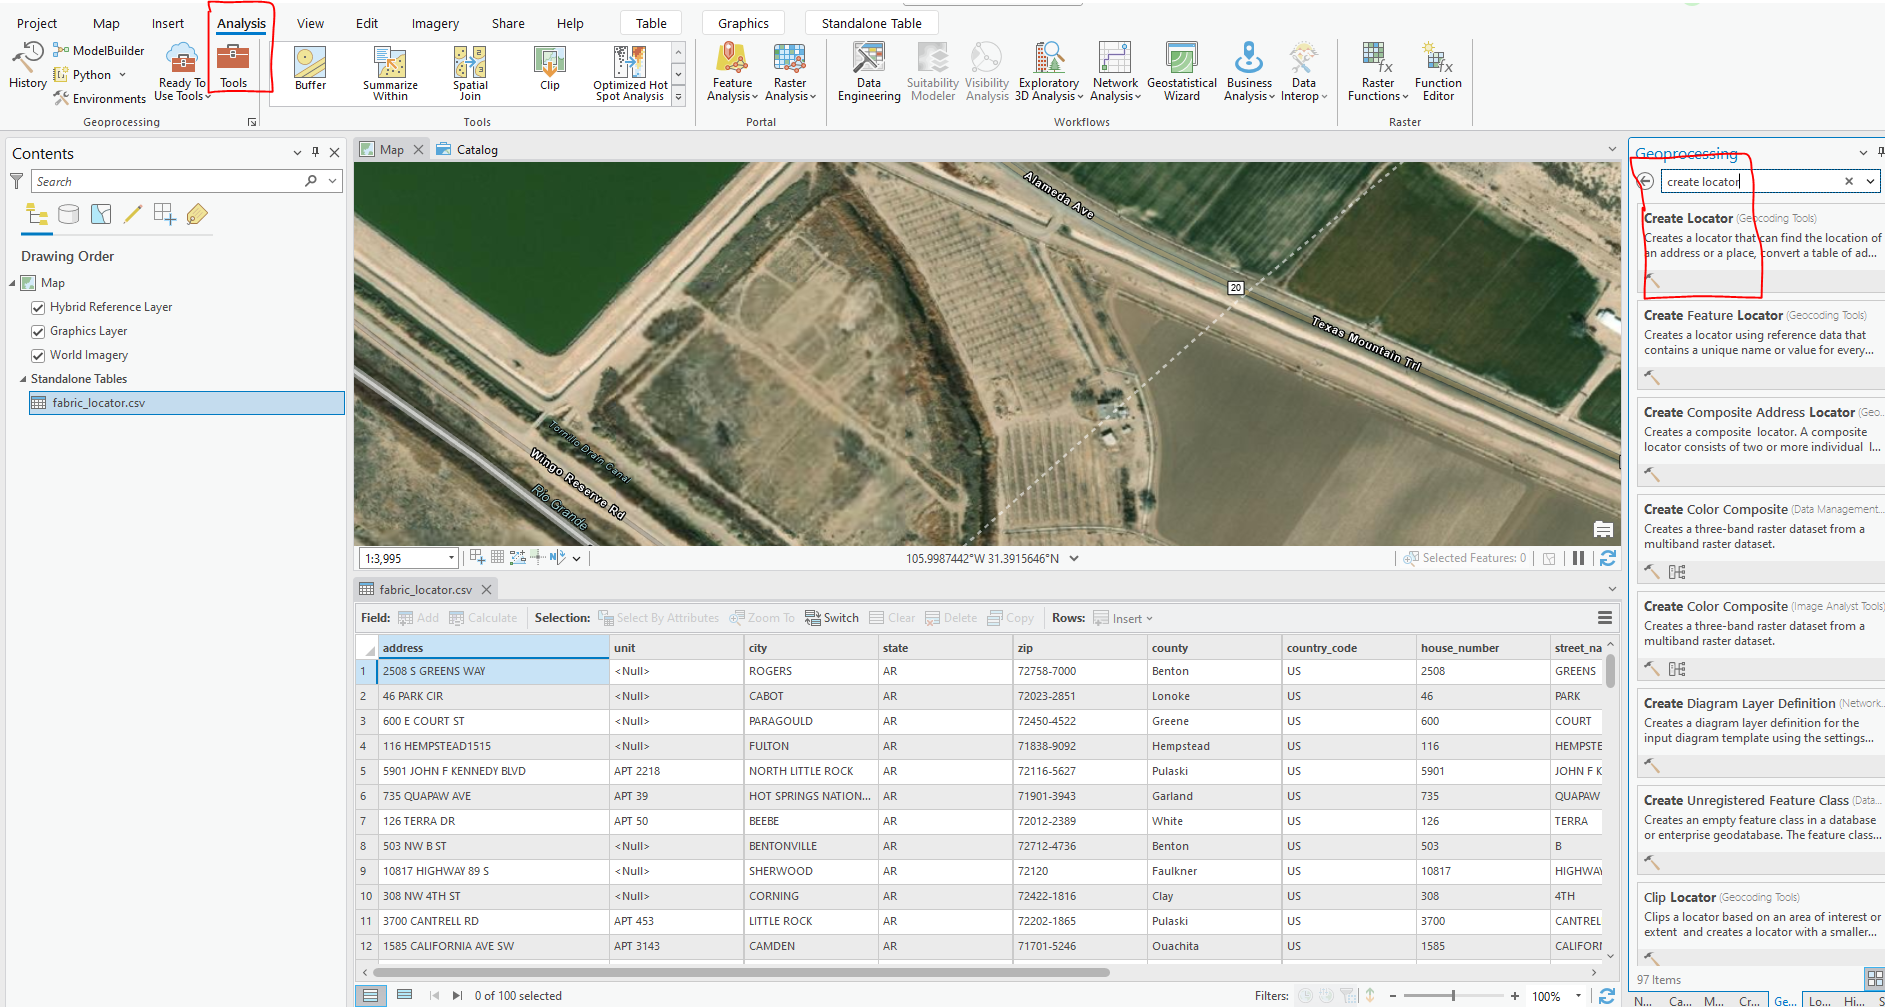
2. Next, in the ArcGIS window, select Analysis > Tools. The geoprocessing pane will open. Using the Search field, search for “Create Locator”.
3. The parameters for the Locator can now be set. Select which addressing components in the addresses table to use (parsed or whole addresses).
Make sure to input the X and Y columns into the “Display X” and “Display Y” parameters.
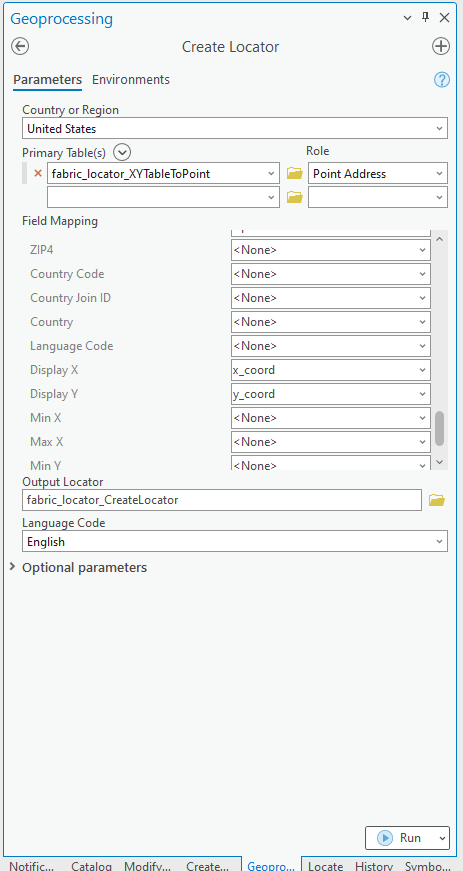
Next, click Run and the Locator will be created. It can be found in the "Locate" tab at the bottom of the same pane as the Create Locator tool.
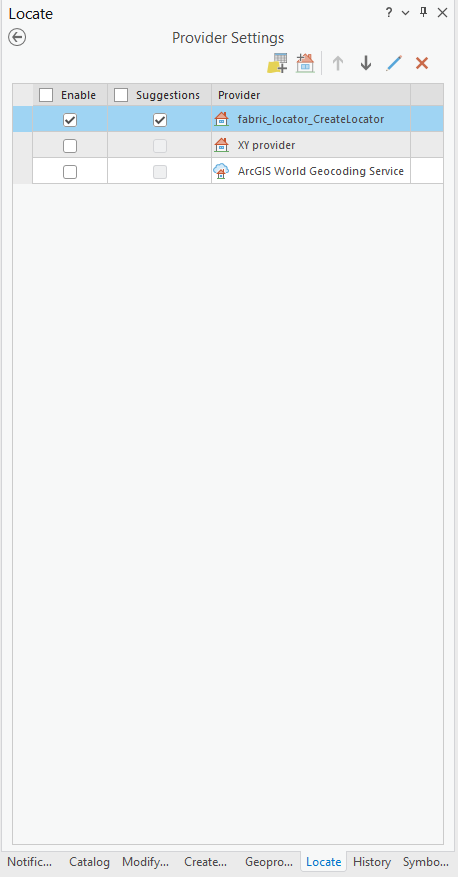
In the Locator window, enter an address into the search bar. The map will display the X, Y that is referenced from the SmartFabric Addresses along with all of the referenced address information.

Pulling Directly from PostGreSQL within ArcGIS Pro
A database connection can be created within ArcGIS to pull the SmartFabric data directly from the database/schema it has been stored in.
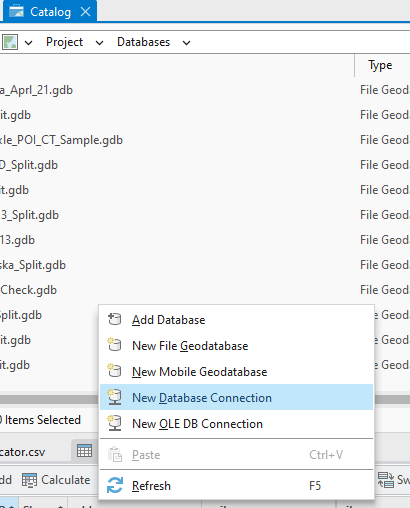
1. Go to the catalog view withing ArcGIS and right-click, next select New Database Connection. *right click where or on what?
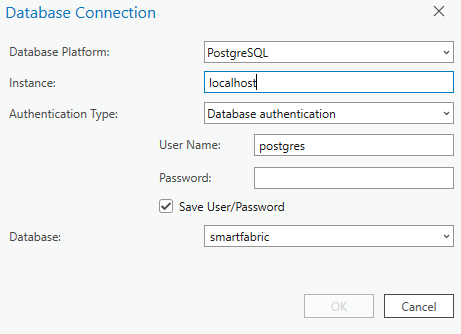
2. Next, enter the parameters for the database connection to be accessed that contains the SmartFabric Addresses table.
3. Once a connection has been established, it will appear in the catalog view with any other Geodatabase connections that are stored within that project. Within is, any table can be added from the database to the map.
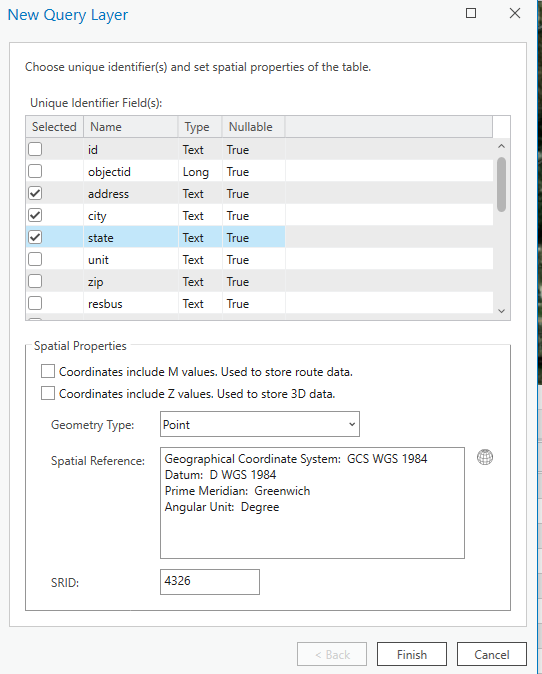
Which columns to be used for the Locator can be selected in the table. Enter which spatial reference to use to bring the data into ArcGIS. The table will automatically be brought in as a feature class with geometries without the need to convert the geometry column to X and Y.
Once the feature class is added to the map, a Locator can be created using the steps above.
.png)

.png)