Vendor Job Manager Workflow
- Print
- DarkLight
- PDF
Vendor Job Manager Workflow
- Print
- DarkLight
- PDF
Article summary
Did you find this summary helpful?
Thank you for your feedback!
Purpose
The purpose of this Job Aid is to describe how to procure Vendor Job Manager Services. It also describes how a Vendor Job Manager completes an assignment.
Audience
Job Managers and Content Administrators.
Vendor Job Manager Workflow
The Vendor Job Manager (VJM) workflow comprises the following steps:
Procurement (JM/CA): The Job Manager sends an RFP for an external Service to be completed by a VJM.
Accept Award (VJM): The awarded VJM accepts the award and completes the assignment in Collateral360 via the VJM tool.
Complete Data Capture (VJM): If required by the assignment, the VJM will complete and/or interpret a Data Capture.
Complete Review (VJM): If required by the assignment, the VJM will complete a Review Memo.
Complete and Submit VJM Assignment (VJM): Upon completion of the assignment, the VJM will save and close the assignment in Collateral360, submit the assignment in PARCEL, then upload an invoice and finalize the job.
Sending an RFP to a Vendor Job Manager (JM/CA Perspective)
The workflow for sending an RFP to one or more VJMs is nearly identical to the typical RFP workflow.

Navigate to the appropriate Service page (Valuation, in this example).
Click Create RFP for the appropriate Service (Appraisal Review, in this example).
If the Service can be sent to a VJM for completion, the RFP will ask “Do you want to procure this service to a Vendor Job Manager?” The default is “No.”

Click Yes and four new options will appear.

Interpret Completed Data Capture and Author Review Memo: Directs the Vendor Job Manager to interpret the Data Capture and author a Review Memo. When this option is selected, two additional drop-down menus will appear below.

Select the Service to be reviewed and the appropriate Review Memo Template from the drop-down menus. If no Data Capture has been started, an error message will appear in place of the first drop-down menu.
To make a service eligible, save and exit the RFP, start a data capture, then return to complete the RFP.Author Review Memo Only: Directs the Vendor Job Manager to complete a Review Memo only. When this option is selected, a drop-down menu appears below.

Select the appropriate Review Memo Template to proceed.Complete Data Capture Only: Directs the Vendor Job Manager to complete a Data Capture only. When this option is selected, a drop-down menu appears below.

Select the appropriate Service to proceed.
Complete the RFP and click Save and Procure at the bottom of the page.
Receiving a Vendor Job Manager RFP (Vendor Perspective)
When you’ve received an RFP for a Vendor Job Manager job in PARCEL, the details can be viewed in the RFP Details PDF. This document can be found in the upper right-hand corner of the bid page, as well as at the bottom of the bid page in the Reports, Data, and Research section.

The Vendor Job Manager information will appear near the bottom of the PDF.

The VJM bidding and award acceptance workflow in PARCEL is identical to other, non-VJM jobs. Once the award has been accepted, navigate to All Projects tab in PARCEL and click View Details.

The View Details page will open. Two Vendor Job Manager-specific buttons are visible under the Review Forms heading.

Open Review Forms: Click to open Collateral360 and begin the assignment.
Submit Assignment: Click to submit the completed assignment.
To begin the assignment, click on Open Review Forms. Collateral360 will load, displaying the appropriate Service page (Valuation, in this example).

Click on Actions.

The buttons that appear in the Actions drop-down menu reflect the specific requirements of the assignment, as described in the RFP Details document:
Interpret Completed Data Capture and Author Review Memo: Open Data Capture and Open Review Memo buttons are visible.
Complete Data Capture and Author Review Memo: Open Data Capture and Open Review Memo buttons are visible.
Author Review Memo Only: Open Review Memo is visible.
Complete Data Capture Only: Open Data Capture is visible.
To begin completing or interpreting a Data Capture, refer to Completing the Data Capture.
To begin authoring a Review Memo, refer to Completing the Online Review Memo.
Note: Completing the assignment will require, at most, accessing three pages in Collateral360.
The relevant Service page (Valuation, Environmental, or Construction).
The Data Capture page.
The Review Memo page.
While other pages (e.g. Report Status and File Manager) can be accessed, they do not contain information or functionality necessary to complete a VJM assignment.
Completing the Data Capture (Vendor Perspective)
To access the Data Capture, click Actions and then click Open Data Capture in the drop-down menu. 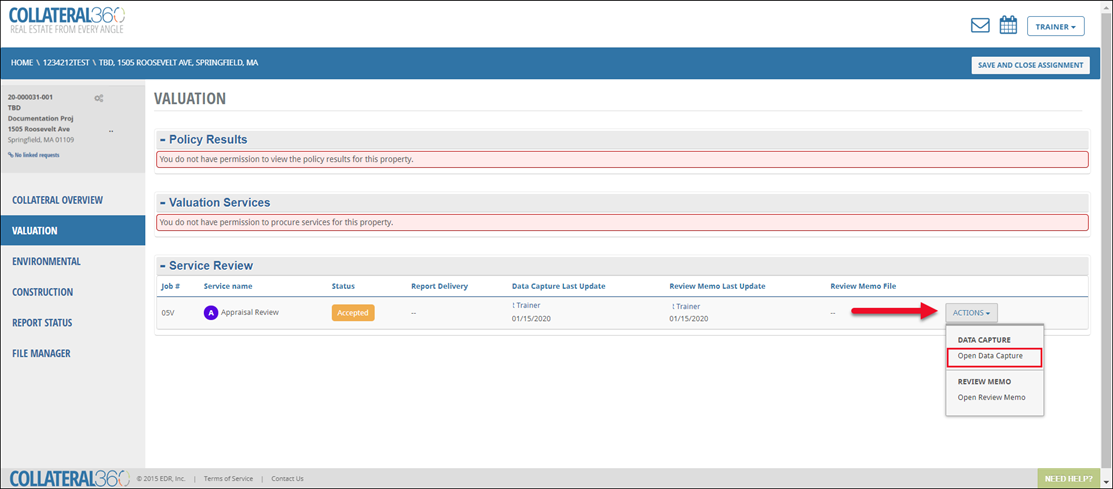
The Data Capture page will open.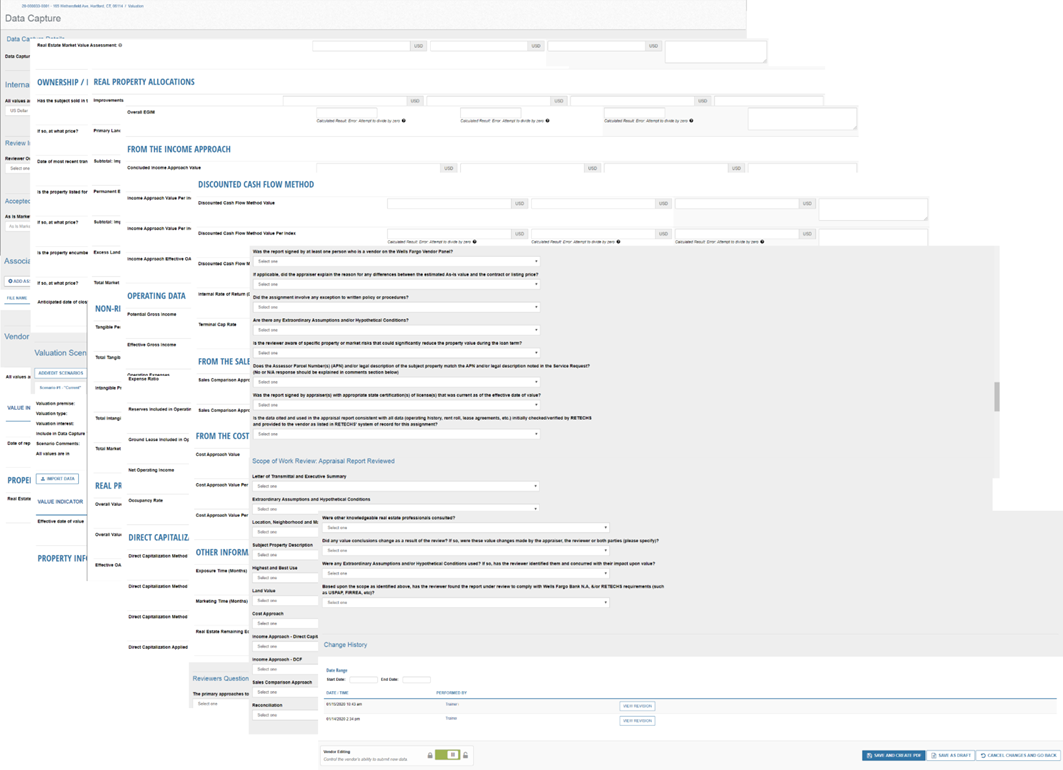
The specific fields and drop-down menus available vary among Services and templates. Complete and/or interpret the Data Capture by entering the relevant values and making selections.
Note:The values entered in the Vendor’s Initial Values column can be copied to the Vendor’s Final Values column; the values from the Vendor’s Final Values can be copied to the Reviewer’s Conclusions column.
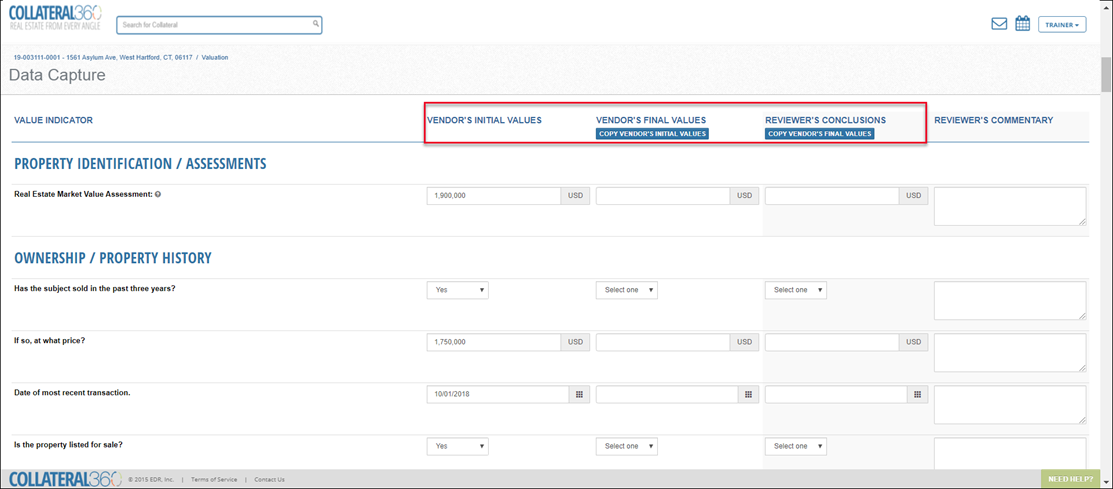
To copy the Vendor’s Initial Values into the Vendor’s Final Values column, click Copy Vendor’s Initial Values at the top of the Vendor’s Final Values column.
The values from the Vendor’s Initial Values column will populate the Vendor’s Final Values column.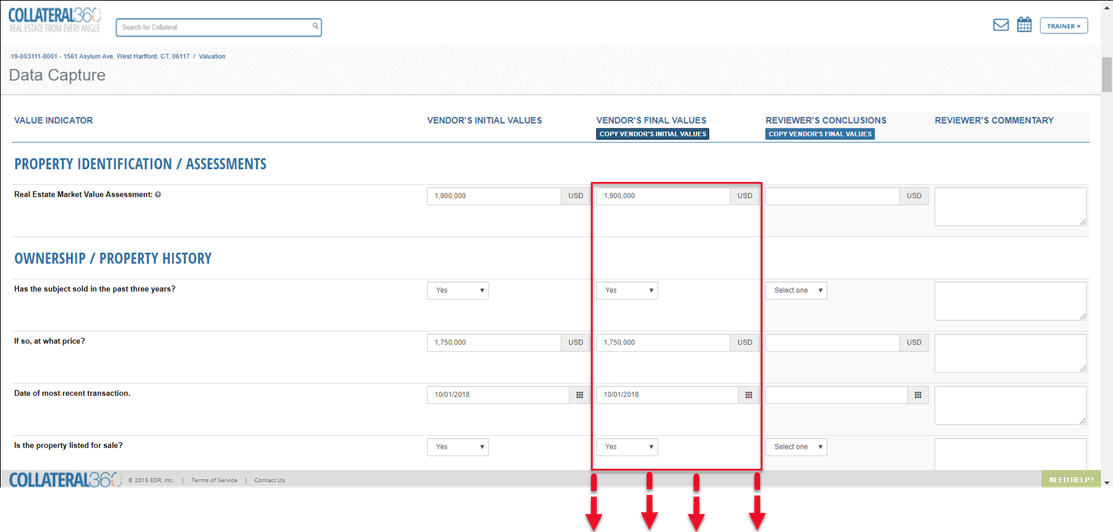
To copy the Vendor’s Final Values into the Reviewer’s Conclusions column, click Copy Vendor’s Final Values.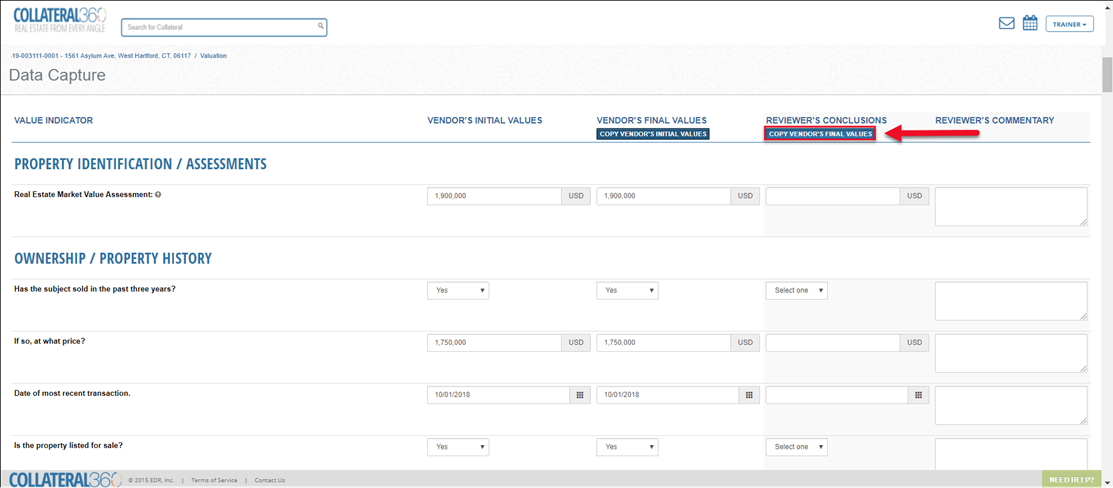
The values from the Vendor’s Final Values column will populate the Reviewer’s Conclusions column.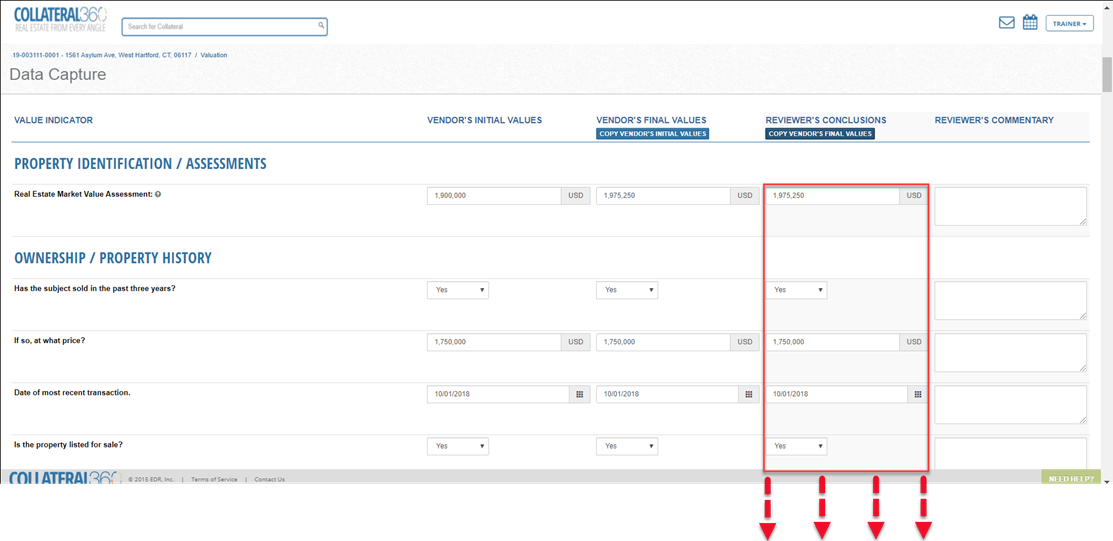
Make required changes and/or additions to the data and then click the Save and Create PDF button at the bottom of the page to finalize the Data Capture.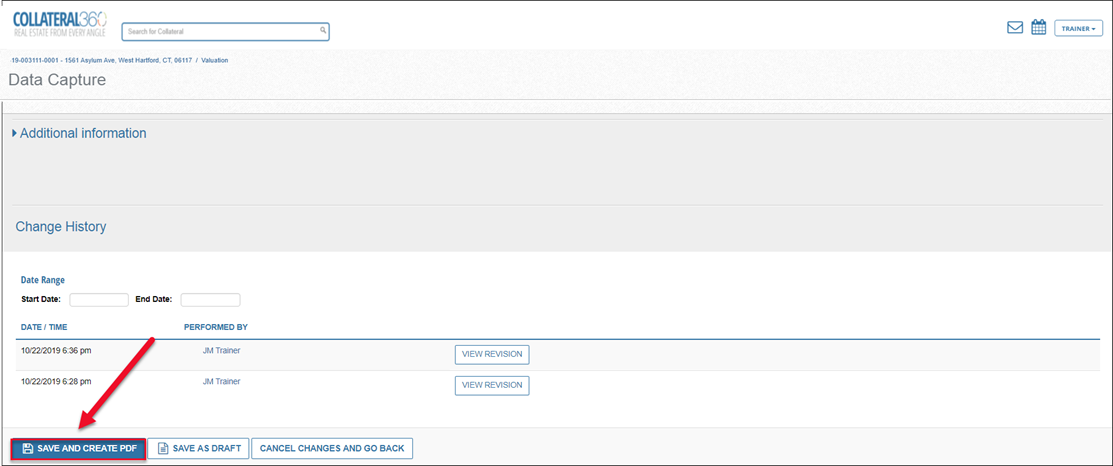
Click View Revisionto see all the details in the Data Capture.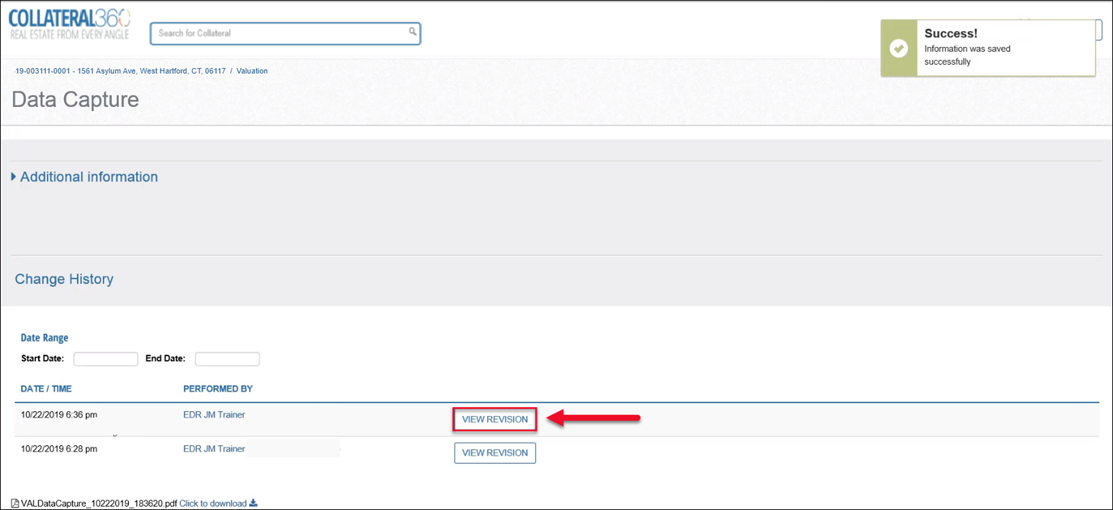
The Revision history modal will open.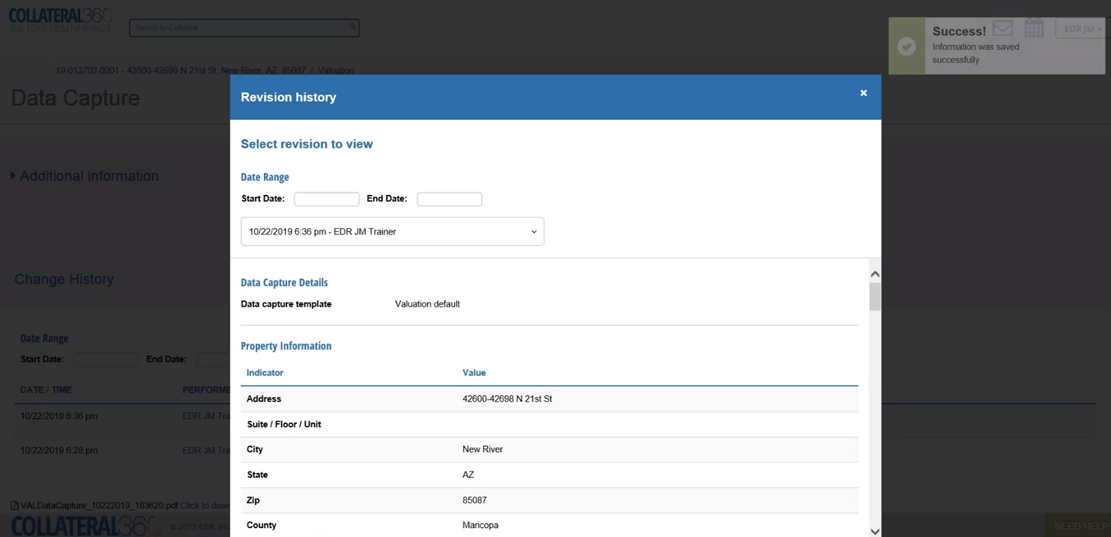
Once the Data Capture process has been completed, click on the blue Service link (Valuation in this example) to return to the Service page.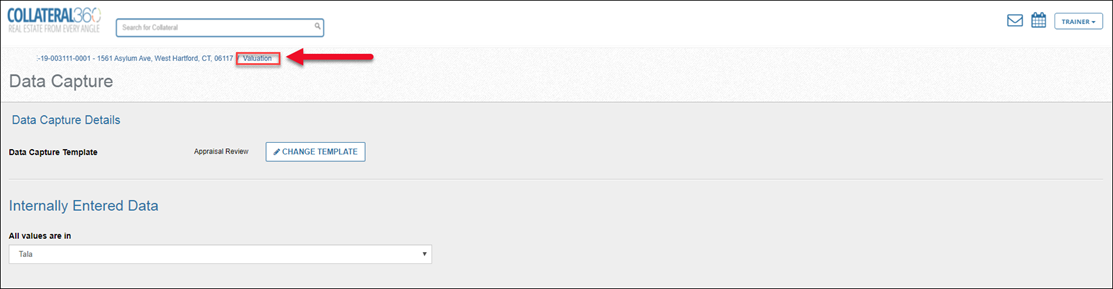
The date of the last Data Capture update will be listed.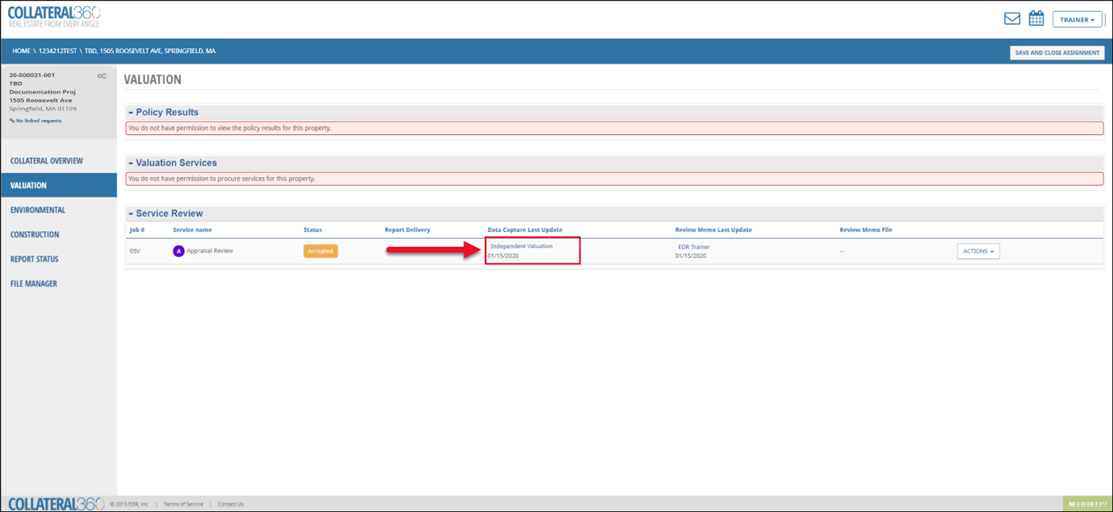
Completing the Online Review Memo (Vendor Perspective)
To start a Review Memo, click on Actions, then click Open Review Memo in the drop-down menu.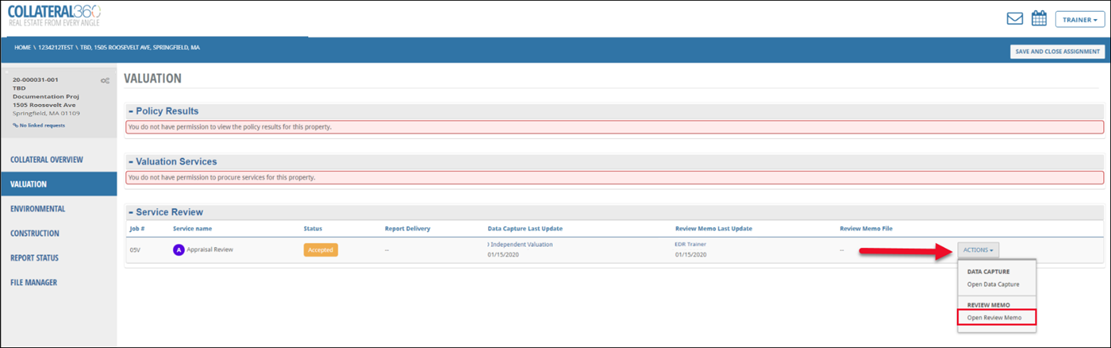
The Review Memo will open.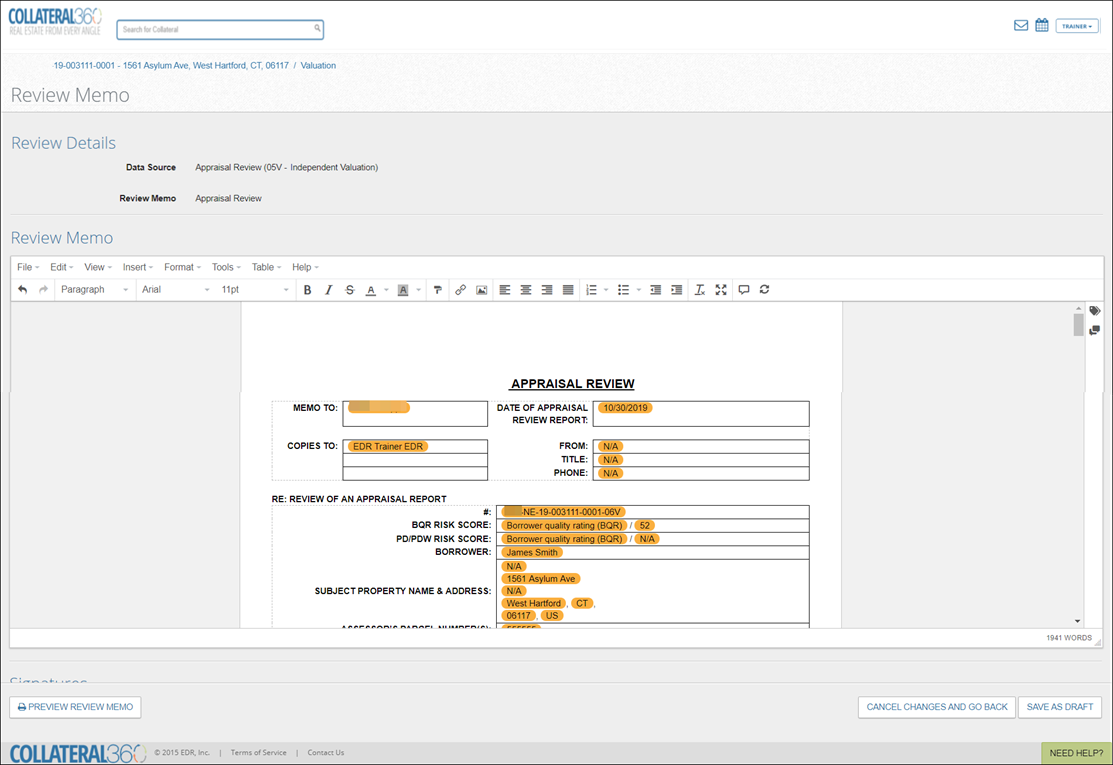
There are two important Review Memo tools to be aware of:
Variables
Comments
Variables (Vendor Perspective)
Variables appear in the Review Memo document as orange fields.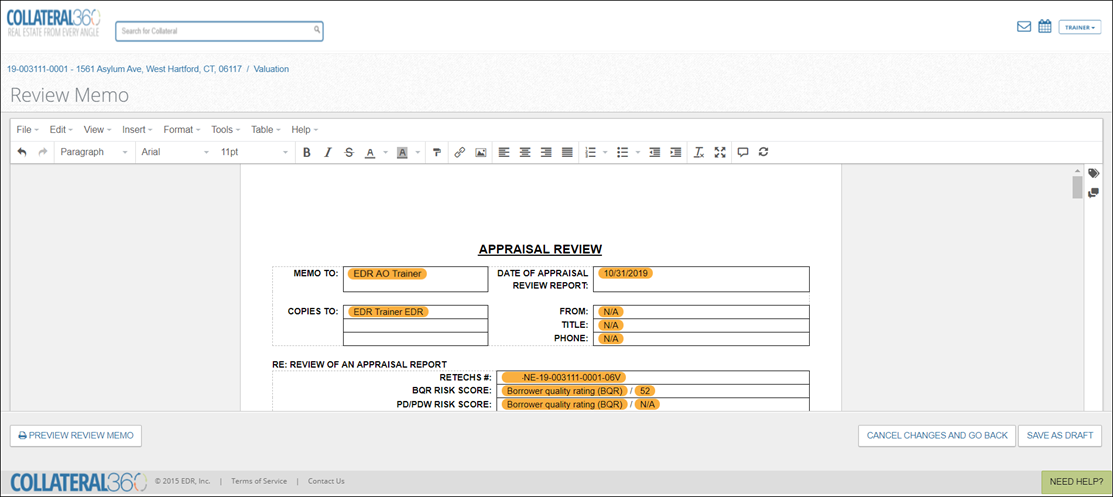
Each Variable will populate the relevant, job-specific information for that variable type. For example, the Variable in the MEMO TO cell in the screenshot above is Account Officer, which is populating the value EDR AO Trainer (the Account Officer on this job).
Variables can be inserted by clicking the tag symbol in the upper right-hand corner of the document.
Click on a Variable header, such as Collateral Information or Service Information, to expose the Variables nested beneath it. Click on a Variable to insert it in the Review Memo document in the current location of the cursor.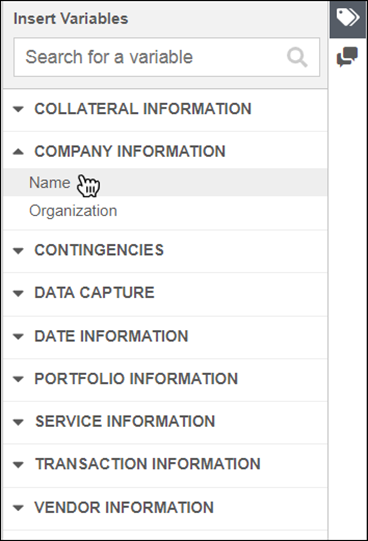
The appearance of some Variables can be modified. The appearance options available are based on the type of Variable – text or numerical.
Click on a Variable and then click the gear symbol to open a modal.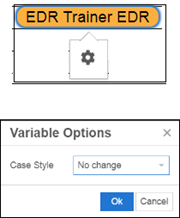
Text Variables have the following four options:
No change (Maintains the existing formatting from the source, such as the SRF or RFP)
All uppercase
Capitalize first word
Title style
Numerical Variables have the following eight options:
$1,234 (currency symbol and thousands separator)
$1234 (currency symbol and no thousands separator)
$1234.00 (currency symbol and two decimal points)
$1,234.00 (currency symbol, thousands separator, and two decimal points)
1234 (no currency symbol, thousands separator, or decimal points)
1,234 (thousands separator)
1234.00 (two decimal points)
1,234.00 (thousands separator and two decimal points)
Comments (Vendor Perspective)
Comments can be inserted in the body of a Review Memo document. These Comments are for the benefit of the reviewer(s) and will not be visible in the final PDF document.
To insert a Comment, click the Comment bubble icon in the upper right-hand corner of the Review Memo document.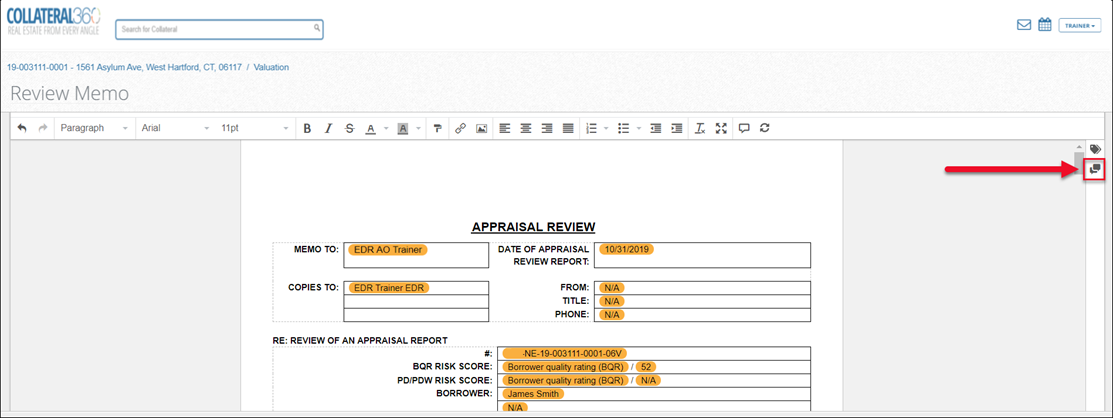
The Comment interface will open in the right-hand side of the screen.
When the Comment interface has been opened, existing Comments will be represented in the body of the document by blue bubbles. 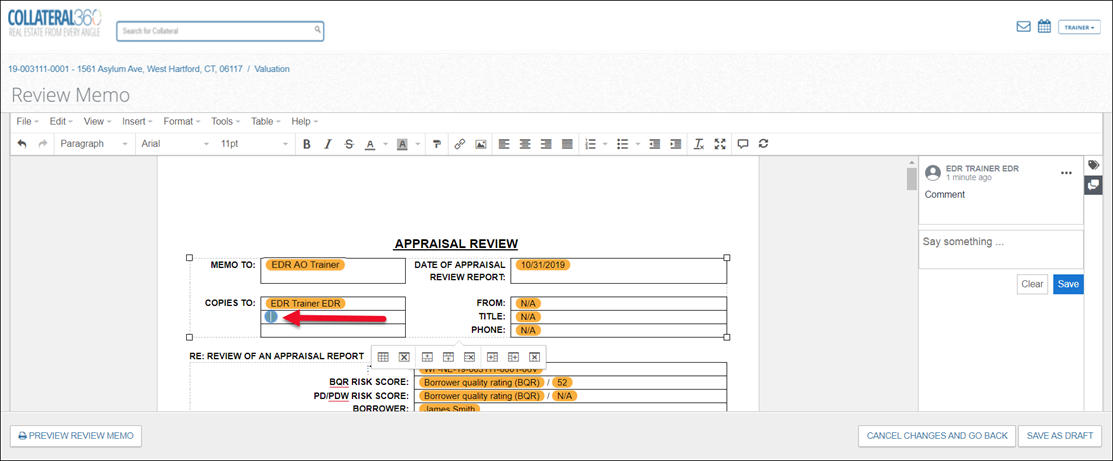
Click on a blue bubble to open the Comment in the Comment interface on the right.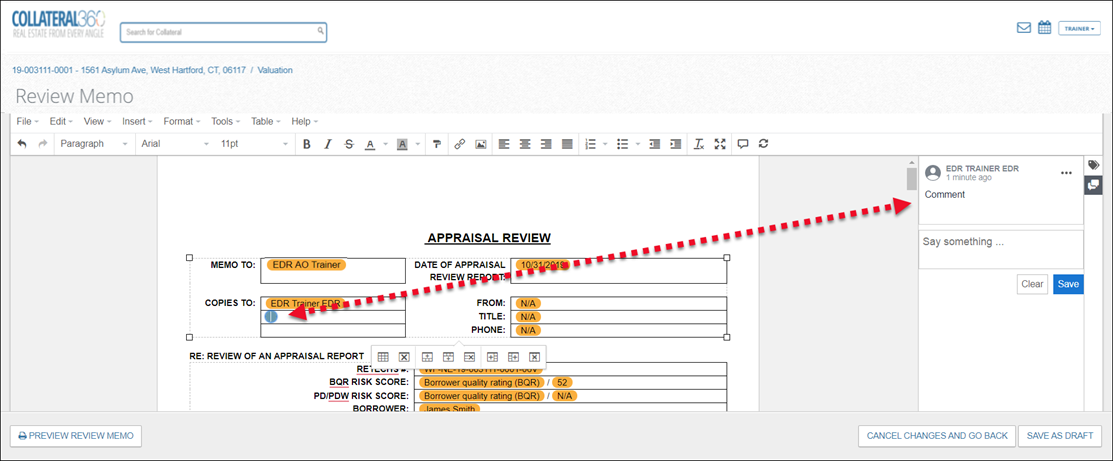
To respond to the Comment, enter text in the text box below the original Comment and then click Save.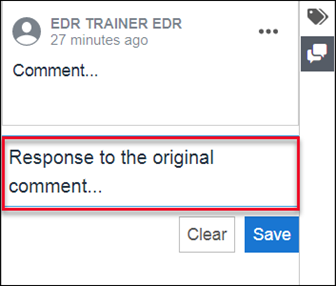 Once the Comment response has been saved, it will then appear beneath the original Comment whenever the Comment bubble is clicked in the document.
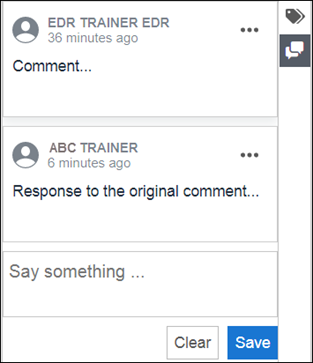 A Comment you have posted can be edited or deleted. Click on the three dots in the upper right-hand corner of the Comment to expose a menu with two options:
Delete Comment OR Delete Conversation: One of two button labels will be listed.
If there’s a single Comment, or if attempting to delete the first Comment in a multi-Comment thread, the button will read ‘Delete Conversation.’ Note that deleting the first Comment in a multi-Comment thread will delete all Comments in the thread, including those made by other users.
If clicking on a secondary, tertiary (etc.) comment, the button will be labelled ‘Delete.’
Edit: Opens the Comment for editing. Click Save to save the changes after editing or click Cancel to discard the changes.
To insert a Comment, click a location in the Template, or highlight text or an image. Then, click the Comments icon to open the Comments interface.
Enter the desired text, then click Save. The Comment will be inserted at the location selected/on the text or image highlighted.
There are two additional methods for inserting a Comment: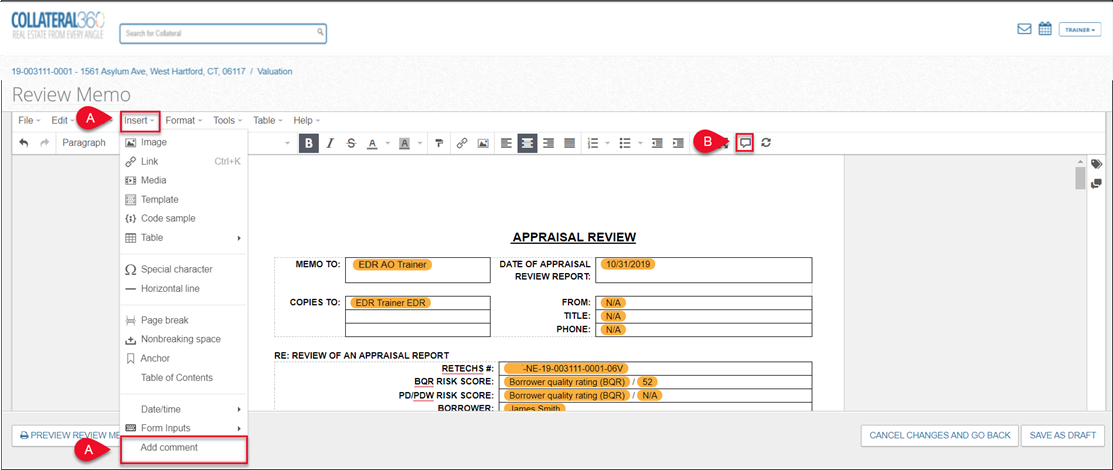
A. Click Insert in the toolbar at the top of the document, then click Add Comment. The Comments interface will open.
B. Click the Comment icon in the toolbar at the top of the document. The Comments interface will open.
Data Entry and Review Completion (Vendor Perspective)
Complete the Review, entering all required information.
Text can be entered directly into the document or pasted in from another source. Note that when text is pasted from another source, it often includes unwanted formatting. To remove formatting, select the text, click Format, then click Clear Formatting.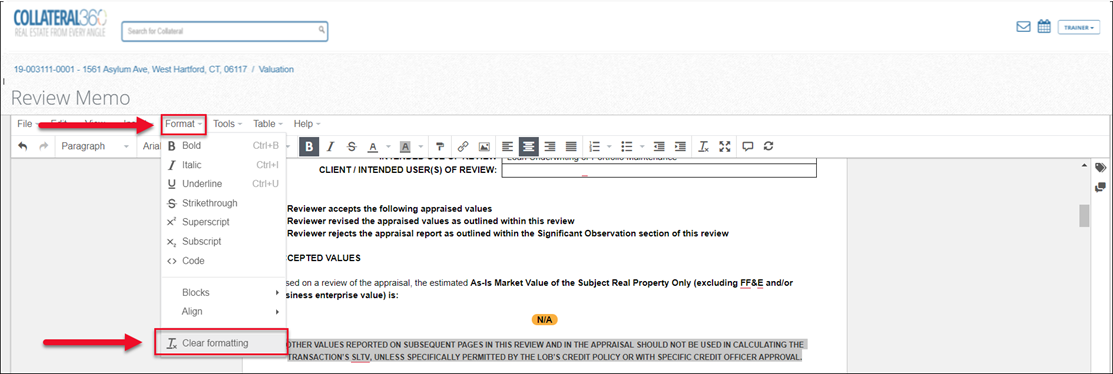
The Review Memo might include forms that require you make a selection(s) or input text. There are five types of form:
Checkbox: Click the box to add/remove a checkmark.
Drop Down List: Click the arrow to expose the menu and then click to make a selection.
Radio Button: Click in a bubble to make a selection. Note that some radio buttons allow for multiple selections, while others only allow a single selection.

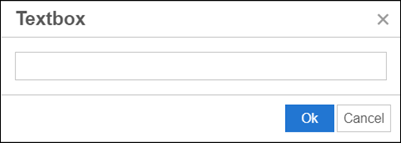
Textbox: Click the textbox to expose an edit button. Then click the edit button to open the textbox pop-up. Enter text and then click OK to save the text. The textbox field has a 50-character limit.
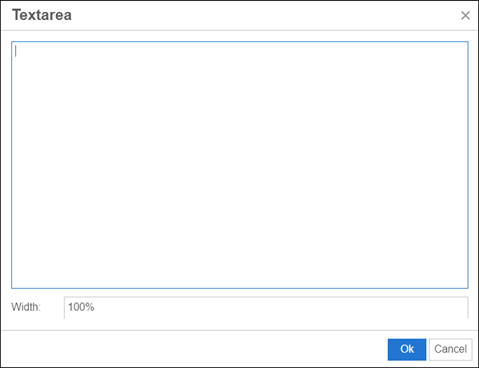
Textarea: Click the textarea box (like the textbox, but larger) to expose an edit button. Then click Edit to open the textarea pop-up. Enter text and then click OK to save the text. The textarea field has no character limit.
If the Review Memo lacks a required element, such as a form or a table, it can be added using the Review Memo tools. Refer to Review Memo Tools – Appendix for more information.
To see how the Review Memo will appear when it has been finalized, click Preview Review Memo at the bottom of the page.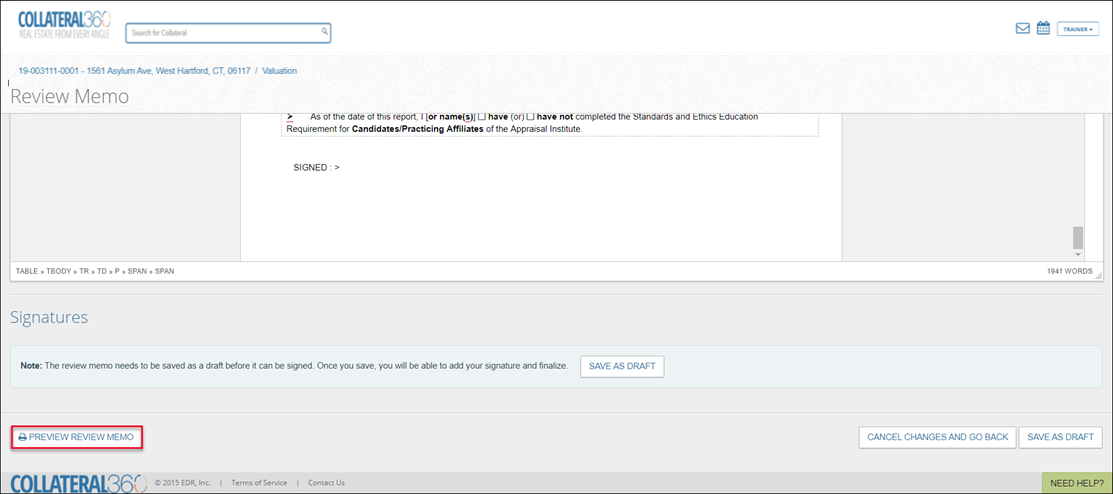
A PDF copy of the Review Memo will open in a new browser tab. A “DRAFT” watermark will appear in the background.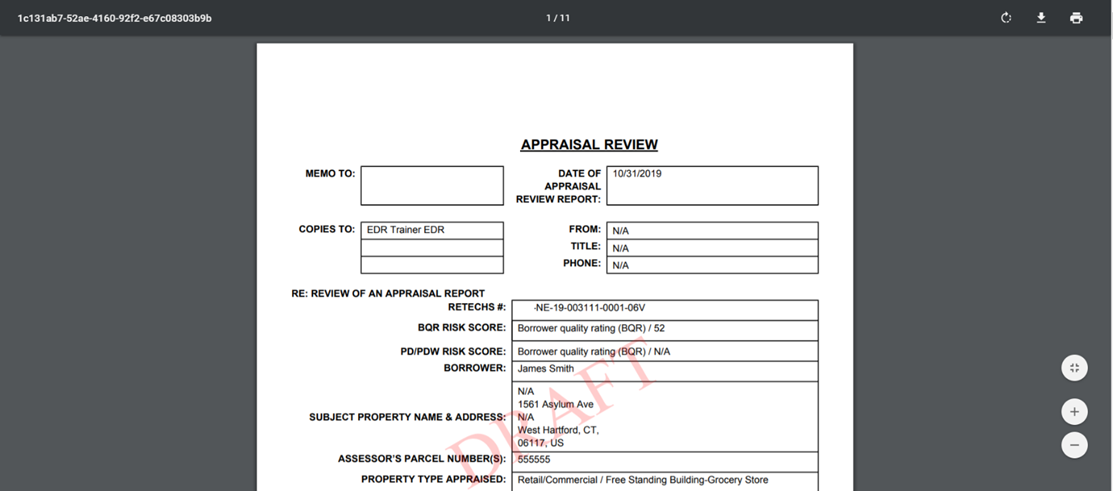
Saving and Signing the Review Memo
To complete the Review Memo, click one of the two Save as Draft buttons at the bottom of the page.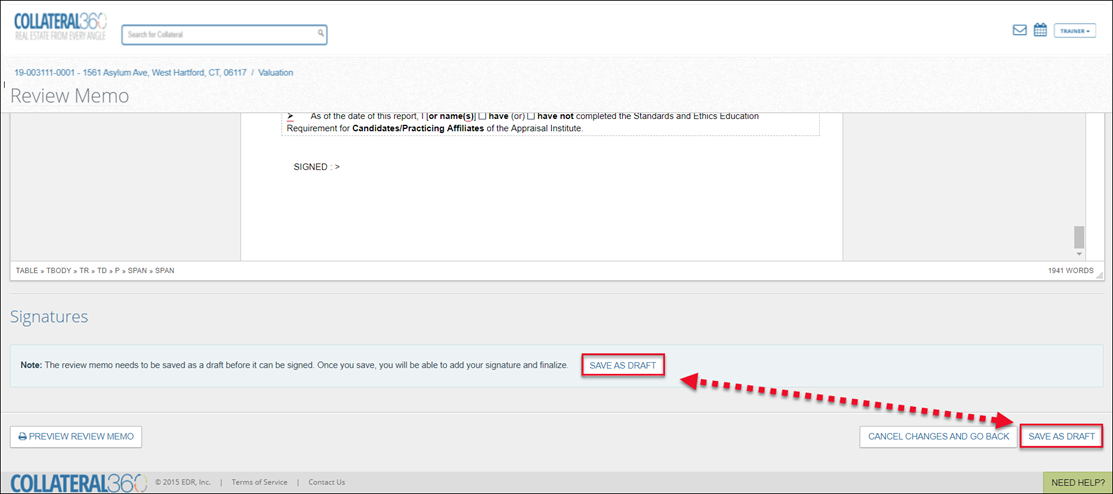
The page will reload, and the current state of the Review Memo will be saved.
Some Review Memos will require one or more signatures. Once the Review Memo has been completed, scroll to the bottom of the page and click Sign Review Memo to begin the signature process. If no signature is required, this button will not be visible.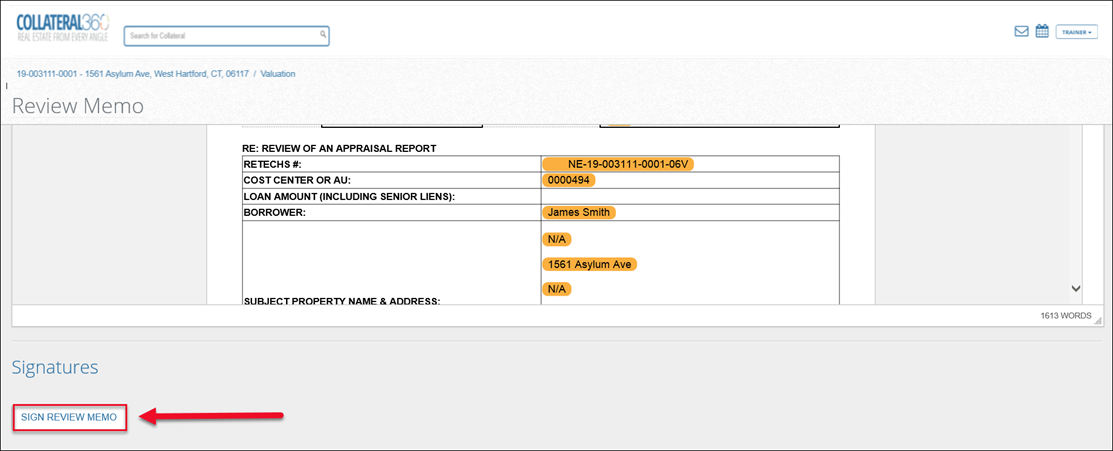
The Signatures interface will open.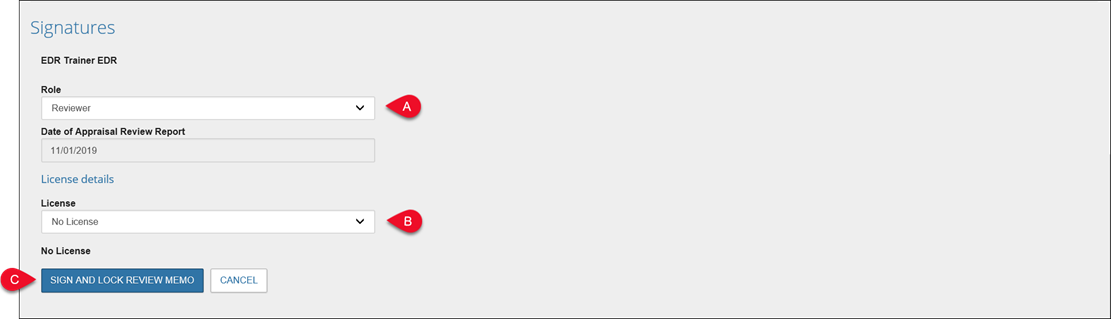
A. Role: Click to select the role of the signer. Available options include:
Reviewer
Peer Reviewer
2nd Signature Reviewer
VJM Reviewer
B. Date of Appraisal Review Report: This field will automatically populate with the current date. It is not editable. The title of this field varies based on the Service.
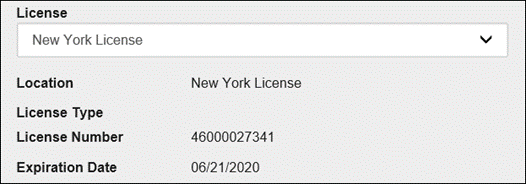
C. License: Click to select the reviewer’s license. The default is “No License.” The license options available are those of the logged in user.
If a license is selected, the Location, License Type, License Number, and Expiration Date will appear below the License drop-down menu.
If “Other” is selected, a text box with a 200-character limit will appear. The text entered here will be included in the signature area of the Review Memo PDF.
D. Sign and Lock Review Memo: Click to apply the signature to the Review Memo document and lock it for editing.
After clicking Sign and Lock Review Memo, the page will reload. New buttons will be available in the Signatures interface and in the bottom right-hand corner of the page. 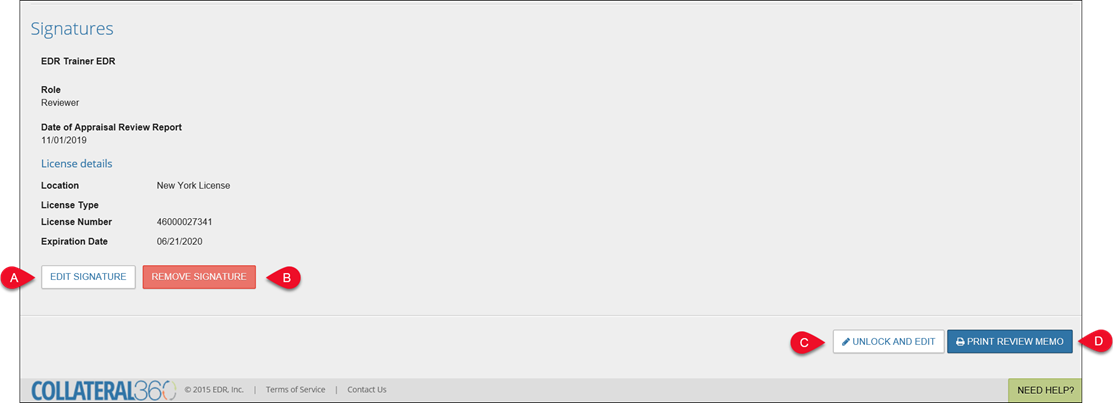
A. Edit Signature: Click to open the signature interface for editing. Make the desired changes and then click Update Signature to apply the change(s).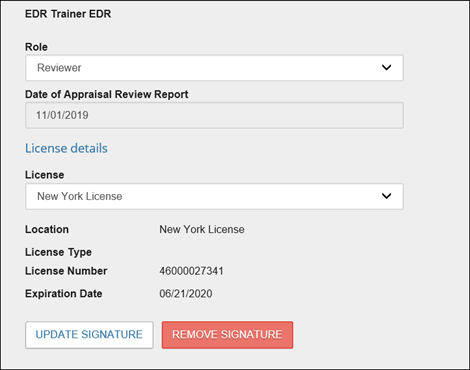
B. Remove Signature: Click to remove the signature. A pop-up will state that removing the signature will make unlock the Review Memo and make it editable. Click Yes, Remove Signature to proceed or No to cancel.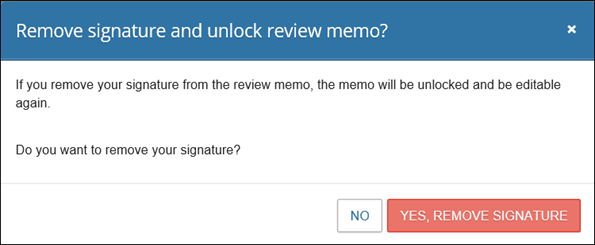
C. Unlock and Edit: Click to unlock the Review Memo to make edits. A pop-up will state that unlocking the document will remove all signatures and notify the signers of the change. Click Yes, Unlock to proceed or No to cancel.
D. Print Review Memo: Click to create a PDF of the Review Memo document. The Review Memo PDF will be available in the Service tab (Valuation in this example). Click the blue file name to open the PDF.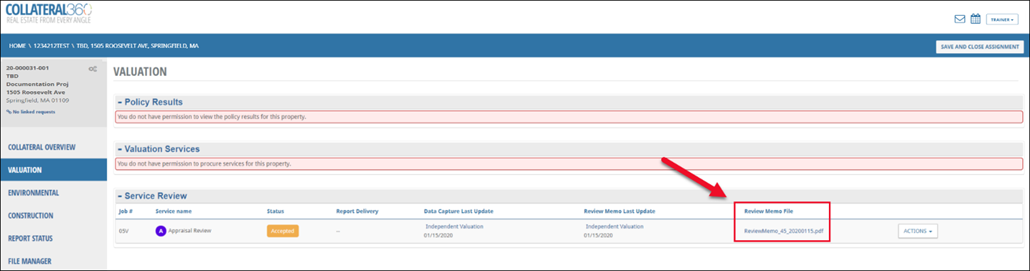
Submitting a VJM Assignment (Vendor Perspective)
Once the assignment has been completed, click Save and Close Assignment to return to PARCEL.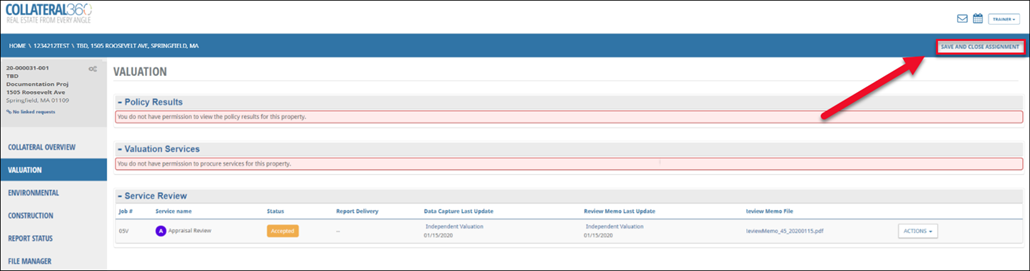
On the All Projects tab, click View Details for the job.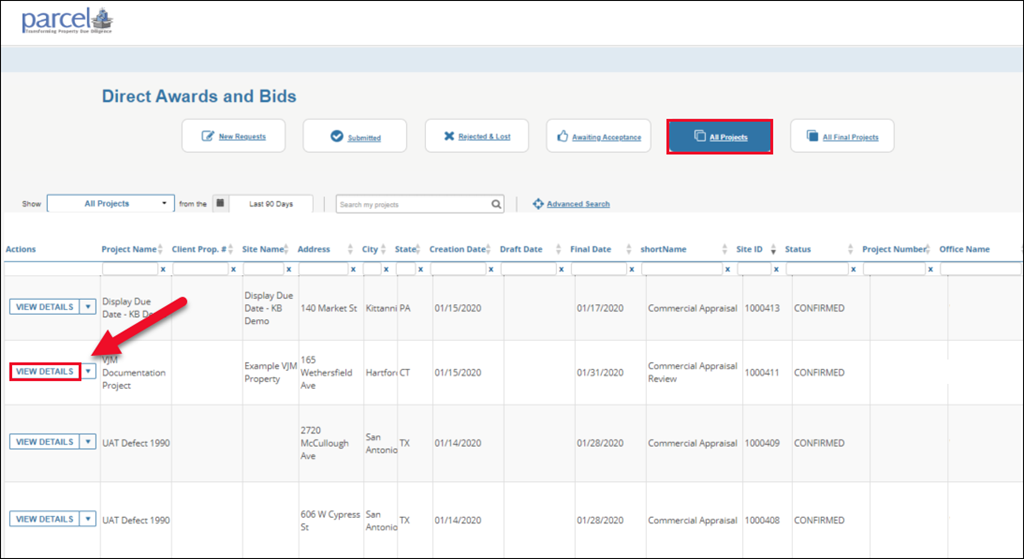
The View Details page will open. Click Submit Assignment to finish the assignment.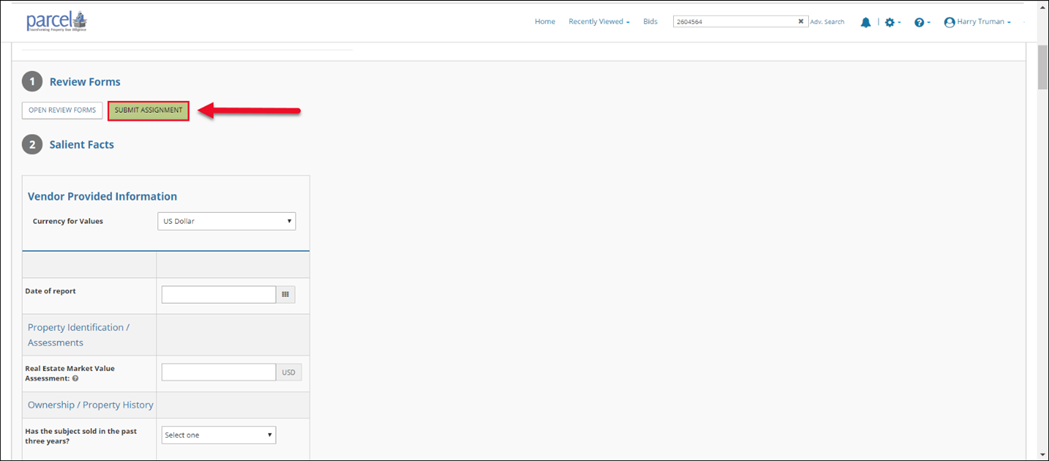
A pop-up window will appear and request confirmation. Click Yes, Submit Assignment to complete the assignment. IMPORTANT: Once the assignment has been submitted, it will be locked; you will no longer be able to access Collateral360 to make any further changes to the Data Capture and/or Review Memo.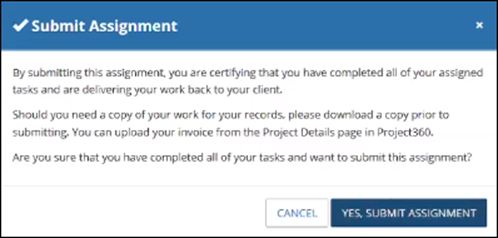
After clicking Yes, Submit Assignment, the pop-up will close. The Review Forms buttons will be grayed out and a message will state “Your access has been revoked.”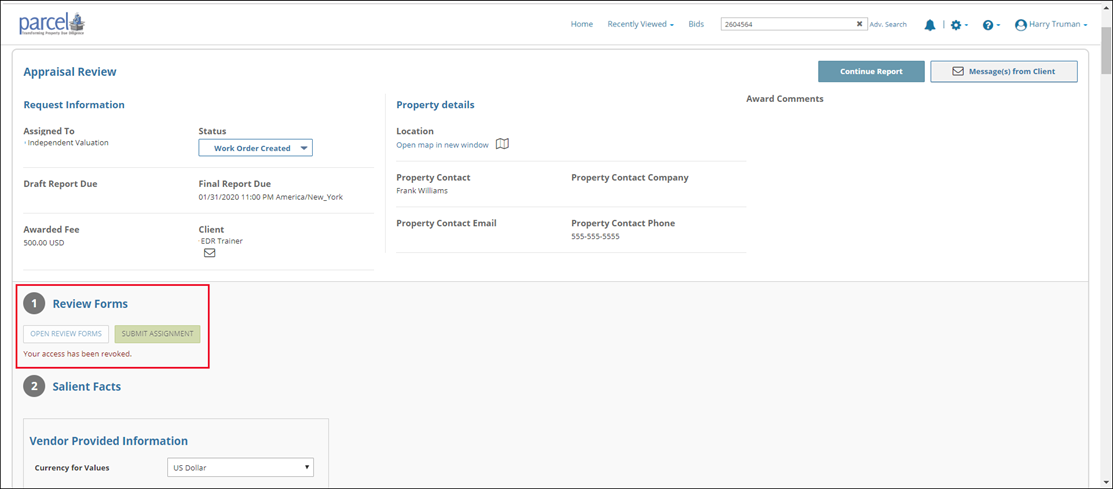
Note for Job Managers and Content Administrators: Once the VJM has submitted the assignment, the Service status in Collateral360 will change to “Uploaded.”
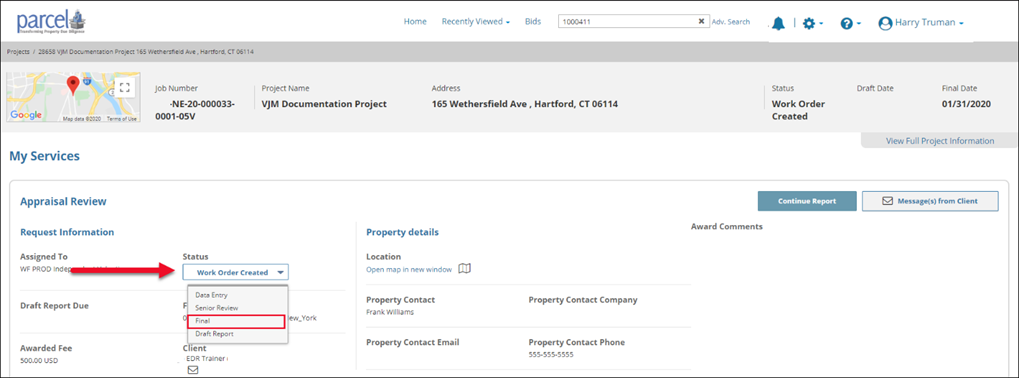
The Job can now be completed and finalized as usual in PARCEL:
1. Upload an invoice.
2. Upload support documentation (optional).
3. Set the Status to Final.
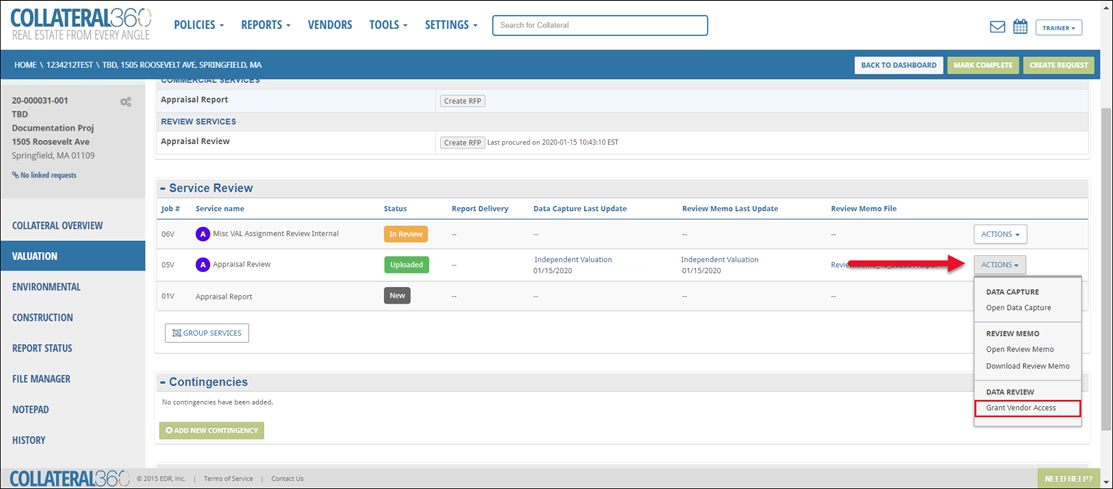
Note for Job Managers and Content Administrators: The VJM can be granted access to Collateral360 again after they’ve submitted the assignment and had their access revoked. To restore access, click the Actions button for the relevant Service in Collateral360, then click Grant Vendor Access.
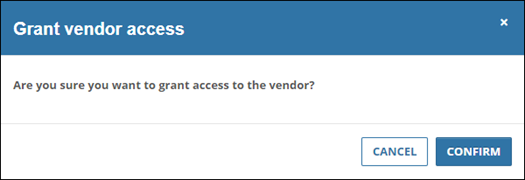
A pop-up will request confirmation. Click Confirm to restore the VJM’s access.
Toolbar
There’s an extensive suite of tools for working with the Review Memo Template.
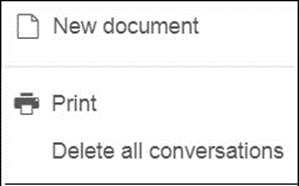
1 | FILE New Document: Replaces the existing Review Memo Template body with a completely blank copy. Note that this will remove formatting, logo, Variables, text, tables, etc.
|
|
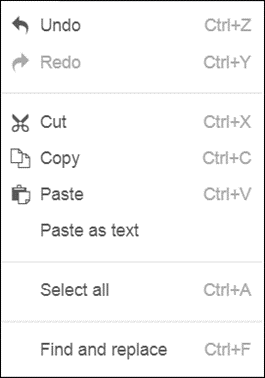
2 | EDIT
|
|
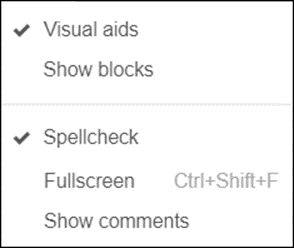
3 | VIEW
|
|
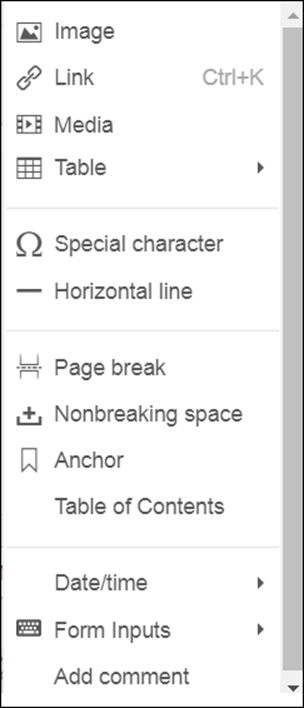
4 | INSERT
|
|
5 | FORMAT
|
|
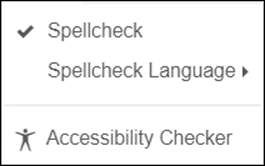
6 | TOOLS
|
|
7 | TABLE
|
|
8 | HELP
|
|

Lower Toolbar
The Lower Toolbar includes buttons for formatting text, inserting images, adding Comments, and more. 
From left to right:
Undo: Undoes the last change made to the document. |
|
Redo: Reverses the action of the last Undo. |
|
Text Formatting: Applies formatting to selected text and/or type new text in the chosen format. Options include paragraph, headings 1 – 6, and preformatted. |
|
Font Family: Applies a font type to selected text and/or type new text in the chosen font family. |
|
Font Sizes: Applies a font size to selected text and/or type new text in the chosen font size. |
|
Bold: Applies bold formatting to selected text and/or type new text in with bold formatting applied. |
|
Italic: Applies bold formatting to selected text and/or type new text with italic formatting applied. |
|
Strikethrough: Applies bold formatting to selected text and/or type new text with italic formatting applied. |
|
Text color: Applies a color to selected text and/or type new text in the color chosen. |
|
Background color: Applies a background color to selected text and/or type new text with the background color applied. |
|
Format Painter: Allows the user to apply the formatting of one block of text to another block of text. Select text with the desired formatting, click the Format Painter button, then select text to apply the formatting to. |
|
Insert/edit link: Opens a modal that allows the user to insert a link in the review memo document. Before inserting a link, highlight text or an image. If no text or image is highlighted, the link will not be visible or clickable. |
|
Insert/edit image: Opens a modal that allows the user to upload or link to an image, apply a description, and define its dimensions. The image will be inserted wherever the cursor was placed when Insert>Image was clicked. |
|
Align left: Left-aligns a block of text. |
|
Align center: Center-aligns a block of text. |
|
Align right: Right-aligns a block of text. |
|
Justify: Justifies a block of text. |
|
Numbered list: Formats selected text as a numbered list. If no text is selected, it will start a new numbered list. |
|
Bullet list: Formats selected text as a bulleted list. If no text is selected, it will start a new bulleted list. |
|
Decrease indent: Decreases the indent of a block of text. |
|
Increase indent: Increases the indent of a block of text. |
|
Clear formatting: Clears the formatting of a block of text. |
|
Fullscreen: Expands the review memo document into full-screen mode. |
|
Add comment: Add Comment: Inserts a Comment at the current location of the cursor within the Review Memo Template. Upon clicking the Add comment button, a new Comment text box is opened in the Comments menu on the right-hand side of the screen. Enter the Comment text and then click Save to add the Comment. |
|
Update Variables: Updates the values for all the Variables in the Review Memo document. Note that every time the Review Memo is opened, Variables are updated automatically, so it is not required to click Update Variables. |
|
Tables
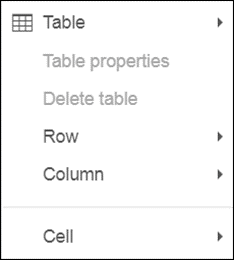
Click within a table in the template to expose a menu of table options.![]()
| Table Properties: Opens a modal that allows the user to define table properties, such as width, height, border, and alignment. |
| Delete table: Deletes the table in which the cursor is currently placed. |
| Insert row before: Inserts a row above the row in which the cursor is currently placed. |
| Insert row after: Inserts a row below the row in which the cursor is currently placed. |
| Delete row: Deletes the row in which the cursor is currently placed. |
| Insert column before: Inserts a column to the left of the column in which the cursor is currently placed. |
| Insert column after: Inserts a column to the right of the column in which the cursor is currently placed. |
| Delete column: Deletes the column in which the cursor is currently placed. |


Forms
There are five types of form input that can be added to a Review Memo Template:
Checkbox
Drop Down List
Radio Button
Textbox
Textarea
Checkbox
While checkboxes can be inserted anywhere, creating a table and then adding the checkboxes to the table will create a more organized Review Memo Template.
1. Click Insert in the toolbar.
2. Place the cursor on the Table button, then drag the cursor in the table submenu to create a table of the desired size.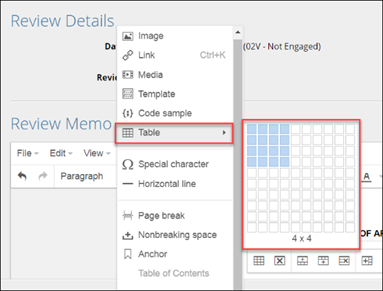
3. Highlight the cells in which you’d like to place checkboxes.
In this example, three of the four columns in the table have been selected.
4. Click Insert.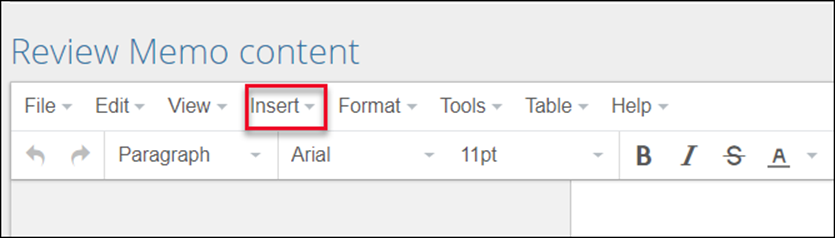
5. Highlight the Form Inputs button, then click the Checkbox button.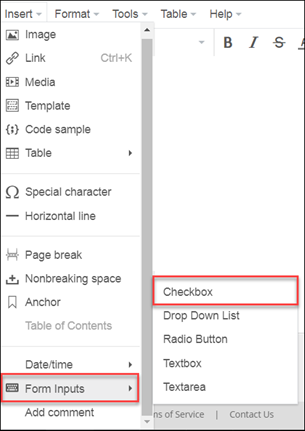
6. A pop-up message will ask if you want the checkboxes to be mutually exclusively.
a. Yes: Only one checkbox in each row can be checked. Checking a second checkbox will uncheck the first checkbox.
b. No: Multiple checkboxes in a single row can be checked concurrently.
7. The checkboxes will be added to the table.
Drop Down List
1. Click the Insert button in the toolbar.
2. Highlight the Form Inputs button, then click the Drop Down List button.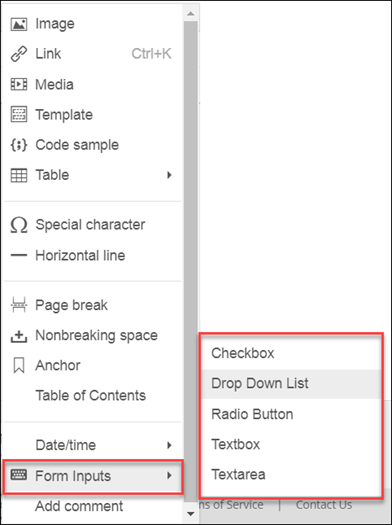
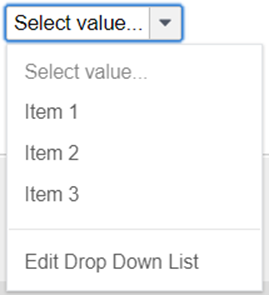
3. The Drop Down List modal will open. Enter the items you would like in the drop-down menu, with a line in between each item. Then click OK.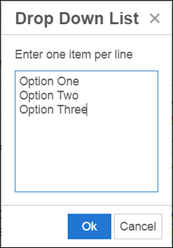
4. The drop-down menu will be added to the Review Memo Template.
Radio Button
While radio buttons can be inserted anywhere, creating a table and then adding the radio buttons to the table will create a more organized Review Memo Template.
1. Click the Insert button in the toolbar.
2. Place the cursor on the Table button, then drag the cursor in the table submenu to create a table of the desired size.
3. Highlight the cells in which you’d like to place radio buttons.
In this example, three of the four columns in the table have been selected.
4. Click Insert.
5. Highlight the Form Inputs button, then click the Radio Button button.
6. A pop-up message will ask if you want the radio buttons to be mutually exclusively.
a. Yes: Only one radio button in each row can be checked. Checking a second radio button will uncheck the first radio button.
b. No: Multiple radio buttons in a single row can be checked concurrently.
7. The checkboxes will be added to the table.
Textbox
The textbox form type is a text-entry field that allows the user to enter up to 50 characters. Note that Variables cannot be placed in textboxes.
1. Click Insert in the toolbar.
2. Highlight Form Inputs, then click Textbox.
3. The textbox will be placed in the template.![]()
Textarea
The textarea form type is a text-entry field. Unlike the textbox field, the textarea field does not have a character limit. Note that Variables cannot be placed in text areas.
1. Click Insert in the toolbar.
2. Highlight Form Inputs, then click Textarea.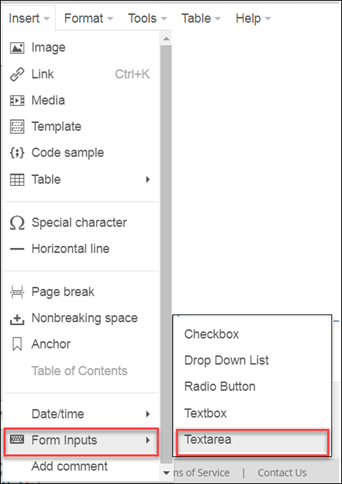
3. The textarea field will be placed in the template.
Was this article helpful?