- Print
- DarkLight
- PDF
Trigger on Status
- Print
- DarkLight
- PDF
Purpose
This documentation describes how to use the Collateral360 Trigger on Status feature, including how to manage, edit, and create Rules.
Audience
Content Administrators and Lender Executives.
Trigger on Status
To access the Trigger on Status administration panel, click Settings in the top navigation bar, then click Platform Settings.
Click Trigger on Status in the left navigation bar.

The Trigger on Status page opens.

Click the down arrow to the left of Trigger on Status Rules to hide/show the list of Rules.
The number of Rules is listed in the blue bar at the top of the page.
Click Actions in the blue bar at the top of the page to expose a menu with a button that turns all Rules on and a button that turns all Rules off.
Rules can also be turned on/off individually. Click the On/Off button to turn a Rule on/off.

Click the Actions button next to a Rule to expose a menu containing three commands:
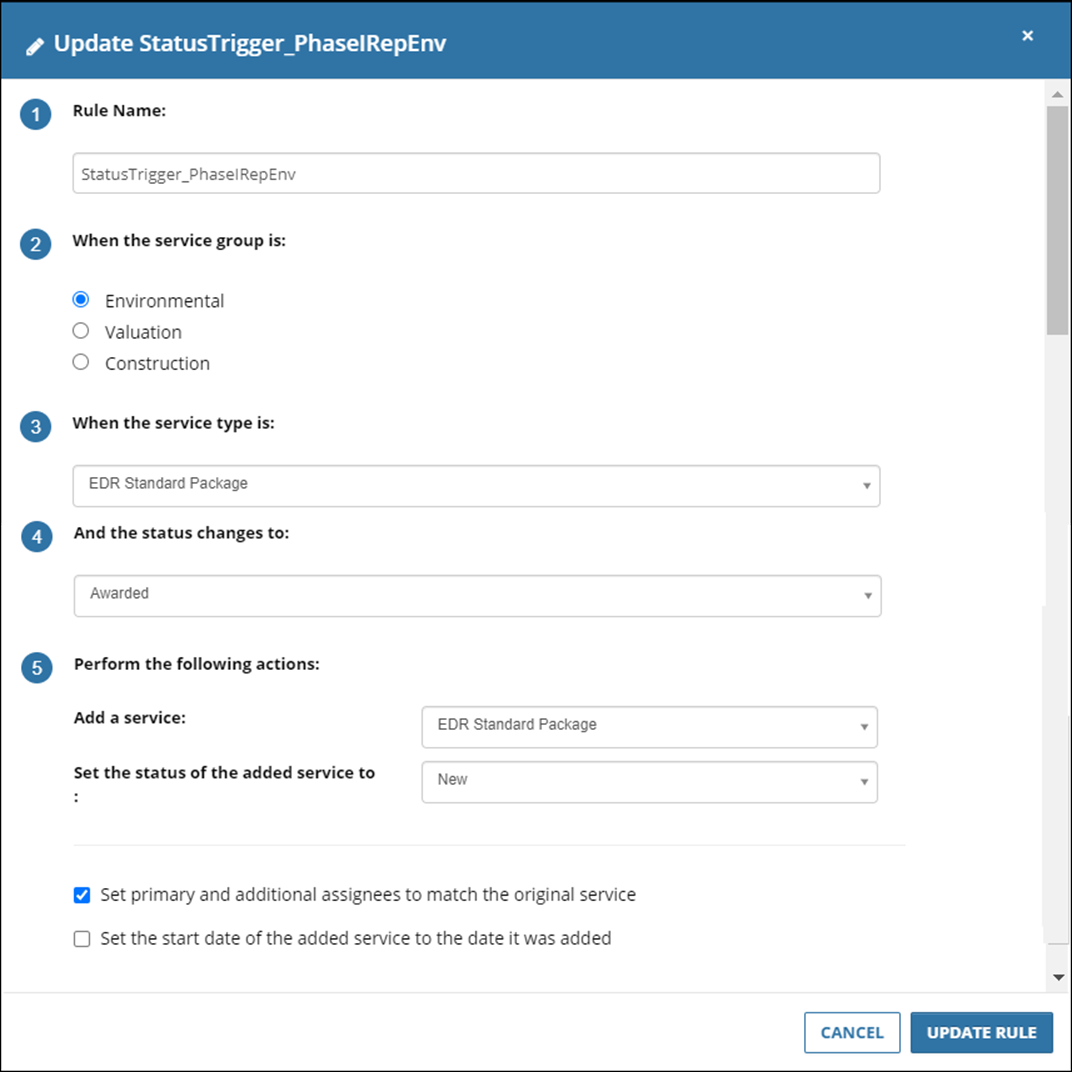
Modify Rule: Opens the Rule for editing. Make the desired changes, then click Update Rule to apply.

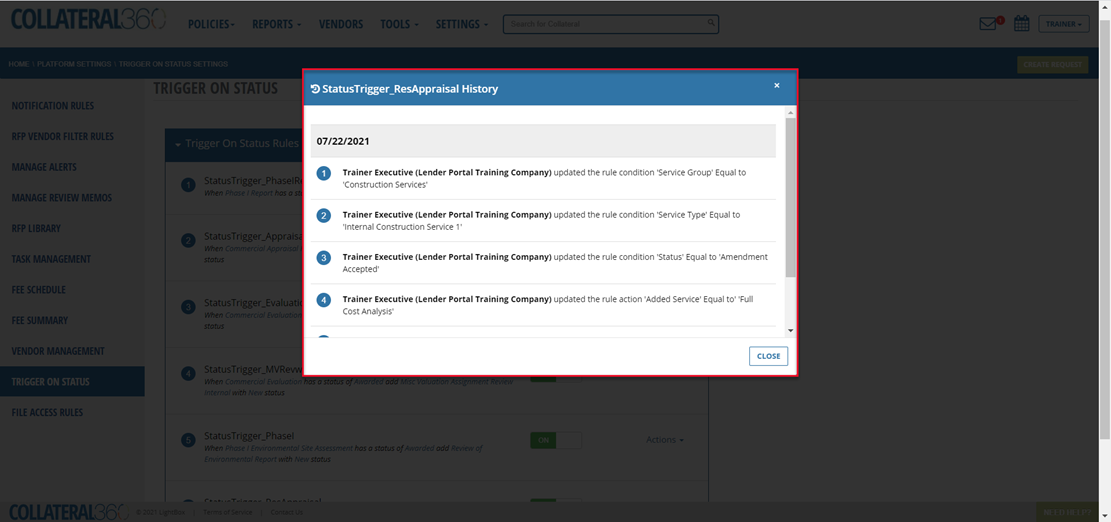
View Change History: Displays a list of all changes that have been made to the Rule.

Delete Rule: Click to delete a Rule. A pop-up will request confirmation. Click Yes, Delete to permanently delete the Rule.

Create a Rule
Click Add New Rule at the bottom of the Trigger on Status page to create a new Rule.

The Add a New Trigger on Status Rule modal opens.

1. | Enter a descriptive title for the new Rule. |
|
2. | Select a Service Group. |
|
3. | Select a Service Type from the drop-down menu. The Service Types available will be determined by the Service Group selected above. |
|
4. | Select a Status from the drop-down menu. When the Status for a Service of the Service Type defined in step 3 changes to this Status, the Rule is triggered. |
|
5. | Select a Service to add when the Rule is triggered and define what Status the Service should be set to when it is created. |
|
6. | Check the box if you wish the primary and additional assignees from the original Service (defined in step 3) to be added to the new Service created when the Rule was triggered. If this box is not checked, the new Service will be unassigned. |
|
7. | Check the box if you wish the start date for the new Service to be the date it was created (when the Rule was triggered). If this box is not checked, the start date will be set when the Status of the Service changes from New. |
|
8. | Click Add Rule to create the Rule. The Rule will be created and set to ON. |
|

The example Rule created above will trigger when a Commercial Appraisal Report has a Status of “Awarded.” When that occurs, an Internal Review Service will be created with the Status of “New.” The primary and additional assignees on the Internal Review Service will match those on the Commercial Appraisal Report and the start date will be the date when it was created.
.png)


.png)