- Print
- DarkLight
- PDF
Online Invoicing
- Print
- DarkLight
- PDF
Purpose
This documentation how to use the Collateral360 online invoicing tool to generate an invoice. It also describes how to access invoices in File Manager.
Audience
Job Managers, Lender Managers, Content Administrators, and Lender Executives.
Online Invoicing Overview
The online invoicing tool allows the user to select one or more services in the Task Pipeline and generate a PDF invoice of the fees associated with those services. The PDF is then accessible in File Manager.
• Create an Invoice
• Access an Invoice in File Manager
Create an Invoice
There are two methods for creating an invoice: Creating an invoice for a single service or creating an invoice for one or more services.
To generate an invoice for a single service, click Actions, then click Create Invoice.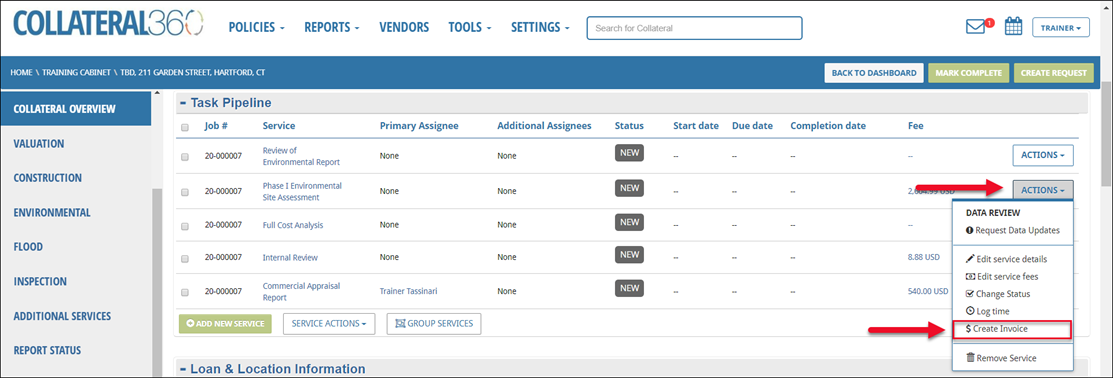
The Create New Invoice modal will open.
To generate an invoice for one or more services, check the box next to the services you would like to include in the invoice.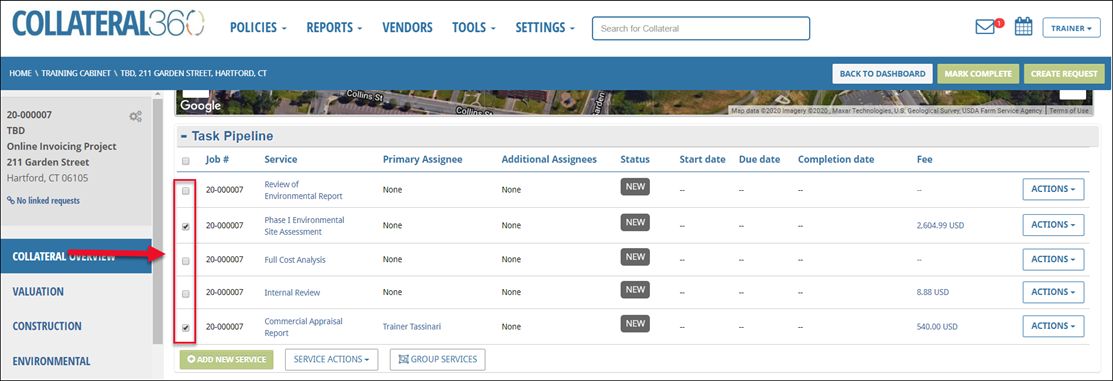
In this example, two services have been selected: Phase I Environmental Site Assessment and Commercial Appraisal Report
Click on Service Actions beneath the Task Pipeline to expose a drop-down menu, then click Create Invoice.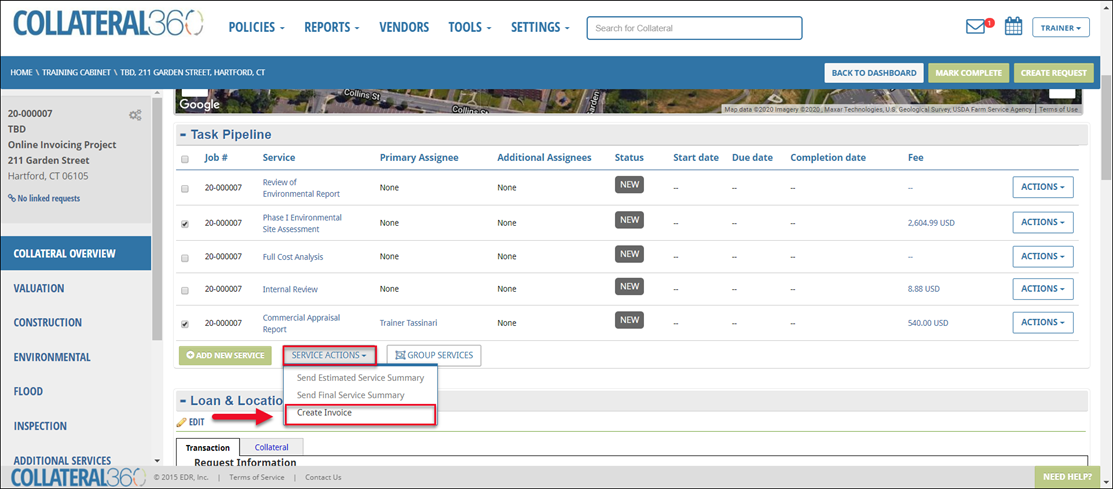
The Create New Invoice modal will appear. Request details and the selected services will be listed. The Preview Invoice and Create Invoice buttons will be grayed out until an invoice template has been selected.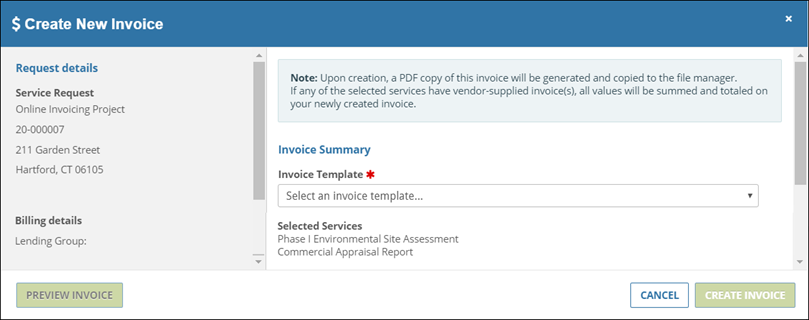
Click Select an Invoice Template and select a template from the menu. The invoice template defines the layout of the invoice document.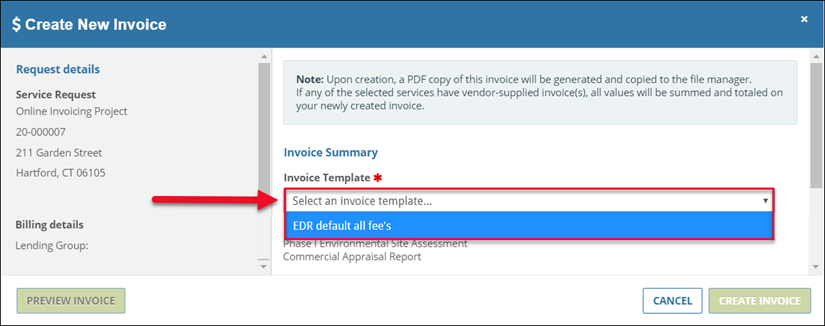
Upon completion, the Preview Invoice and Create Invoice buttons will no longer be grayed out. Preview Invoice allows you to preview the layout and information of the invoice without creating an actual invoice file in the Collateral360 File Manager.
Click Preview Invoice to generate a preview of the invoice PDF.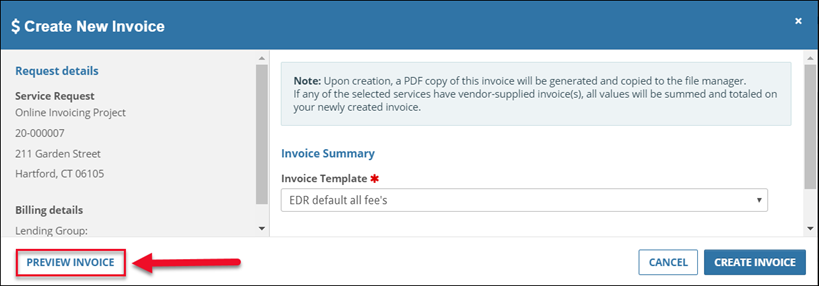
The preview PDF will open in a new browser tab. Note that the preview PDF includes a “DRAFT” watermark to distinguish it from the actual invoice. 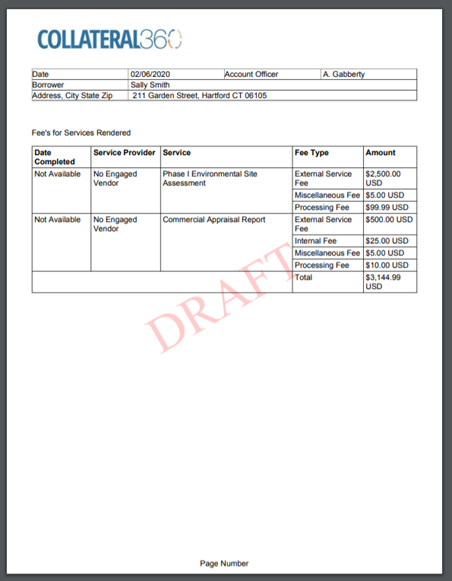
To create the invoice, click Create Invoice in the Create New Invoice modal.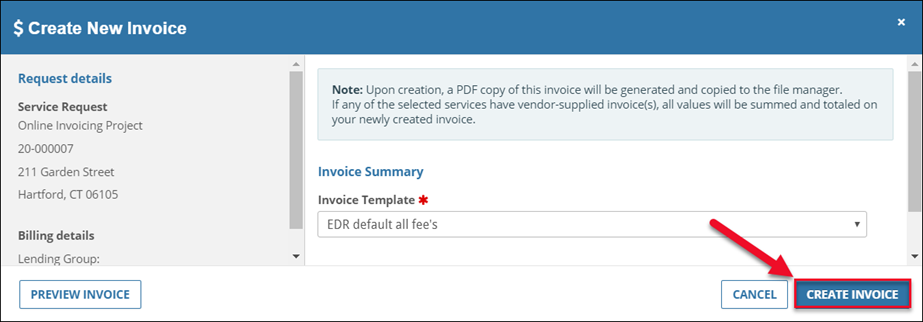
A notification will state that the invoice is being created.
Once the invoice has been created, a notification will state that a PDF has been generated and will be available in the file manager shortly.
The Create New Invoice modal will close.
Access an Invoice in File Manager
To view the invoice PDF, click on File Manager in the left-hand navigation bar.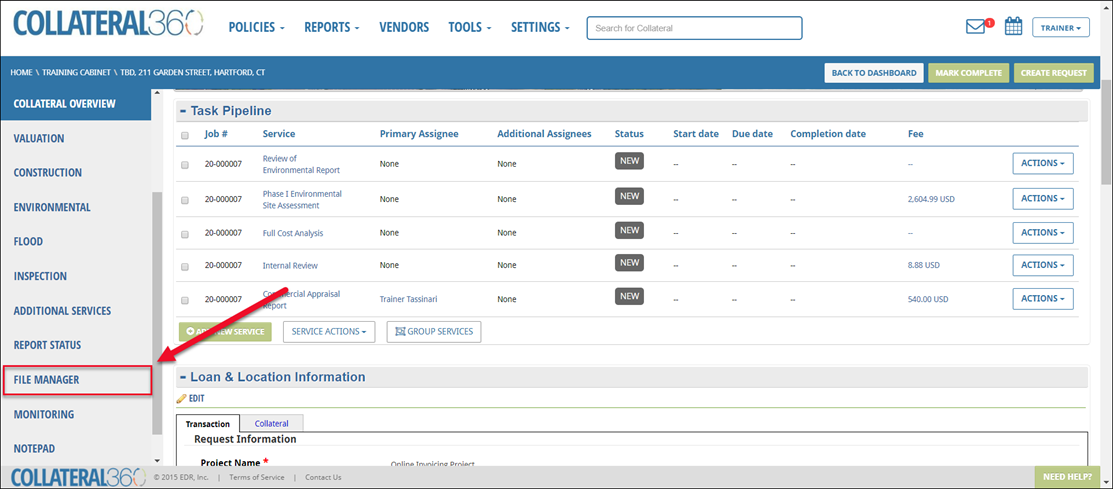
On the File Manager tab, scroll down to the Invoices section to view the invoice PDF.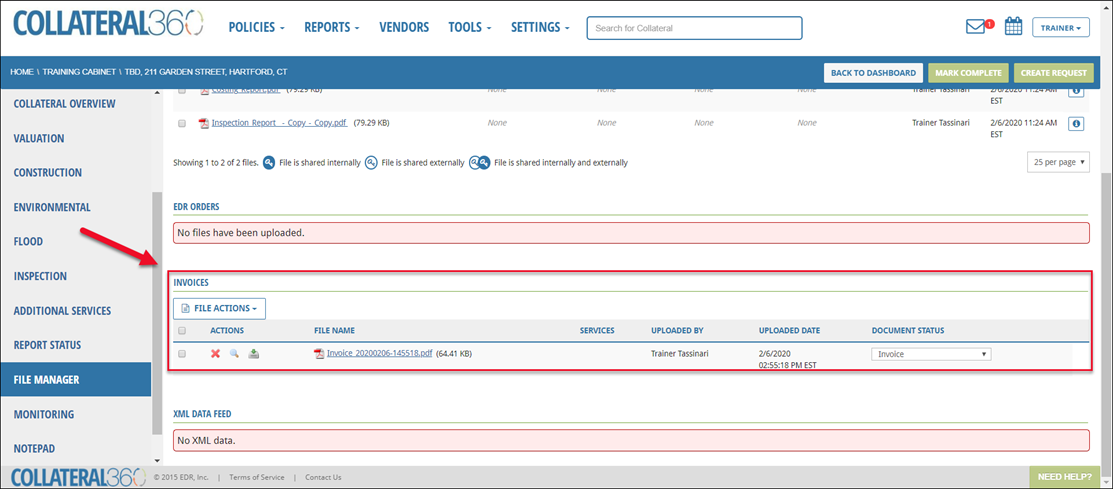
There are buttons to delete, view, and download a single invoice file.
A. Click the X icon to delete the invoice file immediately.
B. Click the magnifying glass icon to open the file in a new browser tab.
C. Click the hard drive icon to download the file to your local computer.
One or more invoice files can also be deleted, downloaded, or shared with other users. Check the box next to one or more invoice files.
Then click File Actions to expose a menu.
A. Download: The selected documents will open in a new browser tab. Click the download icon to download the document(s) as a single PDF document.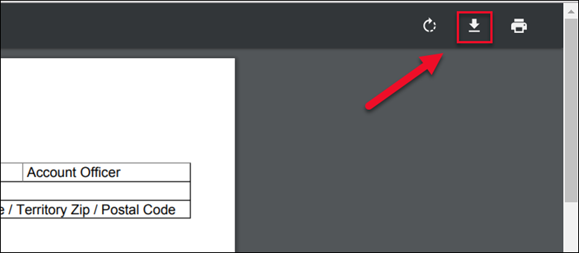
B. Grant Access: Click to open the File attributes modal. 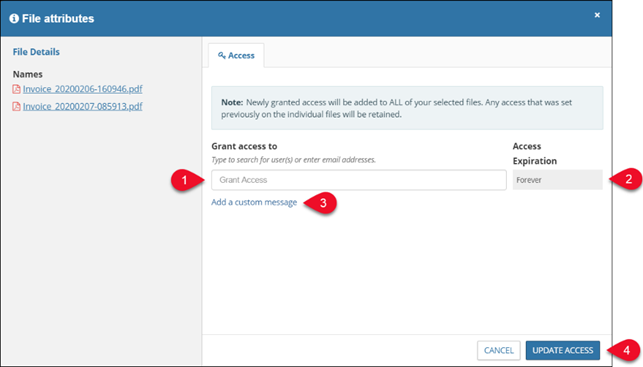
1. Click to select one or more users. Options also include All Lender Users and All SRF Participants.
2. Select a date for the access to expire. The default is Forever.
3. Click Add a custom message to expose a text box.
4. Click Update Access to apply the changes.
C. Delete Files: Click to delete the selected file(s). A pop-up will request confirmation. Click Yes, Delete to delete the file(s).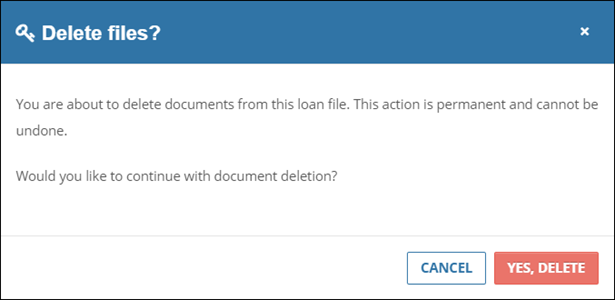
.png)

.png)