- Print
- DarkLight
- PDF
Online Invoice Templates
- Print
- DarkLight
- PDF
Purpose
This documentation describes how to create and edit online invoice templates.
Audience
Content Administrators, Lender Executives, and Corporate Executives.
Online Invoicing Template Overview
Invoice templates determine the layout and information that appears on user-generated online invoices in Collateral360. Qualified users can create and modify invoice templates.
Access Invoice Templates
To access the invoice templates, click Settings, then click Form Settings.

On the Form Settings page, click View Templates in the Templates section.

On the Templates page, click View Templates in the Invoice Templates section.

The Invoice Templates page will open.

Manage Templates
The Invoice Templates screen allows you to manage your organization’s invoice templates.

Click Add New Invoice to create a new invoice.
Search invoice templates. Text and numbers in the Name, Description, Last Updated, and Created By fields is searchable.
Activate/Deactivate a template. Deactivated templates will not be available for use when a user is creating an invoice.
Click Actions to expose a menu.
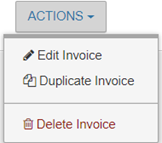
Edit Invoice: Opens the invoice for editing.
Duplicate Invoice: Creates a copy of the invoice and opens that copy for editing.
Delete Invoice: Click to delete the template. A pop-up will request confirmation.
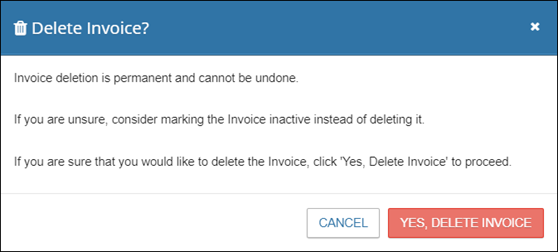
Click Yes, Delete Invoice to delete the template.
Create and Edit Templates
To create a new invoice template, click Add New Invoice.

The New Invoice Template page will open.
In the Invoice template details section at the top of the page, enter a Template Name (required) and a Description (optional).

In the Invoice content section, enter the content of the template itself, such as text and tables.

The Invoice content section includes a robust suite of tools for adding and manipulating content. For more information, refer to Toolbar, Lower Toolbar, and Tables in the sections below.
Insert Variables
Variables appear as orange fields in the invoice template. When an invoice is generated, each variable in the invoice template will display relevant information for that variable type. For example, three variables have been inserted in the template below: Date, Account Officer, and Company Number. When an invoice is generated using this template, the current date, Account Officer for the services selected, and the Company Number will be displayed in the invoice.

Click the Insert Variables menu button icon on the right side of the Invoice content area.

Click on a variable header, such as Collateral Information or Service Information, to expose the variables nested beneath it. Click on a variable to insert it in the invoice template in the current location of the cursor.

The appearance of some variables can be modified. The appearance options available are based on the type of variable – text or numerical.
Click on a variable and then click the gear icon to open a modal.

Text variables have the following four options:
No change (Maintains the existing formatting from the source, such as the SRF or RFP)
All uppercase
Capitalize first word
Title style
Numerical Variables have the following eight options:
$1,234 (currency symbol and thousands separator)
$1234 (currency symbol and no thousands separator)
$1234.00 (currency symbol and two decimal points)
$1,234.00 (currency symbol, thousands separator, and two decimal points)
1234 (no currency symbol, thousands separator, or decimal points)
1,234 (thousands separator)
1234.00 (two decimal points)
1,234.00 (thousands separator and two decimal points)
Any change made to a variable’s options will be applied solely to the current invoice template.
To insert variables for fees, click on Fee & Invoice Information, then click Table.

The Select Fee Information modal will open.

The modal includes two tabs: Column Settings and Fee Settings. Column settings defines what columns will appear in the fees table. Click the display toggle next to a field to add/remove the column from the table.

In the example above, the Service Provider column will not be displayed. The Service and Amount columns are set to display by default and cannot be turned off.
Click Fee Settings to navigate to that tab. Click the display toggle next to a field to add/remove the fee from the table.

In the example above, the Freight Amount and Tax Amount fields will not be displayed.
When the Hide fees equal to zero toggle at the bottom of the modal is on, fees equal to zero will not appear in the invoice.
Click OK to apply the changes and insert the fees table in the template.

The fees table will be added to the invoice template.

Generate a Preview and View the Change History
You can view a preview of the invoice template by clicking Preview in the bottom left-hand corner of the screen.

The Select Print Formatting Template modal will appear. The print formatting template defines layout settings, such as margins, header, and footer. Select a print formatting template, and then click Preview.

The template will open in a new browser tab. Note: Variables will not be populated in the preview; they will appear in brackets.

When you are ready to finalize the invoice template, click Save and Create Template at the bottom of the New Invoice Template page.

The Change History logs all changes made to the invoice. It will not appear until you click Save and Create Template, at which point it will appear at the bottom of the page with an entry listing the creation date and time and the user who created the template (or made the change).

Enter a Start Date and End Date to filter the revision records.
Click View Revision next to an entry to open the Revision history modal.

Select an entry from the menu to see the state of the template at that time.
View the Template name and Description.
View the Invoice content section.
Click Close to close the modal.
Appendix
Toolbar

A | FILE
|  |
B | EDIT
| 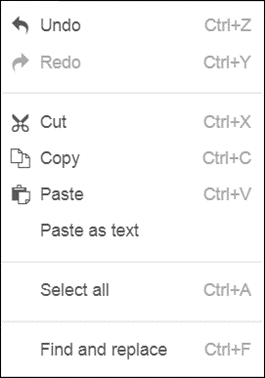 |
C | VIEW
| 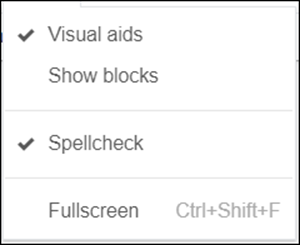 |
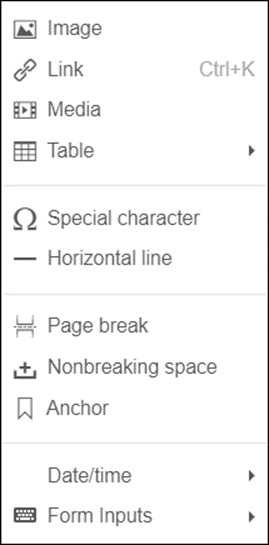
D | INSERT
|  |
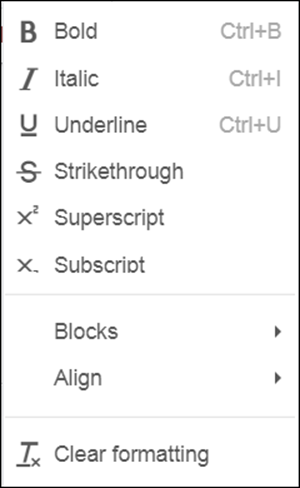
E | FORMAT
|  |
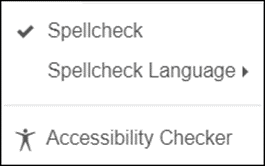
F | TOOLS
|  |
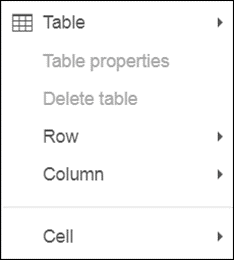
G | TABLE
|  |
H | HELP
|  |
Lower Toolbar
The lower toolbar includes buttons for formatting text, inserting images, and more.

From Left to Right:
Undo: Undoes the last change made to the document. | |
Redo: Reverses the action of the last Undo. | |
Text Formatting: Applies formatting to selected text and/or type new text in the chosen format. Options include paragraph, heading 1-6, and preformatted. | |
Font Family: Applies a font type to selected text and/or type new text in the chosen font family. | |
Font Size: Applies a font size to selected text and/or type new text in the chosen font size. | |
Bold: Applies bold formatting to selected text and/or type new text in with bold formatting applied. | |
Italic: Applies italic formatting to selected text and/or type new text in the bold formatting applied. | |
Strikethrough: Applies a strike-through formatting to selected text. | |
Text color: Applies a color to selected text and/or type new text in the color chosen. | |
Background color: Applies a background color to selected text and/or type new text with the background color applied. | |
Format Painter: Allows the user to apply the formatting of one block of text to another block of text. Select text with the desired formatting, click the Format Painter button, then select text to apply the formatting to. | |
Insert/edit link: Opens a modal that allows the user to insert a link in the invoice template. Before inserting a link, highlight text or an image. If no text or image is highlighted, the link will not be visible or clickable. | |
Insert/edit image: Opens a modal that allows the user to upload or link to an image, apply a description, and define its dimensions. The image will be inserted wherever the cursor was placed when Insert>Image was clicked. | |
Align Left: Left-aligns a block of text. | |
Align Center: Center-aligns a block of text. | |
Align Right: Right-aligns a block of text. | |
Justify: Justifies a block of text. | |
Numbered list: Formats selected text as a number list. If no text is selected, it will start a new numbered list. | |
Bullet List: Formats selected text as a bulleted list. If no text is selected, it will start a new bulleted list. | |
Decrease indent: Decreases the indent of a block of text. | |
Increase indent: Increases the indent of a block of text. | |
Clear formatting: Clears the formatting of a block of text. | |
Full-screen: Expands the invoice template document into full-screen mode. |
Tables
Click within a table in the template to expose a menu of table options.

Table properties: Opens a modal that allows the user to define table properties, such as width, height, border, and alignment. |  |
Delete table: Deletes the table in which the cursor is currently placed. |  |
Insert row before: Inserts a row above the row in which the cursor is currently placed. |  |
Insert row after: Inserts a row below the row in which the cursor is currently placed. |  |
Delete row: Deletes the row in which the cursor is currently placed. |  |
Insert column before: Inserts a column to the left of the column in which the cursor is currently placed. |  |
Insert column after: Inserts a column to the right of the column in which the cursor is currently placed. |  |
Delete column: Deletes the column in which the cursor is currently placed. |  |
.png)

.png)