- Print
- DarkLight
- PDF
Invoice Management
- Print
- DarkLight
- PDF
Purpose
The purpose of this Job Aid is to describe how to use the Invoice Management tool to view and manage validated invoices.
Audience
Job Managers, Lender Managers, Content Administrators, and Lender Executives.
Invoice Management Overview
The Invoice Management feature allows you to process validated vendor invoices and send the appropriate info to your organization’s accounting department for payment.
To access Invoice Management, click Tools, then click Invoice Management in the dropdown menu.

The Invoice Management feature includes four tabs. In a typical workflow, invoices proceed through the tabs at the top of the page from left to right.

Validated Invoices: Once an invoice has been validated in a loan file, it appears here.
Invoice Batches: Invoices that are grouped together in batches, waiting to be sent to the accounting department.
Submitted Batches: Invoice batches that have been sent to the accounting department.
Approved Batches: Invoice batches that have been approved by the accounting department.
Validated Invoices
When an invoice is validated in a loan file it appears in the Validated Invoices tab of the Invoice Management feature.
For more information about invoice validation refer to the Validating and Creating Invoices from the Service Tab video.
.png)
A. Invoices All validated invoices first appear in this table.
Scroll to the bottom of the page to view a legend. |
|
B. Column Headings Click on a column heading to sort the table in ascending order by that column. Click a second time to sort in descending order. | .png) In the example above, the table is sorted by the Invoice Date column. |
C. Search Input a search phrase to search the Validated Invoices table. The search will include entries on pages other than the one currently displayed. Most table fields are searchable. | .png) |
D. Tools From left to right, the icons in the upper right corner of the table:
| .png) |
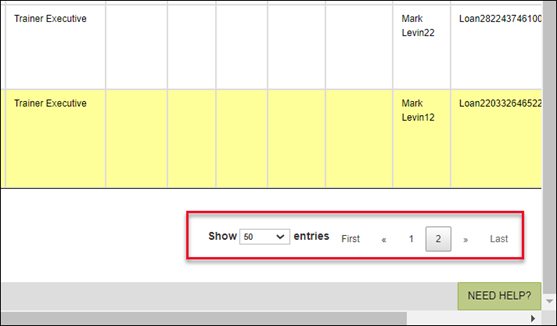
E. Page Navigation Click the Show menu at the bottom and select 10, 25, 50, 100 or ALL to define how many records appear at once. Click the First, Last, arrow and page number buttons to navigate the records. |  |
To view the details for a specific invoice, click the view/edit icon.

The Invoice Details modal opens.

You can adjust fees, add missing information, and enter comments.
Click View vendor’s invoice to open the original invoice from the vendor.

If there is an issue with the invoice that cannot be addressed in the Invoice Details modal, click Return Invoice.

This will remove the invoice from Invoice Management as a whole. The SRF participants on the associated loan file will see a status of “returned” on the invoice within the appropriate Service tab.

In the example above, the invoice for the Commercial Evaluation has been returned and the status is visible in the Invoices section of the Valuation tab.
Check the boxes next to the invoices you want to batch.

In the example above, three invoices have been selected.
Click Create New Batch or Add to Batch.
Create New Batch immediately creates the batch upon clicking the button. A popup confirmation message appears.

Click Not Now to stay on the Validated Invoices tab. Click Yes, View Batch to navigate to the Invoice Batches tab and view the newly created batch.
Add to Batch opens a popup with a dropdown menu that lists existing batches. Select a batch from the list. Batches shown in gray have been submitted and are not selectable.

A popup confirmation message appears. Click Not Now to stay on the Validated Invoices tab. Click Yes, View Batch to navigate to the Invoice Batches tab and view the newly created batch.
Invoice Batches
The newest batch appears at the top of the Invoice Batches tab. The individual invoices are listed in each batch, along with summary information, such as the number of invoices and total invoice amount.

Invoices in the Invoices Batches tab can be viewed and edited by clicking on the view/edit button. The Invoice Details modal contains an additional button for invoices in Invoice Batches: Remove from Batch. Click to remove the invoice from the batch, which will put it back in the Validated Invoices tab.

To send one or more batches to your organization’s accounting department, select the batch(es) and click Export Selected Batches.

Select a file type from the list: PDF, Excel spreadsheet, or zip file.

The file will download to your default file download folder and can then be emailed to the accounting department.
Once a batch has been emailed to accounting, click Mark Batches Submitted in the Invoice Management too. A success message appears in the upper right corner of the page and the batch is moved to the Submitted Batches tab.

Submitted Batches
The Submitted Batches tab lists submitted batches, along with summary information for those batches. Click the plus symbol next to a batch to expand it, displaying the individual invoices it contains.

In the example above, the top batch has been expanded, displaying the invoices in the batch.
Individual invoices in the Submitted Batches tab can be viewed, removed from a batch, and removed and returned. Fields cannot be edited.

Once a batch has been approved by the accounting department, select it in Submitted Invoices and then click Mark Batches Approved. The batch will move to the Approved Batches tab.
Approved Batches
Approved Batches lists all finalized batches. Note that only a company administrator can remove a batch from the Approved Batches tab.

.png)

.png)