- Print
- DarkLight
- PDF
Data Capture Access Management
- Print
- DarkLight
- PDF
Purpose
The purpose of this documentation is to describe how to use the Data Capture Access Management tool to control users’ ability to edit Dynamic Data Capture values.
Audience
Content Administrators and Lender Executives.
Overview
The Data Capture Access Management allows qualified users to create data capture rules. These rules
define whether the Primary Assignee and Additional Assignee(s) have the ability to edit the Vendor’s Values, Reviewer’s Values, or both for a specific Service Type. Additionally, the rules provide a way to extend those privileges to grouped Services.
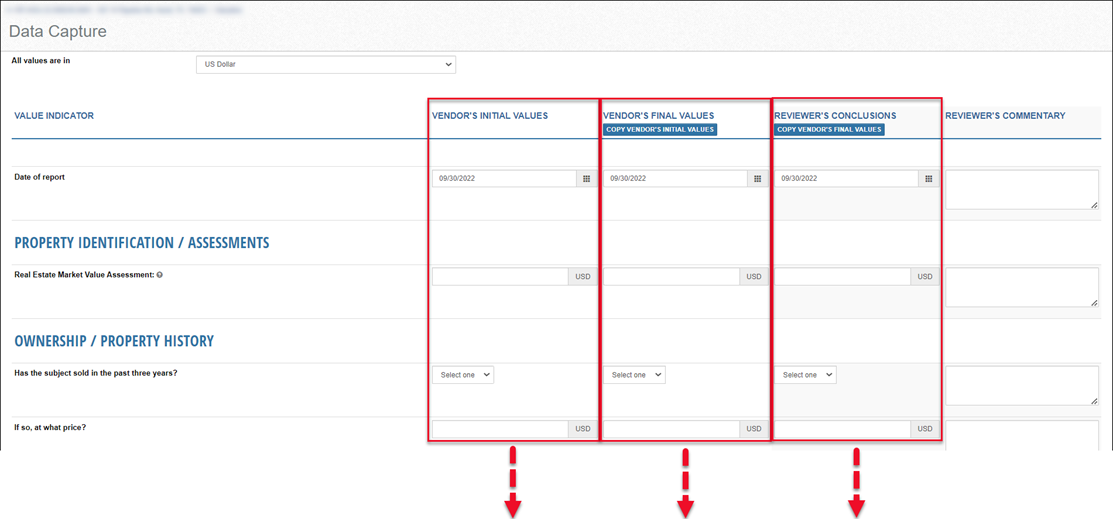
 The image above shows (from left to right) the Vendor’s Initial Values, Vendor’s Final Values, and Reviewer’s Conclusions (Values).
Data Capture Access Management rules supersede user role permissions. If no Data Capture Access Management rule is present, or if the tool is turned off, Collateral360 looks to user roles to determine editing permissions for each Service Type with a corresponding data capture.
Creating and Managing Data Capture Access Management Rules
To access the Data Capture Access Management tool, click Settings in the upper navigation bar, then click Platform Settings.

On the Platform Settings page, click Data Capture Access Management.

The Data Capture Access Management page lists the Data Capture Access rules, if any exist.

Actions (all rules): click to expand a menu containing two commands:
Turn all rules on
Turn all rules off
Note: There is no confirmation required to turn all rules on/off; they will be turned on/off immediately.
On/Off: Click to turn on/turn off an individual rule.
Note: This change is applied immediately to all applicable services.
Actions (individual rule): click to expand a menu containing three commands:
Modify Rule: Opens the rule for editing.
View Change History: Opens a modal listing all the changes made to the rule, the date of each change, and the user who made the change.
Delete Rule: Click to dele the rule. A popup will appear and request confirmation.

Click Add New Rule at the bottom of the page to begin creating a new rule.

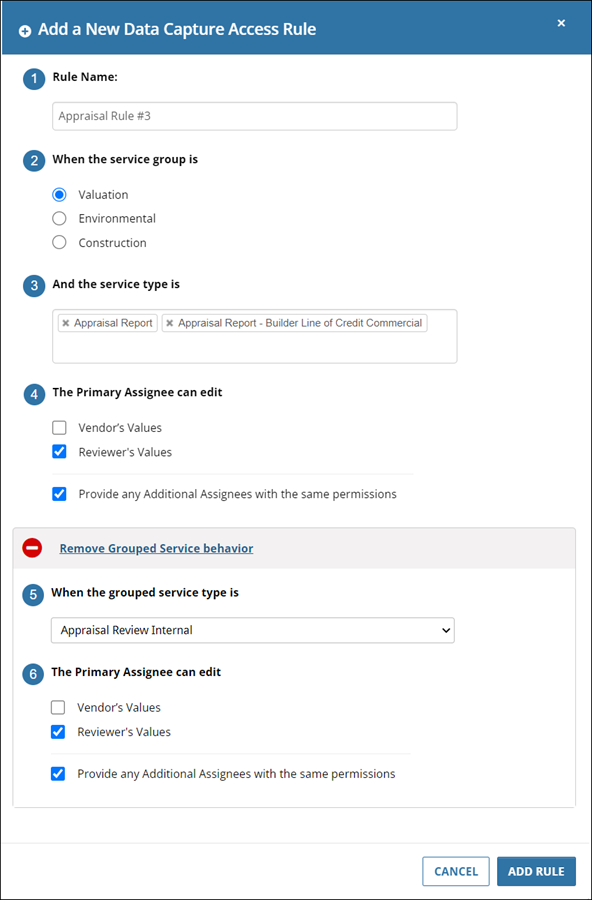
The Add a New Data Capture Access Rule modal will open.

Enter a descriptive name for the new rule.
Select a Service Group. Only Service Types within that Service Group will be available for selection in the next step. Note: The specific Service Groups available in the modal are defined by each organization and may differ from those depicted above.
Click in the field to display a menu listing the available Service Types. Select one or more Service Types.

In the example above, two Service Types have been selected. Clicking the ‘x’ next to either Service Type will remove it.Check one or more boxes to define what editing permissions the rule applies, and to what users.

Vendor’s Values: When this box is checked, the Primary Assignee on the Service Type(s) defined in step 3 will have the ability to modify the values in the Vendor’s Initial Values and Vendor’s Final Values columns of the data capture form.
Reviewer’s Values: When this box is checked, the Primary Assignee on the Service Type(s) defined in step 3 will have the ability to modify the values in the Reviewer’s Conclusions column of the data capture form.
Provide any Additional Assignees with the same permissions: Assigns to the Additional Assignee(s) the same permissions assigned to the Primary Assignee.
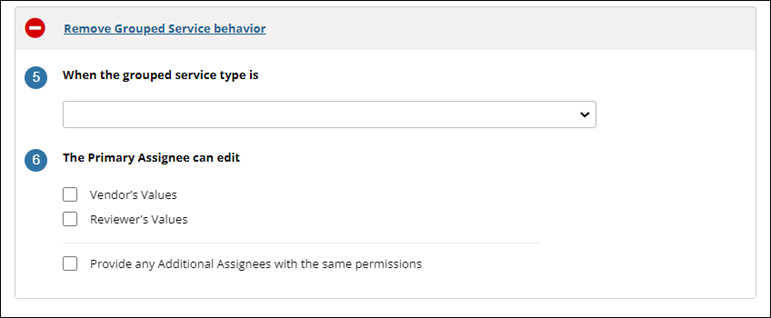
Add Grouped Service Behavior: Optionally, click to expose additional settings. When steps 5 and 6 are completed, if the Service Type defined in step 5 is grouped with the Service Type(s) defined in step 3, then the permissions defined in step 6 are applied.

When the grouped service type is: Select a Service Type from the dropdown menu. The options available are determined by the Service Group selection made in step 2 above.
The Primary Assignee can edit: These selections mirror those in step 4 above.
EXAMPLE RULE:
Steps 1- 4 The Additional Assignees on those same Service Types can edit the Reviewer’s Values, but NOT the Vendor’s Values. Steps 5 – 6 |
|
Click Add Rule at the bottom of the modal to create the new rule. It will be ON by default.

Note:
Rules are additive, and do not override one another. Example:
Two rules exist for the Appraisal Report Service Type
Rule One grants the Primary Assignee access to the Vendor’s Values.
Rule Two grants the Primary Assignee access to the Reviewer’s Values.
The Primary Assignee for Appraisal Report Services will have access to both the Vendor’s Values and the Reviewer’s Values, as Rule One and Rule Two combined grant access to both. The fact that Rule Two does not grant access to the Vendor’s Values does not override or negate the access granted in Rule One.
.png)


.png)