- Print
- DarkLight
- PDF
Creating a Service Request
- Print
- DarkLight
- PDF
Purpose
This documentation describes how to create a Service Request using the Service Request Form (SRF).
Audience
Account Officers and Lender Users.
Service Request Form Overview
The Service Request Form (SRF) is used to create new Loan Files in Collateral360. Some features of the SRF are customizable at the company level:
Tabs: One, two, and five-tab versions of the SRF exist.
Fields and Field Labels: Companies can control which fields appear on the SRF and how they are labelled.
Cabinets: Cabinets are an organizational tool. Some SRFs allow the user to select or create a Cabinet, while others make this selection automatically.
As such, your company’s SRF may appear slightly different than the five-tab version shown in this documentation. The five-tab SRF workflow comprises eight steps, and also includes the optional capability to delete a draft SRF:
Start a New Request
Select a Cabinet
Add Request Info
Add Transaction Info
Add Collateral Info
Select Services
Upload Documents
Submit Service Request Form
Delete a Draft Service Request
Service Request Workflow
Start a New Request
Click Create Request in the upper right corner of the page. Note: The title of this button varies among companies, but it is always green and located in the upper right corner of the page. 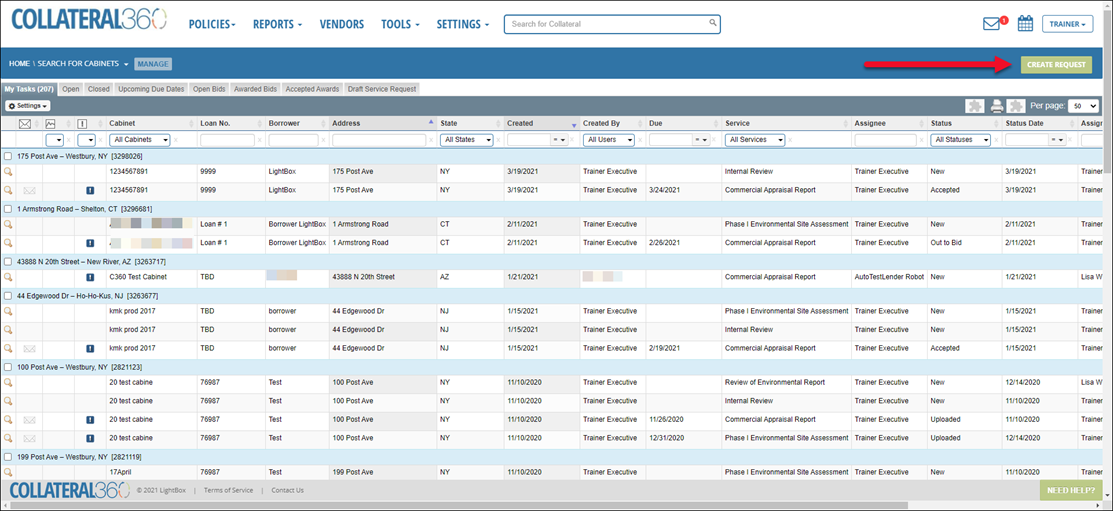
The Service Request Form opens in one of two states:
You are prompted to select, or create and select, a Cabinet. Refer to Select a Cabinet below.
If your company’s SRF is configured to select a Cabinet automatically, this step is skipped. Proceed to Add Request Info below.
Select a Cabinet
Cabinets are an organizational tool that helps companies group Loan Files.
The Choose Cabinet page provides one or two options, depending on company settings and your user permissions.
Option One: Select an existing Cabinet. 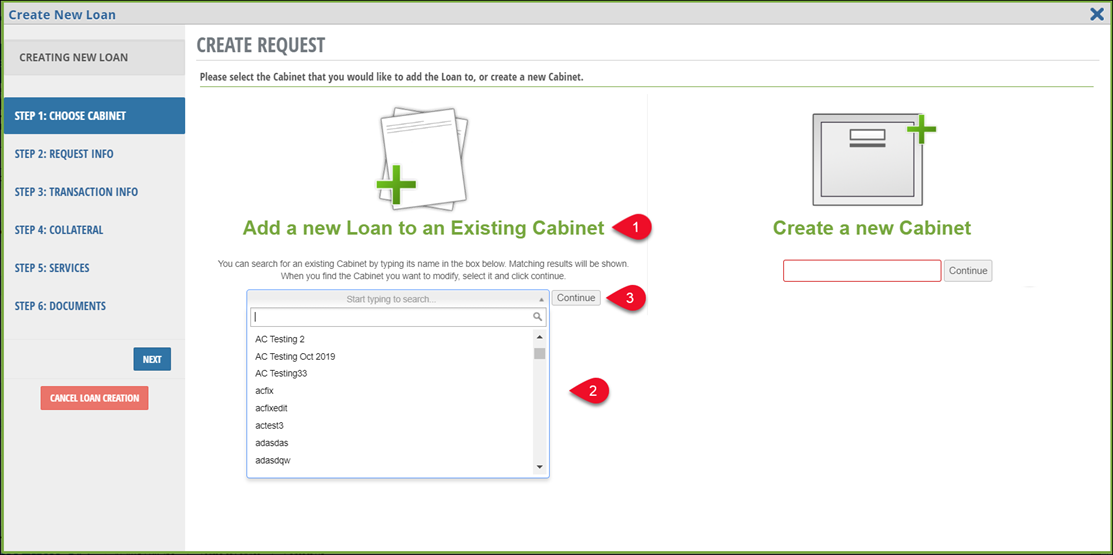
1. Click Add a New Loan to an Existing Cabinet to save the Loan File in an existing Cabinet.
2. Choose a Cabinet from the list of those available.
3. Click Continue to proceed to the next tab of the SRF.
Option Two: Create a new Cabinet.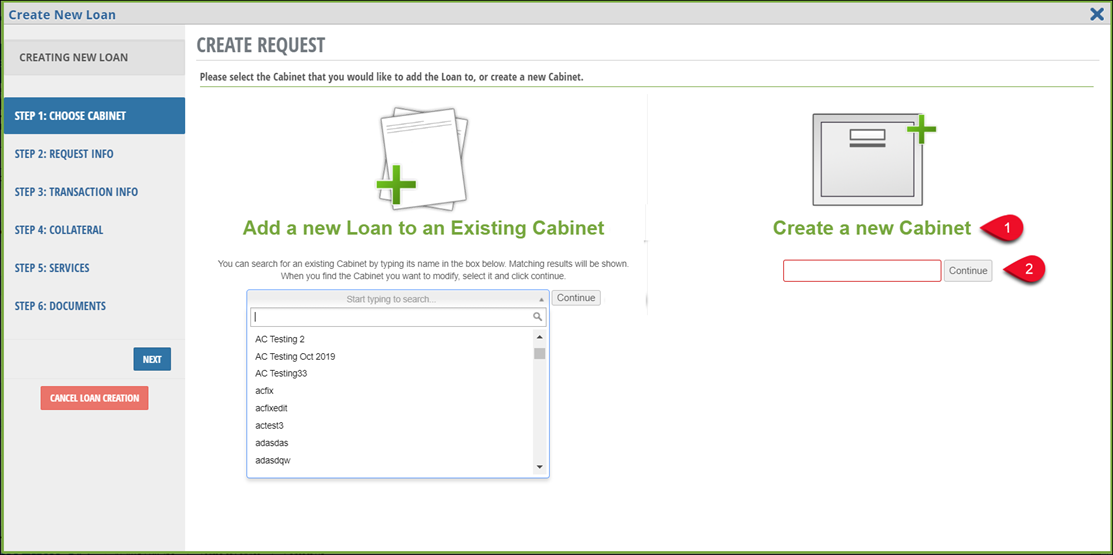
1. Click Create a New Cabinet to save the loan file in a new Cabinet.
2. Enter a new Cabinet name in the available field and click Continue to proceed to the next tab of the SRF.
Add Request Info
The Request Info tab collects information about the request itself, such as the borrower name and the loan closing date.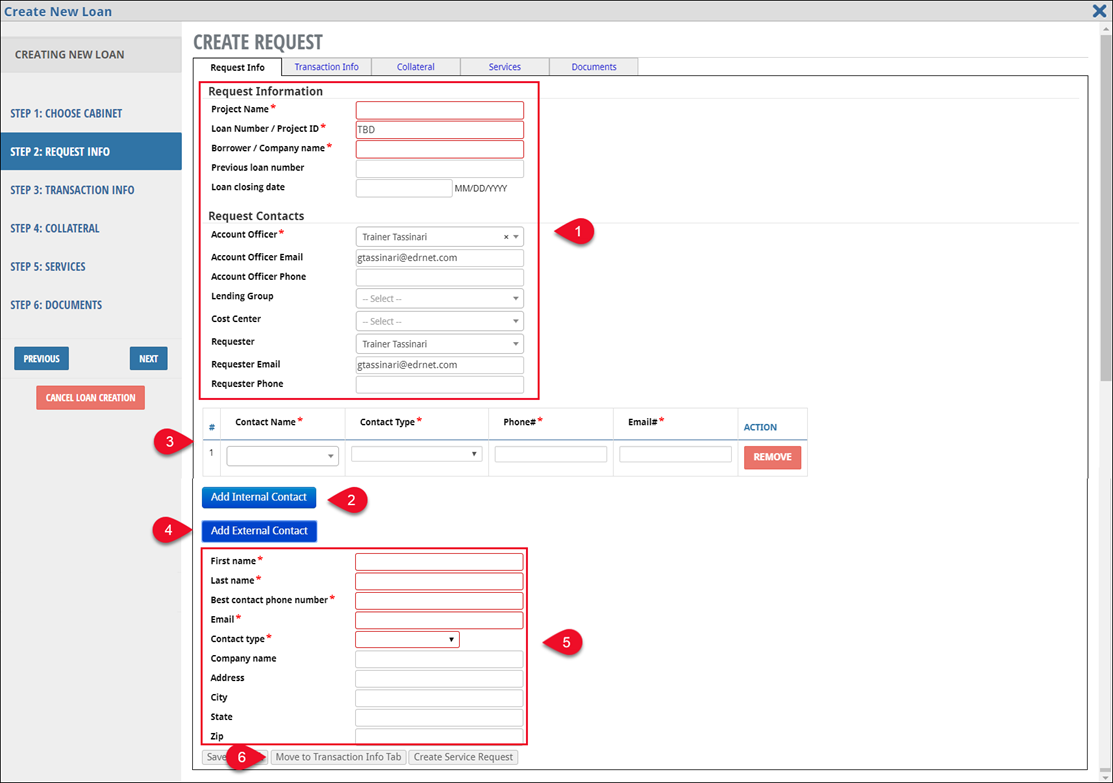
Enter Request Information. Red-outlined fields, and fields with an asterisk, are required. Where applicable, even when not required, we recommend filling out fields. This will reduce the likelihood that the Job Manager or Lender Manager will put the Loan File in an Incomplete Data or On Hold status once the SRF has been submitted.
Optionally, click Add Internal Contact to associate another Collateral360 user with the Service Request.
Enter Internal Contact information.
Click Add External Contact to associate an individual that does not have a Collateral360 user account with the SRF.
Enter the External Contact information.
Click Move to Transaction Info Tab to proceed to the next tab of the SRF.
Add Transaction Info
The Transaction Info tab collects more detailed information about the loan and transaction.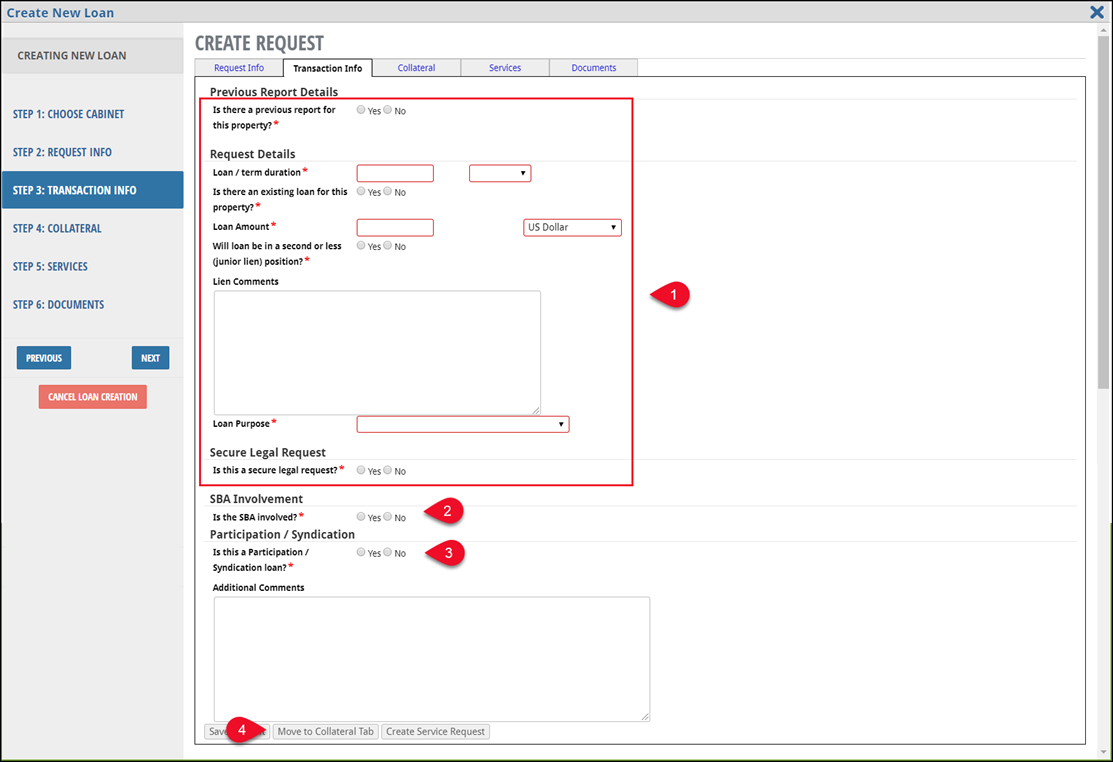
Enter the required information in the Previous Report Details section.
Select Yes or No to the SBA Involvement question and enter the required information.
Select Yes or No for Participation/Syndication Loan and Administrative Agent.
Click the Move to Collateral button to proceed to the next tab of the SRF.
Add Collateral Info
The Collateral tab collects information about the Property or Properties associated with the loan.
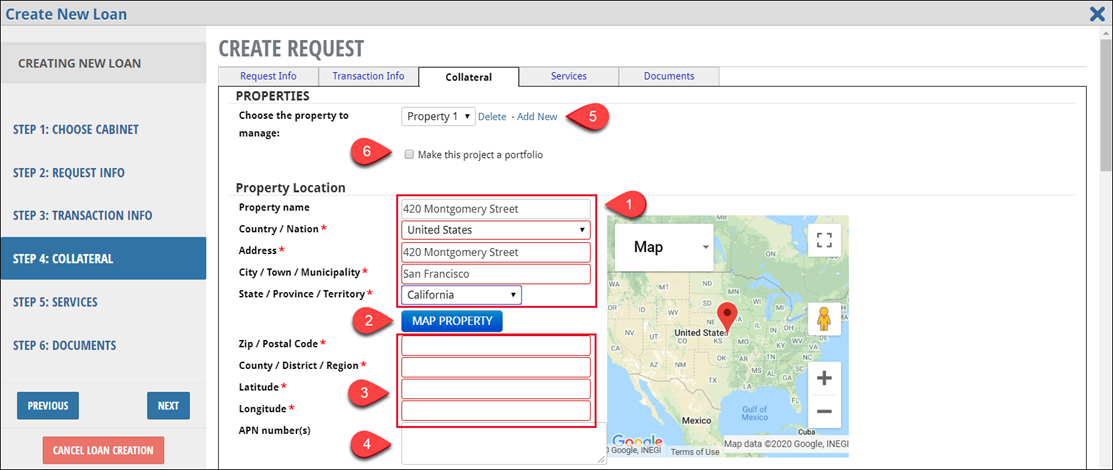
Enter Property Location Information
Enter the Property Location information.
If you begin with the Address field, several locations will be suggested as you type in the address. Click one to automatically fill in the remaining address fields, or continue to manually enter the information.
Note: The address suggestion functionality works for all U.S. addresses and some international addresses.
After adding Country, Address, City, and State, click Map Property to fill in Zip, County, and Latitude and Longitude.
Review and update auto-populated Zip Code, County, Country, Latitude, and Longitude, if necessary.
Enter APN(s)
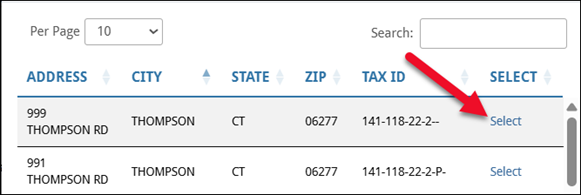
Click Plot by APN to open the Property by Tax ID modal. This feature allows you to enter an APN and automatically fill in the remaining address fields with the data associated with that APN.

In the modal, enter the Tax ID, APN, PARCEL Number, Block or Lot, then select a State and (optionally) a County. Click Search.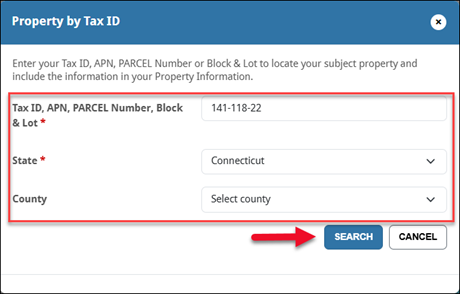
One or more results will appear in a table. If more than 10 results are returned, use the Next/Previous, or page-number navigation at the bottom of the modal to view additional results.Use the Search box at the top of the results box to search the results for a specific entry.
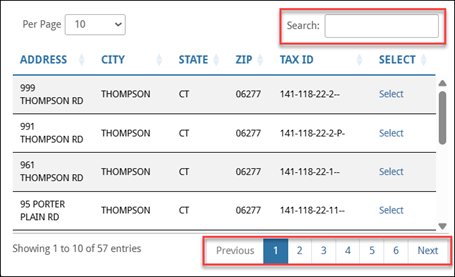
Click a column heading to sort the results by that column. Click a second time to reverse the sort order.

Click the Select text for a specific APN to select that parcel. The modal will close and the Property Location information will be filled out in the SRF.
The APN field and other auto-filled address fields can be edited manually. Additionally, APNs can be entered manually, skipping the Plot By APN tool.
If this request will include multiple Properties and the first Property has been entered, click Add New to begin entering the subsequent Property information on the SRF.If the request will include four or more properties (Portfolio), check the box Make this Project a Portfolio.
Note: This check box is optional and may not appear on your company’s SRF.
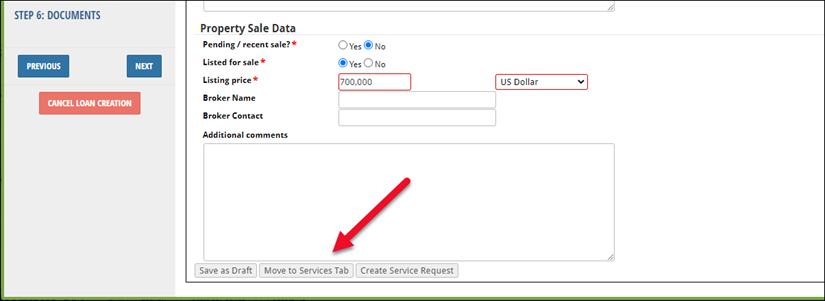
Complete the remainder of the fields on the form, then click Move to Services Tab at the bottom of the page to proceed to the next tab of the SRF.
Select Services
The Services tab lists all the Services available to add to the request. Services are divided by Service Group: Valuation, Environmental, etc. Services on the SRF cannot be sorted. 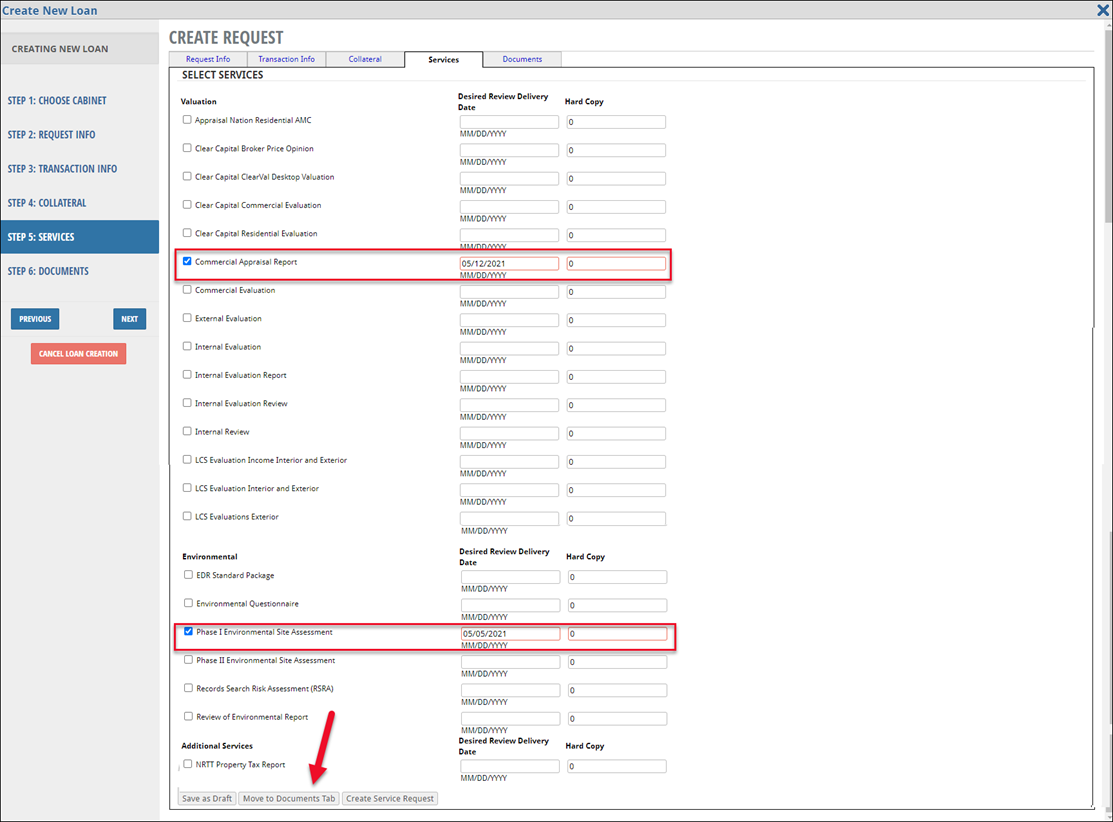
In the example above, the Commercial Appraisal Report Service from the Valuation Services group and the Phase I Environmental Site Assessment Service from the Environmental Services group have been selected.
Check the box next to one or more Services to add those Services to the SRF.
Enter the Desired Review Delivery Date and Hard Copy for each Service added, if applicable.
Click Move to Documents Tab to proceed to the final tab of the SRF.
Upload Documents
The Documents tab allows you to add documents or other files to include in the request. Note: accepted file formats and file size limits are listed on the Documents tab.
Drag and drop files in the blank box or click Browse to navigate to your computer and select files to upload.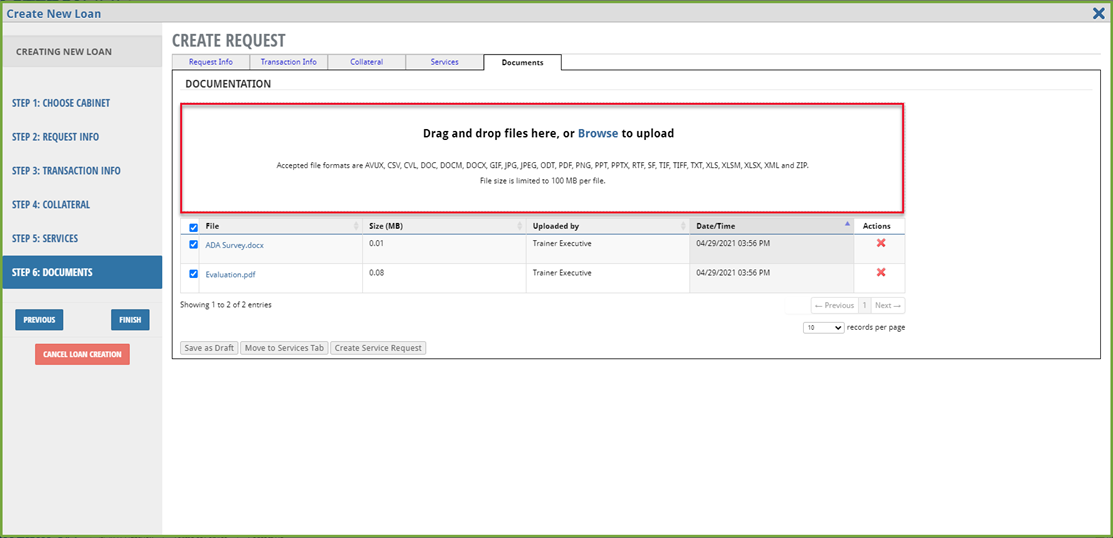
In the example above, two documents have been added to the Service Request: ADA Survey.docx and Evaluation.pdf
To remove an uploaded file, click the red X in the Actions column.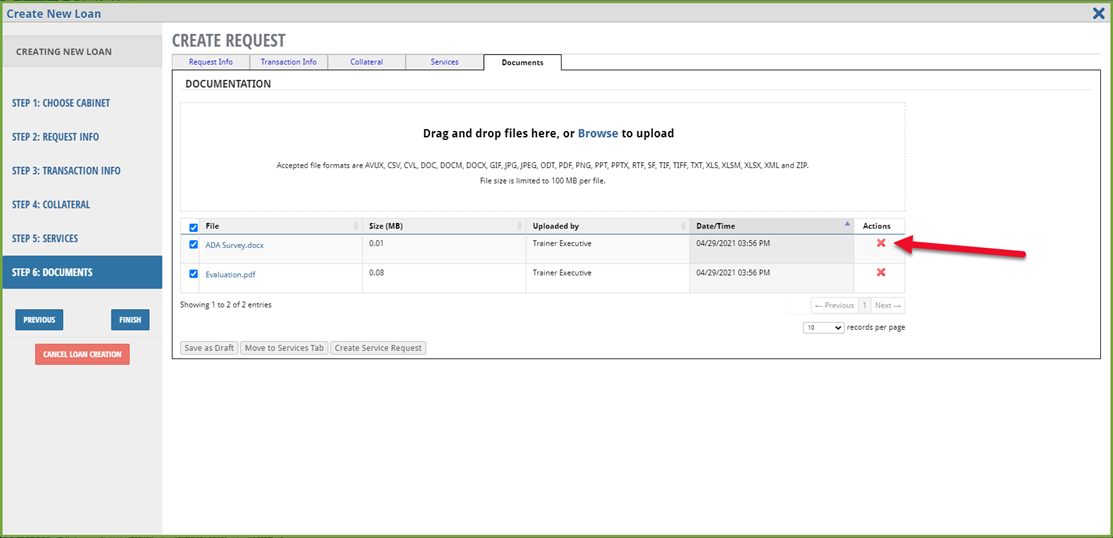
Submit Service Request Form
Click Finish or Create Service Request to submit the request.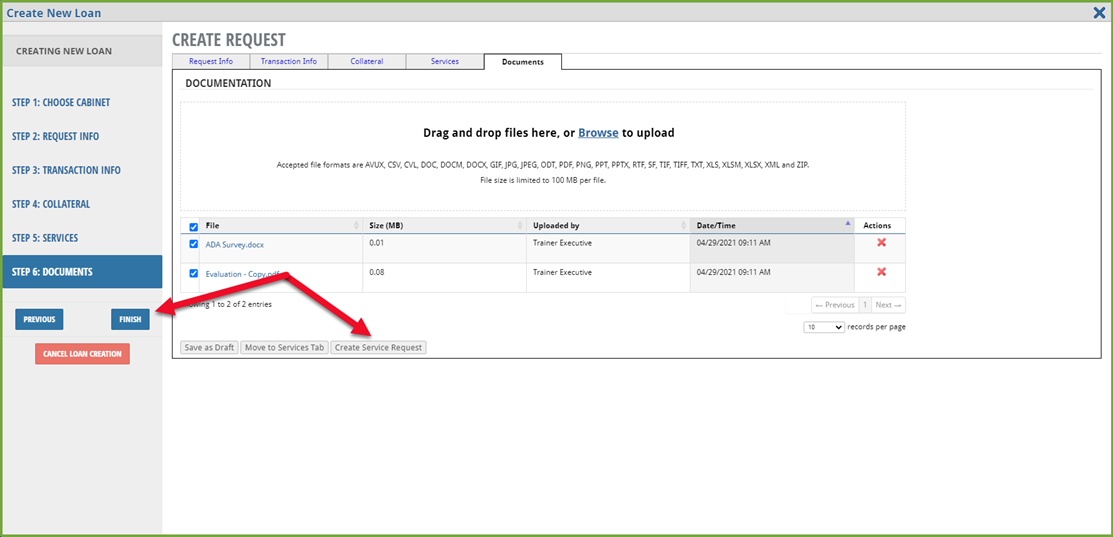
If all required fields have been filled out, the Create New Loan modal will close and a new Loan File will be created. If any required fields have not been completed, the modal screen will refresh and list those required fields in red.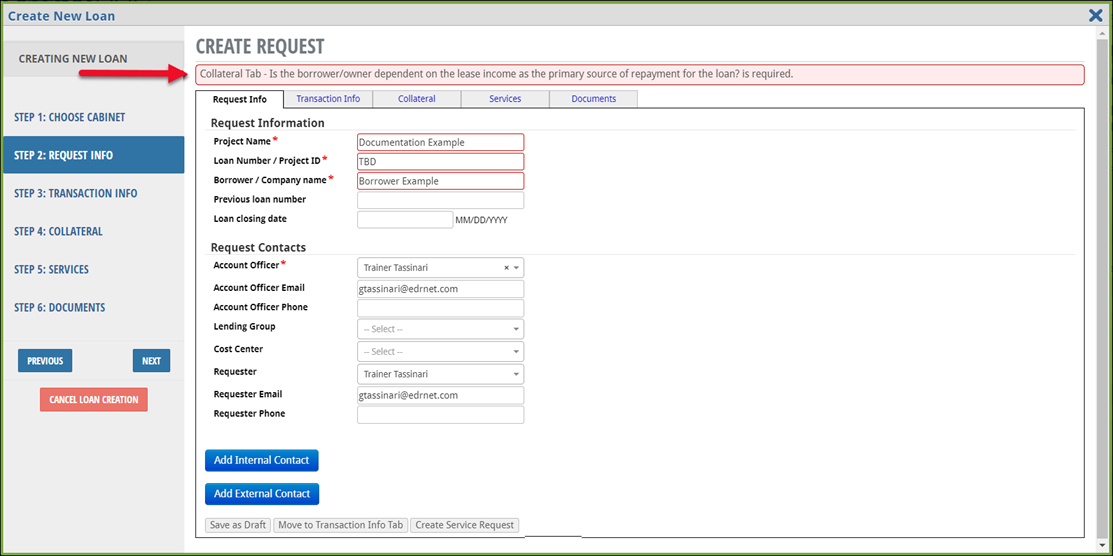
Upon submitting the SRF, a notification appears in the bottom right corner of the page with a link to the Collateral Overview page of the newly created loan file. 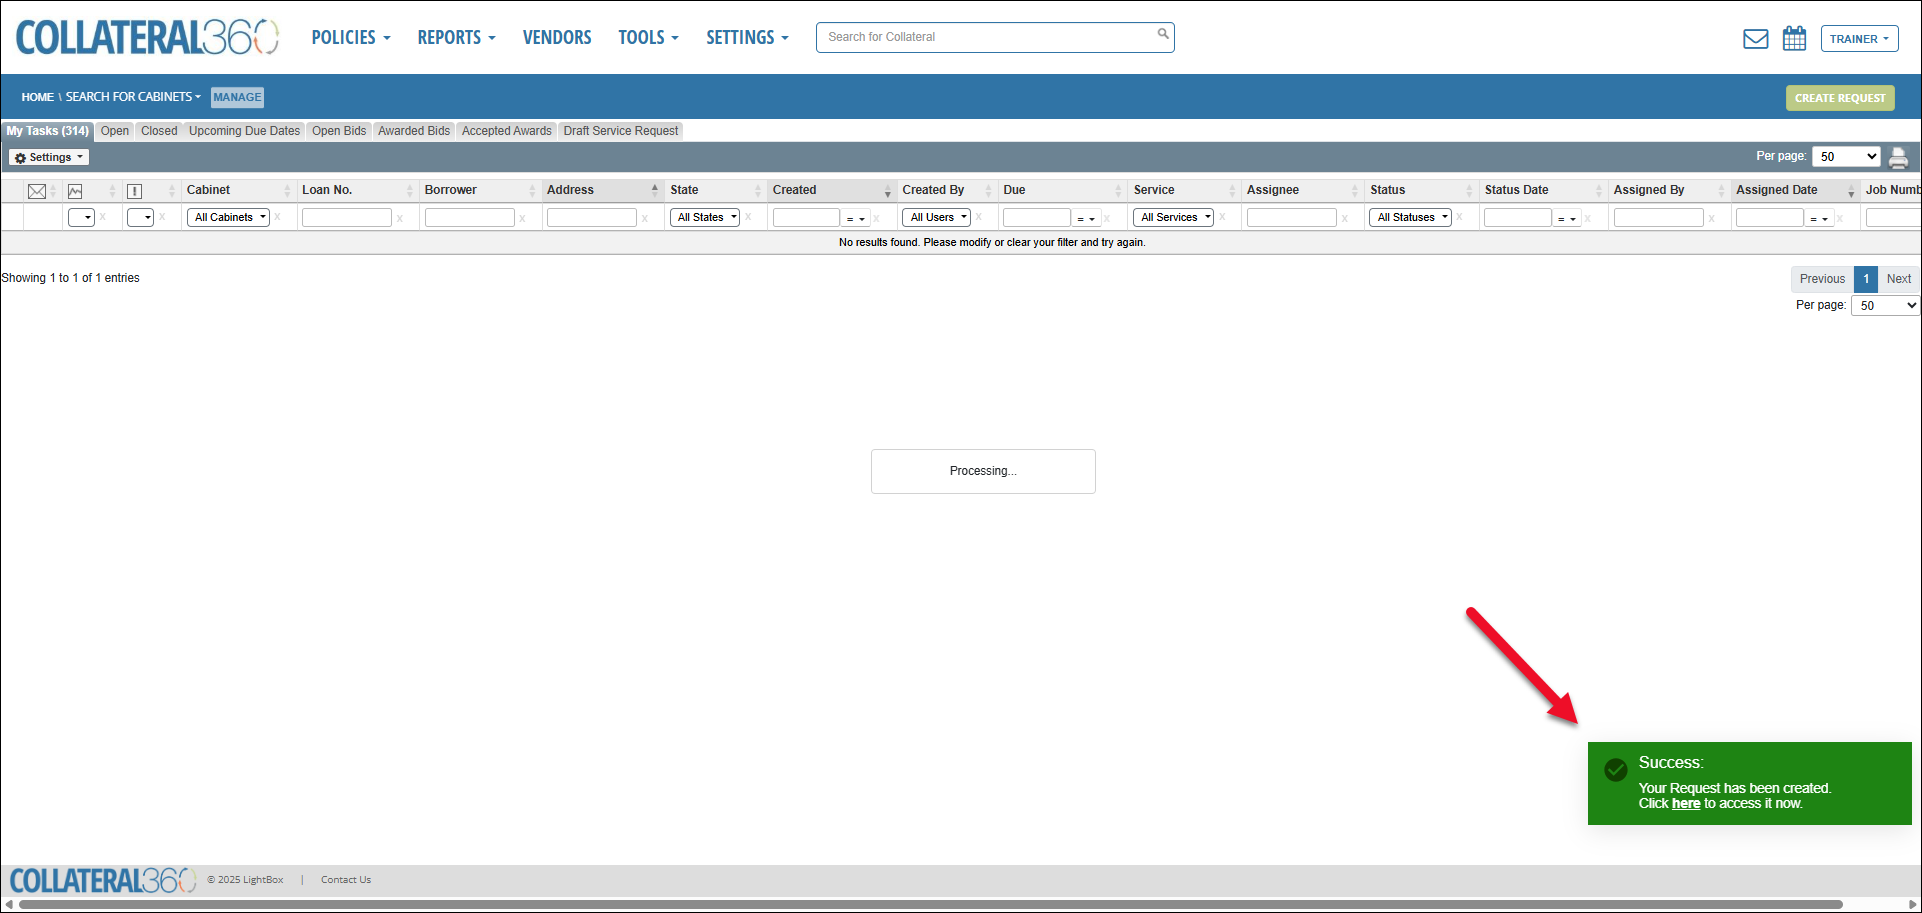
The collateral and associated Services will be listed on the Open tab of the Collateral360 Dashboard.

Delete a Draft Service Request
To delete a Draft Service Request, navigate to the Draft Service Request tab on the Dashboard, then click the magnifying glass next to the draft you wish to delete.

Click the Delete Draft Request button at the bottom of the SRF.

A popup requests confirmation. Click OK to delete the draft SRF.
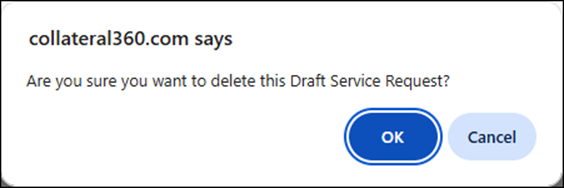
A confirmation message appears in the upper right corner of the SRF. The SRF modal closes, and the draft SRF entry no longer appears in the Draft Service Request tab of the Dashboard.
.png)

.png)