Advanced Property Definition
- Print
- DarkLight
- PDF
Advanced Property Definition
- Print
- DarkLight
- PDF
Article summary
Did you find this summary helpful?
Thank you for your feedback!
Purpose
This Job Aid describes how to use the Advanced Property Definition tool to collect detailed information about the property.
Audience
Job Managers, Lender Managers, Content Administrators, and Lender Executives.
Advanced Property Definition Overview
The Advanced Property Definition (APD) allows a user with the appropriate permissions to access detailed information about a subject property. APD provides tools for redefining a target property, so the actual property boundary and key site data can be shared with vendors.
Follow these steps to access the Advanced Property Definition:
Navigate to a loan file.
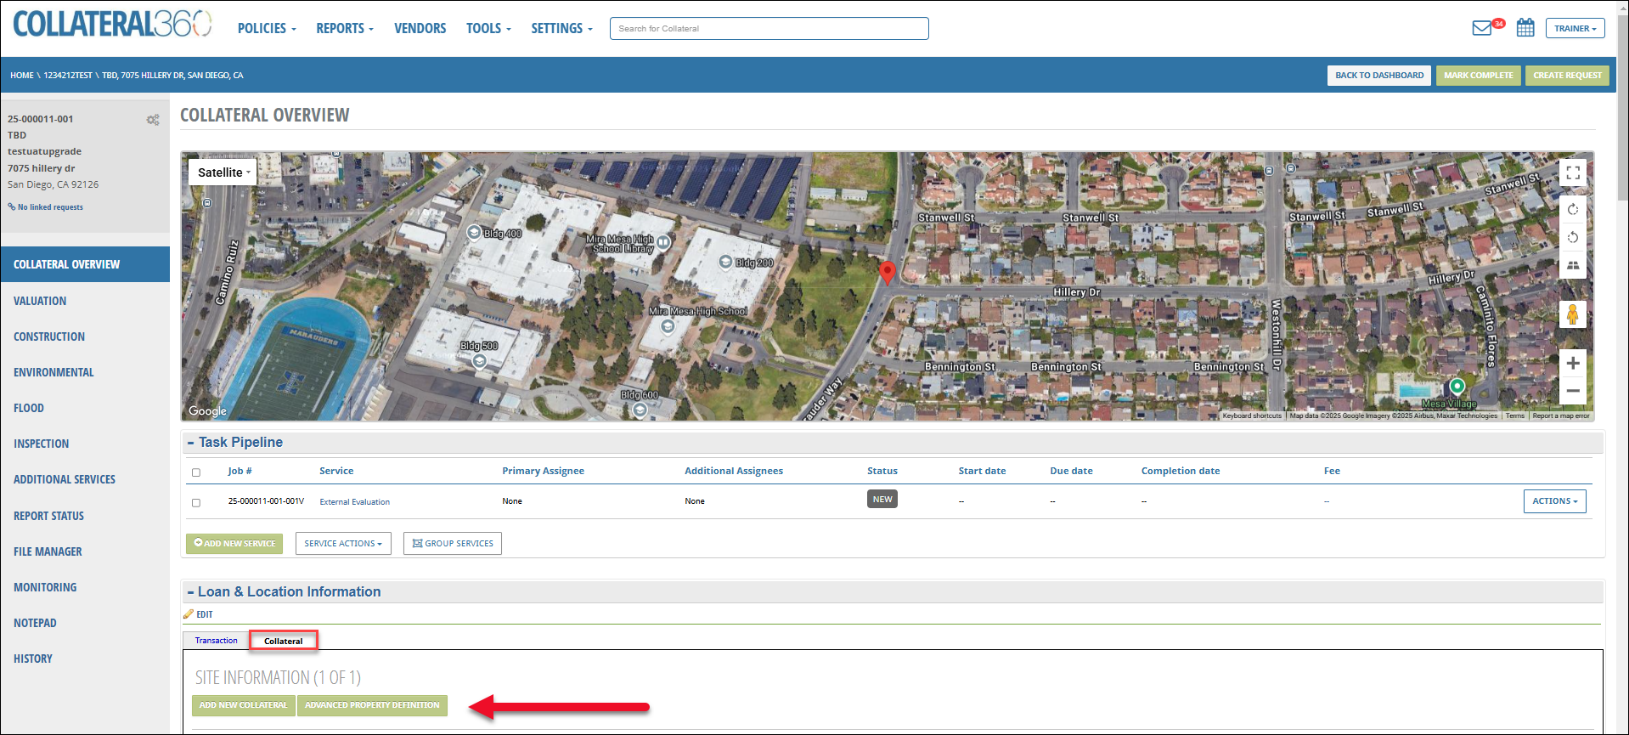
On the Collateral Overview page, scroll down to the Loan & Location section.
Click the Collateral tab.
Click the Advanced Property Definition button.
Note: If the button does not appear, your organization is not utilizing the feature, or your role does not have permission to access it.
Advanced Property Definition opens in a new browser tab. The Project Overview page is displayed first. This page lists address and latitude/longitude, Property Type and Property Subtype, and displays a map with a pin at the property location.
Click Start Research.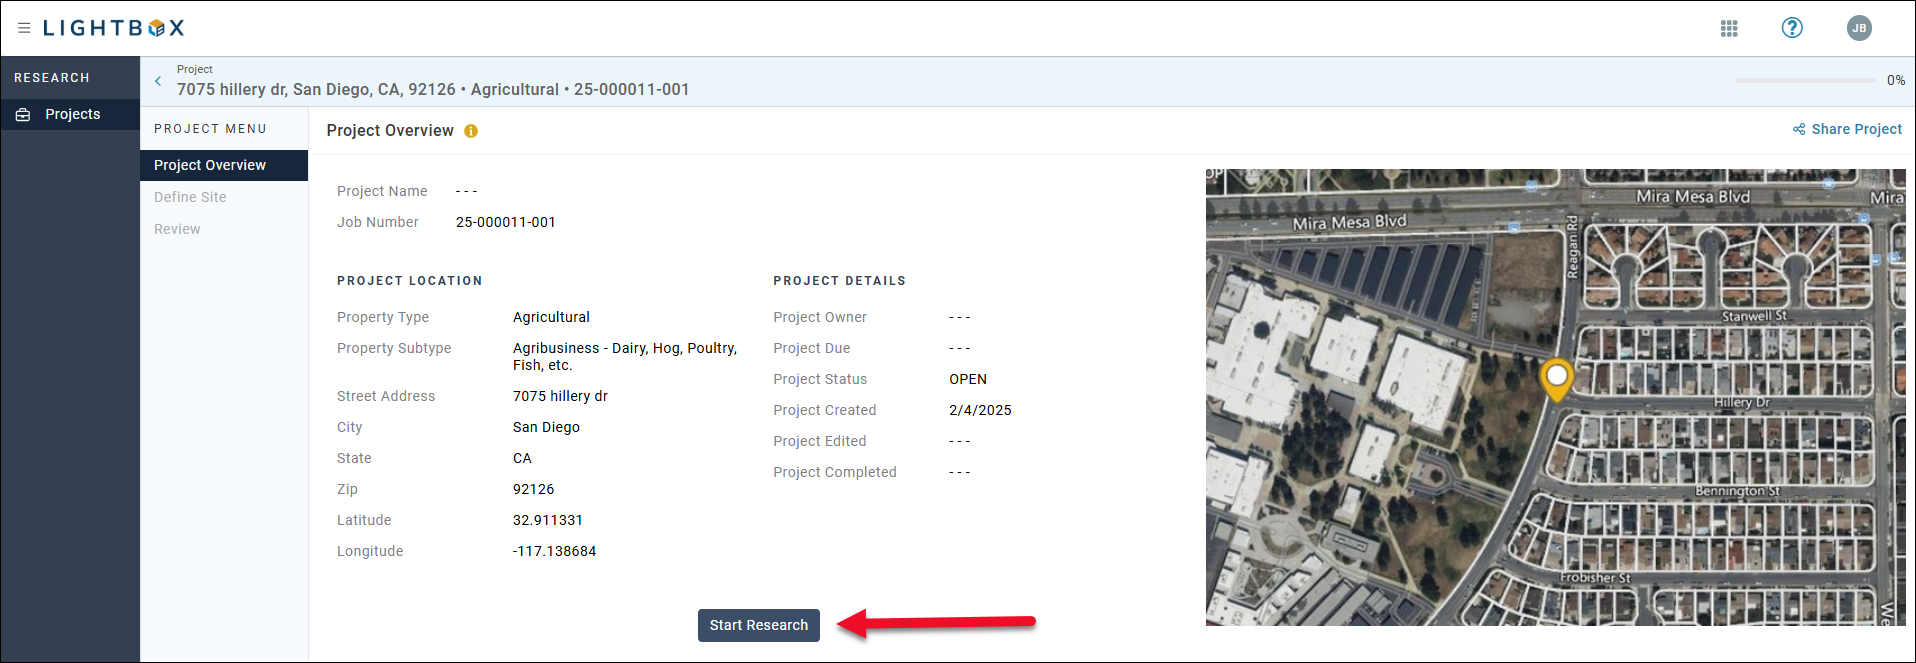
If the address does not map precisely to a parcel, a notification appears at top of the page and the APD automatically places a pin at the nearest parcel. If this not the correct parcel, you will have ability to adjust it manually.
To manually select a parcel, click on it on the map. This will add an additional parcel. 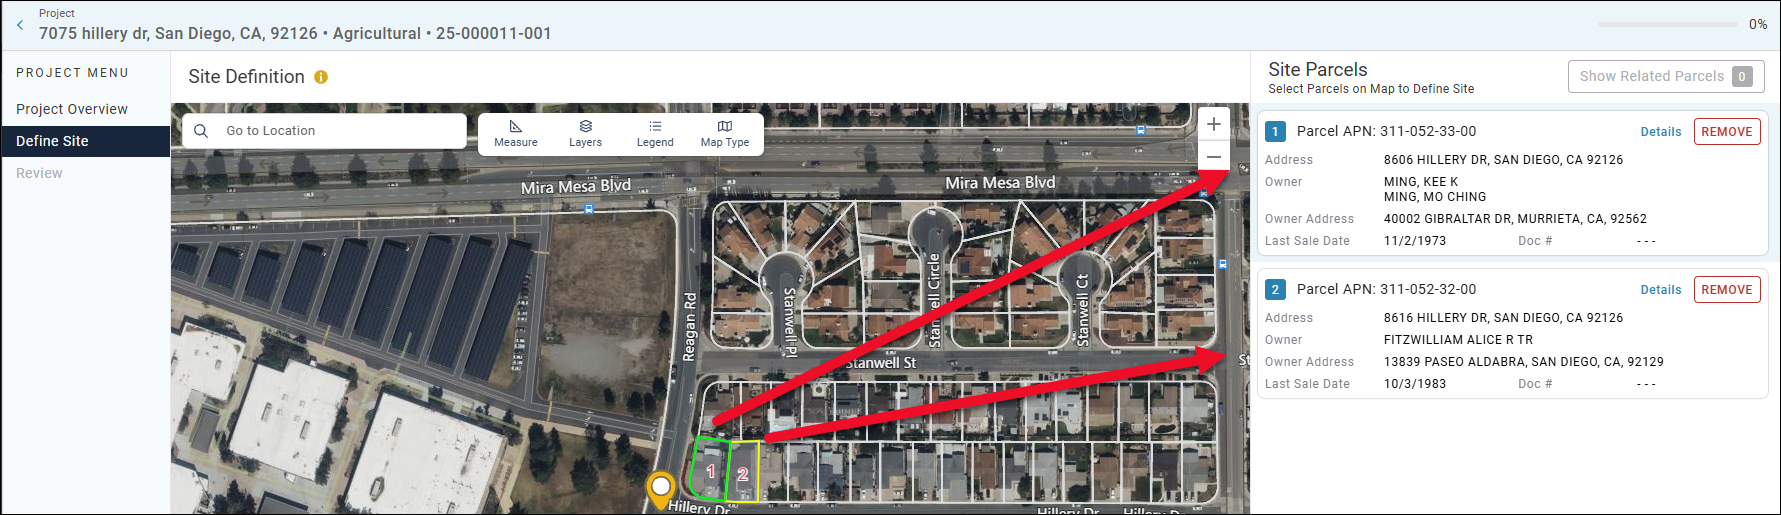
In the example above, there are two parcels selected.
Click Remove to delete a parcel. Note: There must always be at least one parcel item in the list.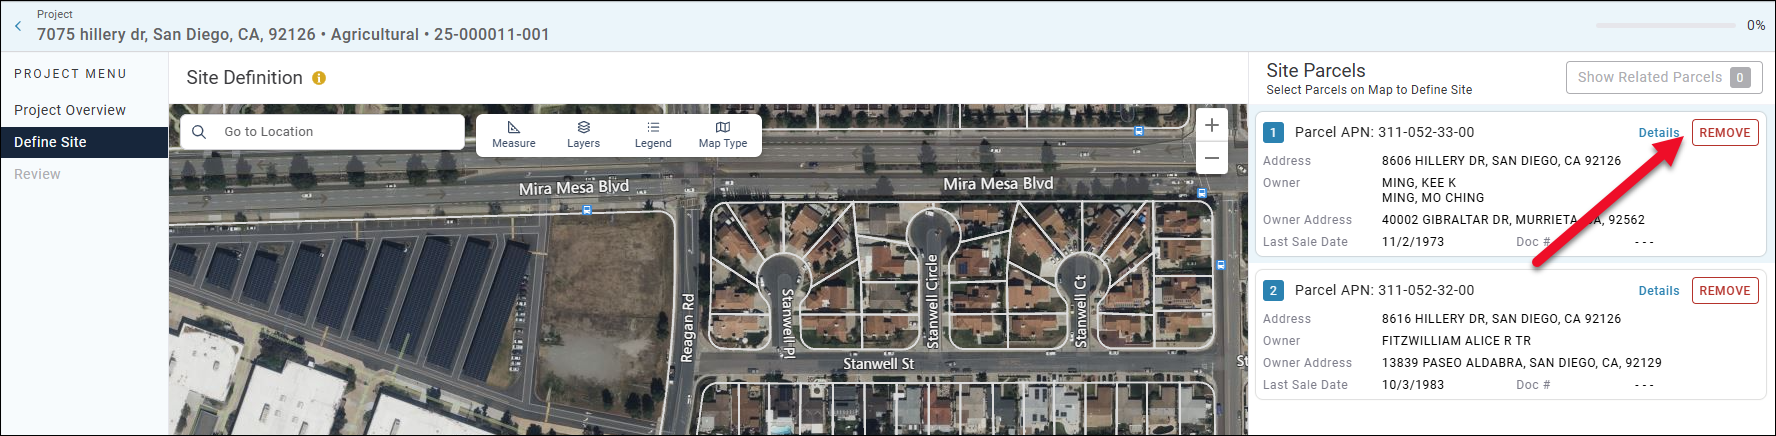
To navigate to a specific location on the map, enter an address in the Go to Location bar at the top of the map panel, then click Enter on your keyboard. The map will display that location, outlining the parcel in green. 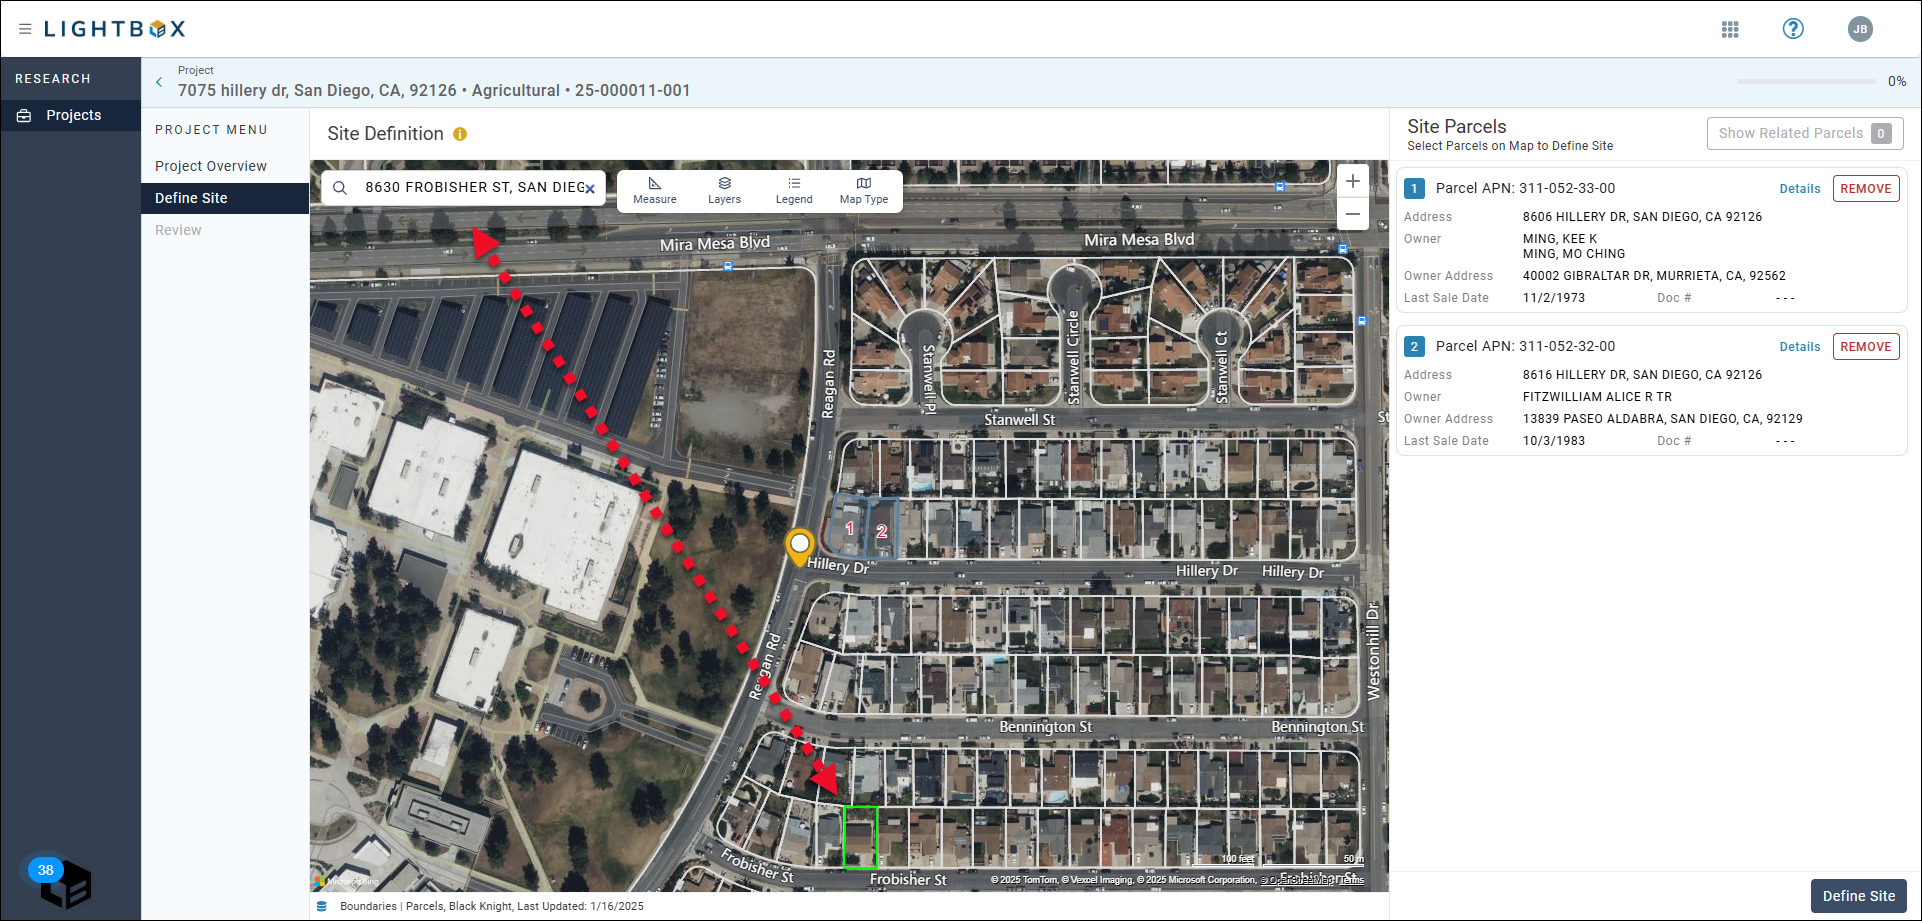
View Parcel Details
To view additional information about a parcel, such as the assessed value, last sale date, and number of acres, click Details in the upper right corner of the parcel card. The parcel card expands to display additional details. 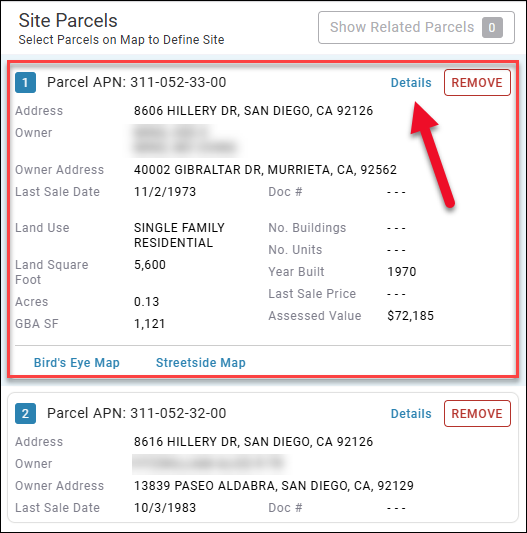
When the parcel card is in the expanded view, two additional links appear at the bottom, in blue text:
Bird’s Eye Map: Opens a new browser window that displays the parcel at a 45° angle.
Streetside Map: Opens a new browser window with a street view of the parcel.
Show Related Parcels
Click Show Related Parcels to highlight parcels that could be part of the site. Related parcels are defined by the following:
Same owner names
Same owner addresses
Same sale dates and sale document numbers
Note: If there are no related parcels, the button will read: "0 related parcels."
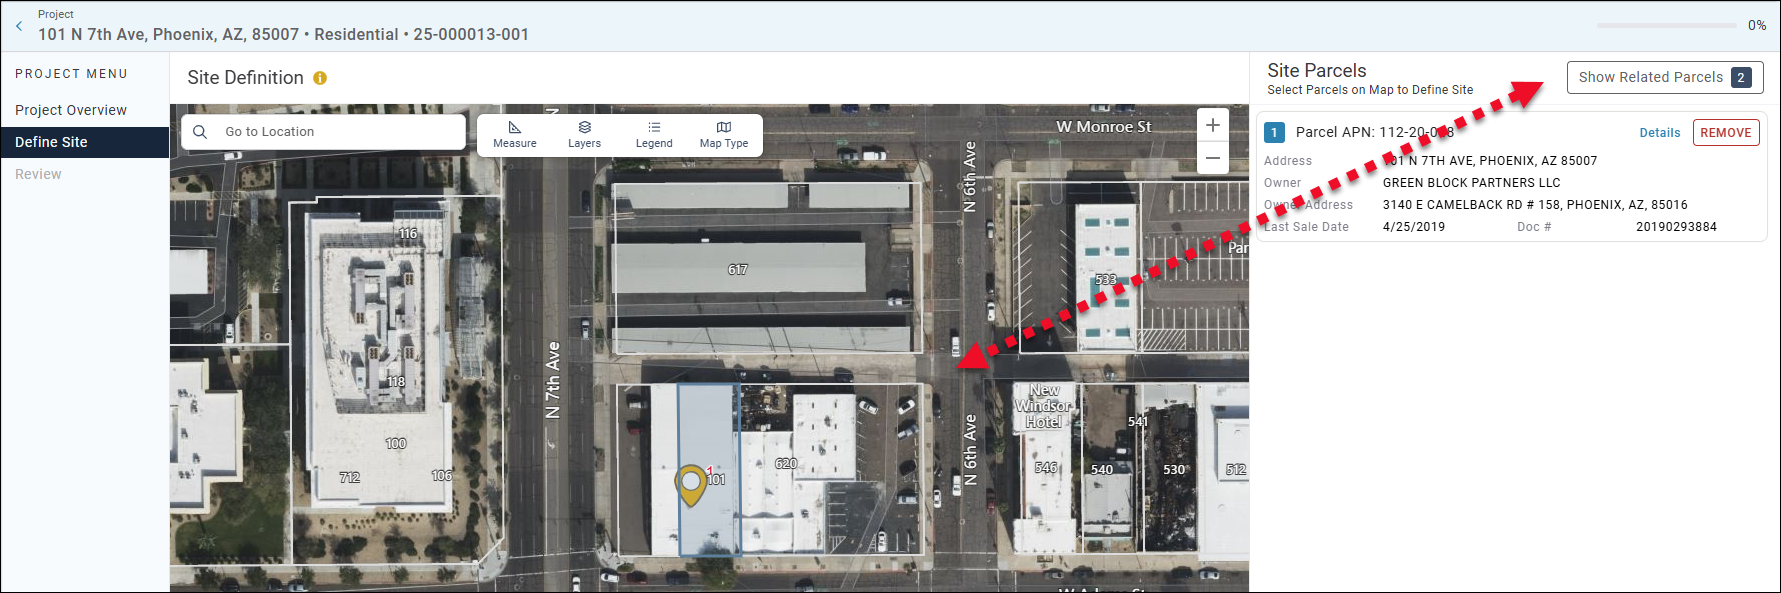
In the example above, related parcels are available but are not being displayed.
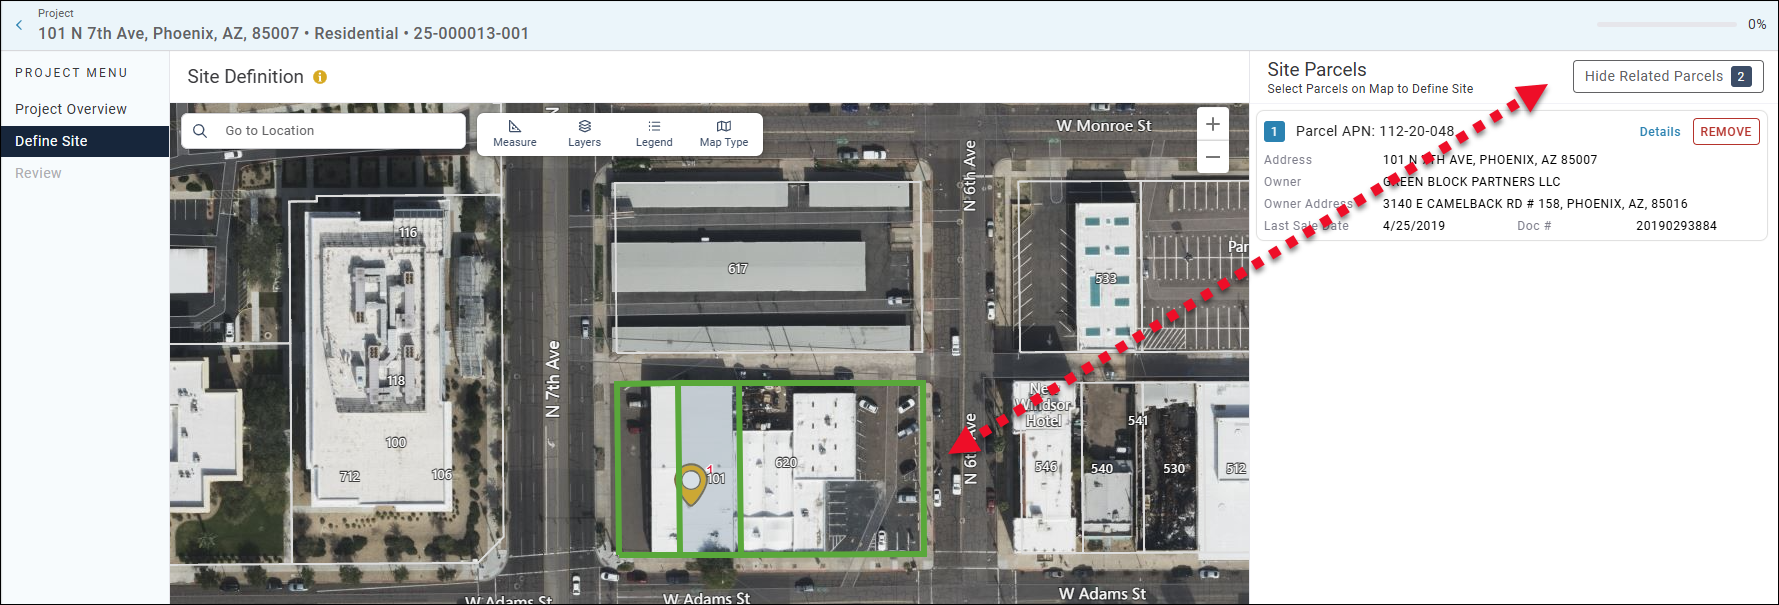
In the example above, Show Related Parcels has been clicked, highlighting related parcels in green.
Click Hide Related Parcels to remove the related-parcels highlighting.
Advanced Property Definition Map Tools
A toolbar can be found at the top of the map panel. 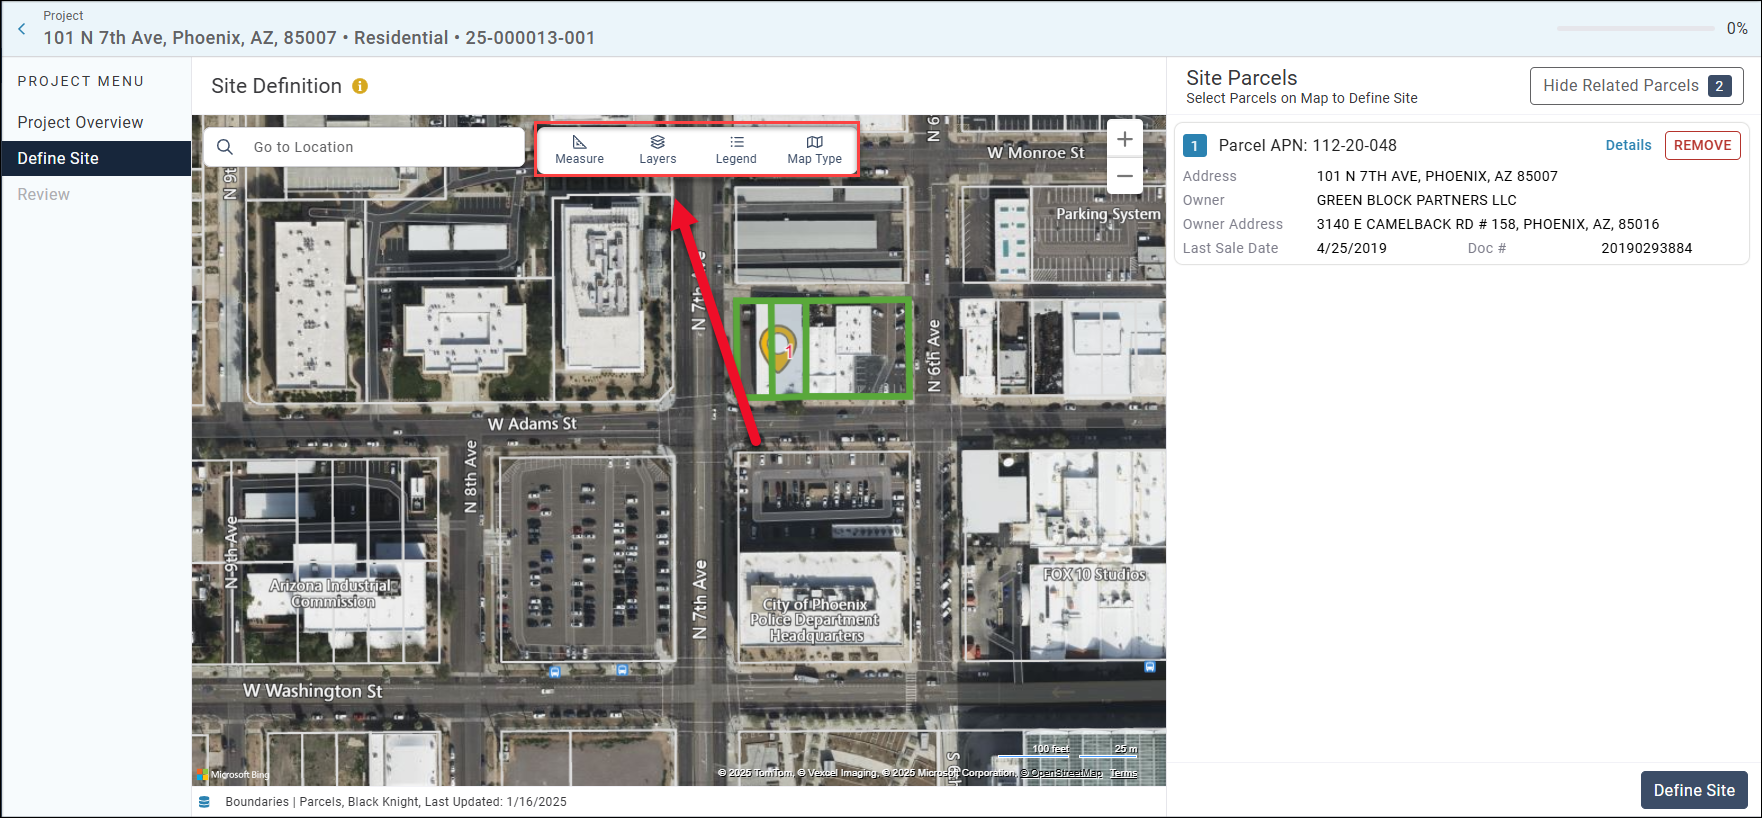
The Advanced Property Definition map toolbar contains four buttons:
Measure
Layers
Legend
Map Type
Measure
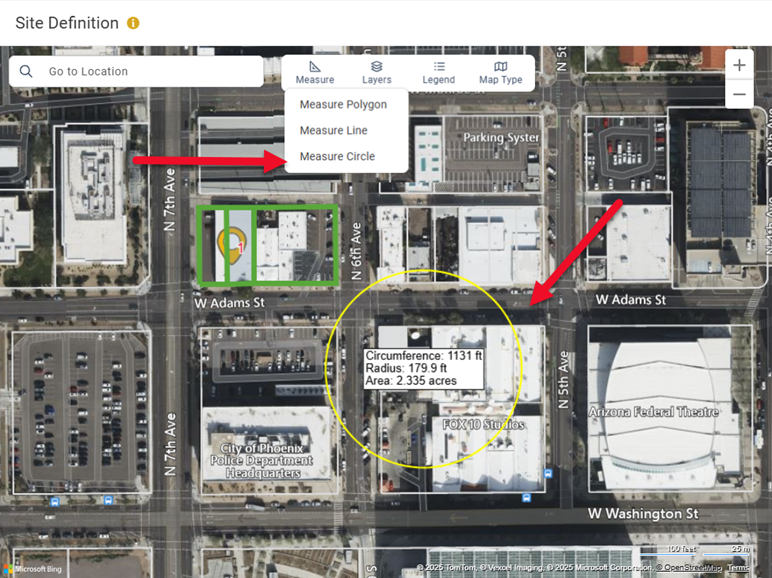
Click Measure to expose a menu containing three items: Measure Polygon, Measure Line, and Measure Circle.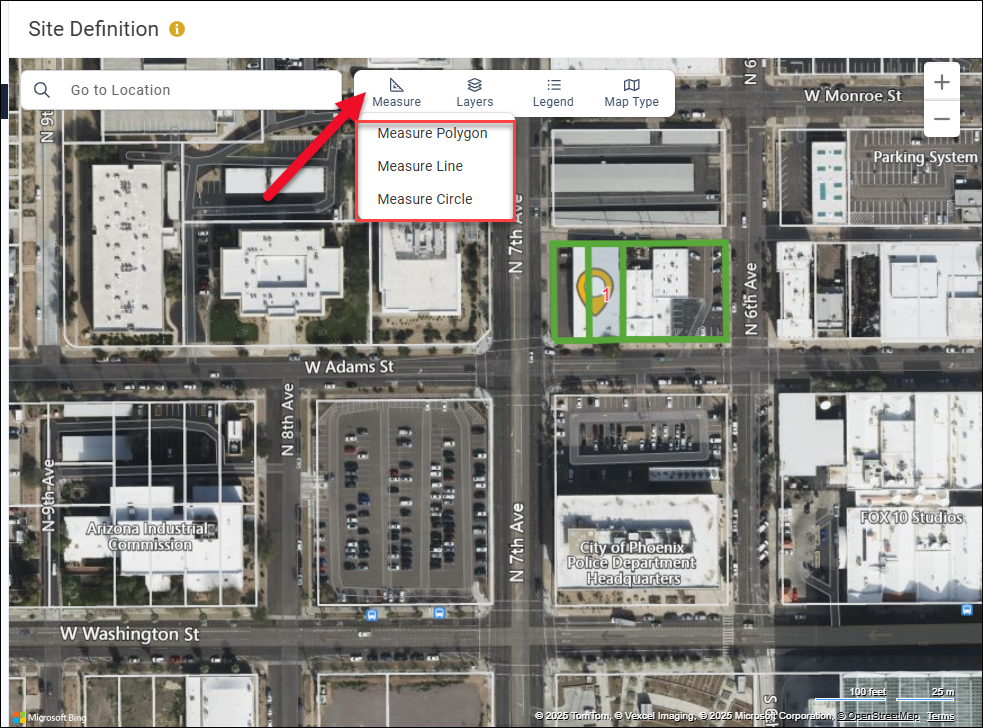
Click Measure Polygon in the Measure menu.
Click a location on the map to begin the measurement. Drag your mouse to the first point at which you need to change direction and then click again to add a vertex. Double click to complete the polygon.
The length is displayed in a white text box.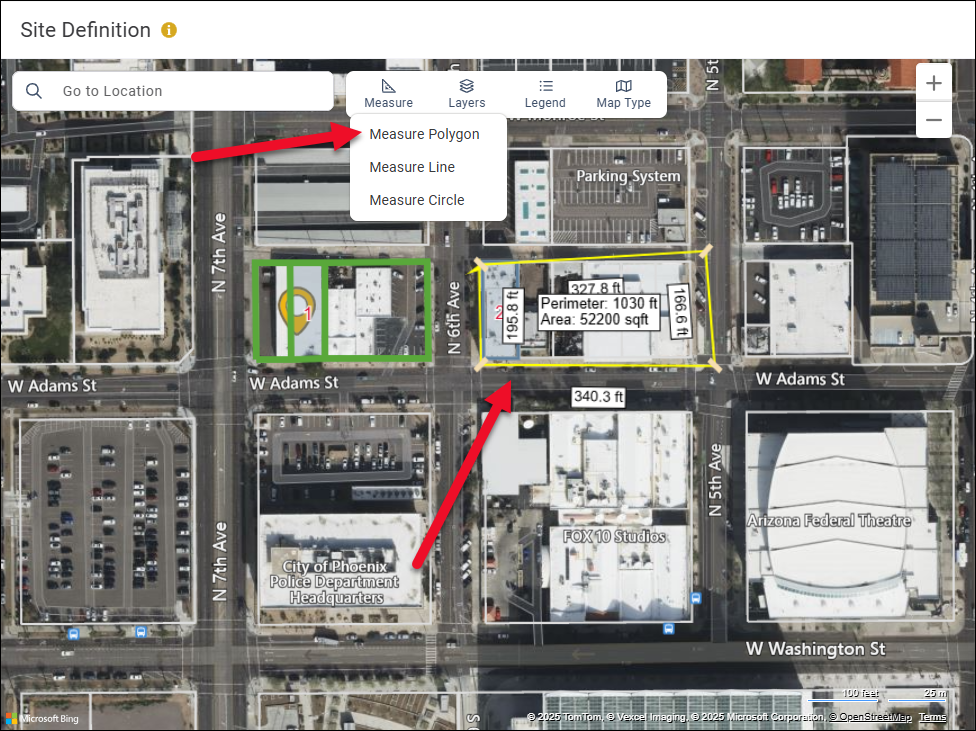
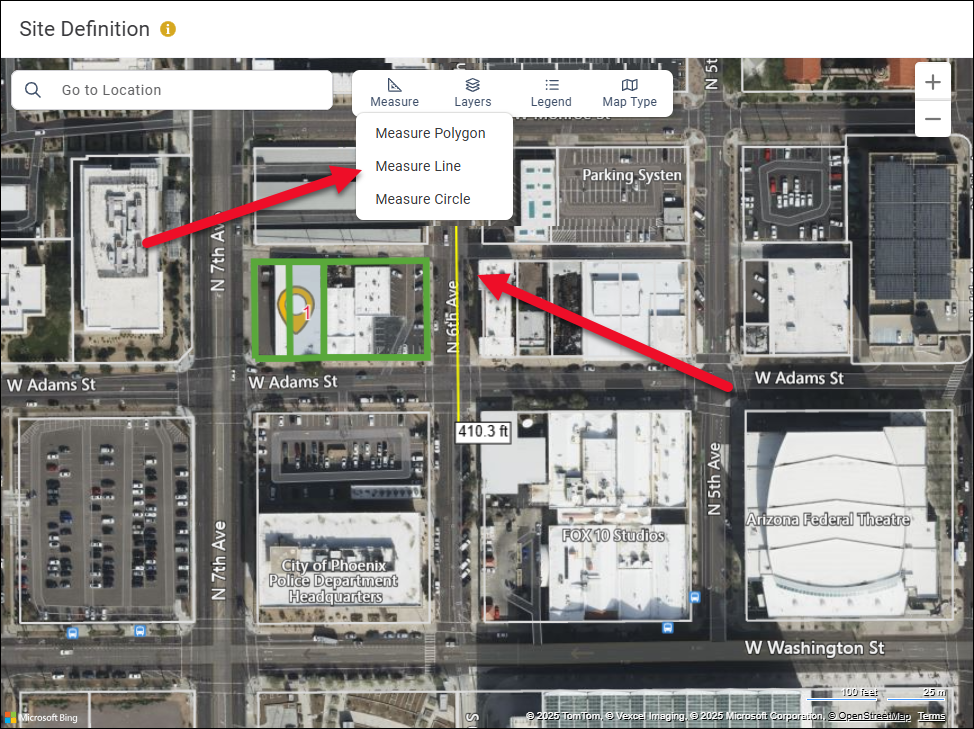
Click Measure Line in the Measure menu. Click the desired starting location on the map to begin the measurement, then drag your mouse to the desired ending location. Double click to complete the line.
The length is displayed in a white text box.
Click Measure Circle in the Measure menu.
Click a location on the map to begin the measurement. This spot will form the center of the circle. Drag the mouse to increase/decrease the size of the circle. Double click to complete the circle.
The circumference, radius, and area are displayed in a white text box.
Layers
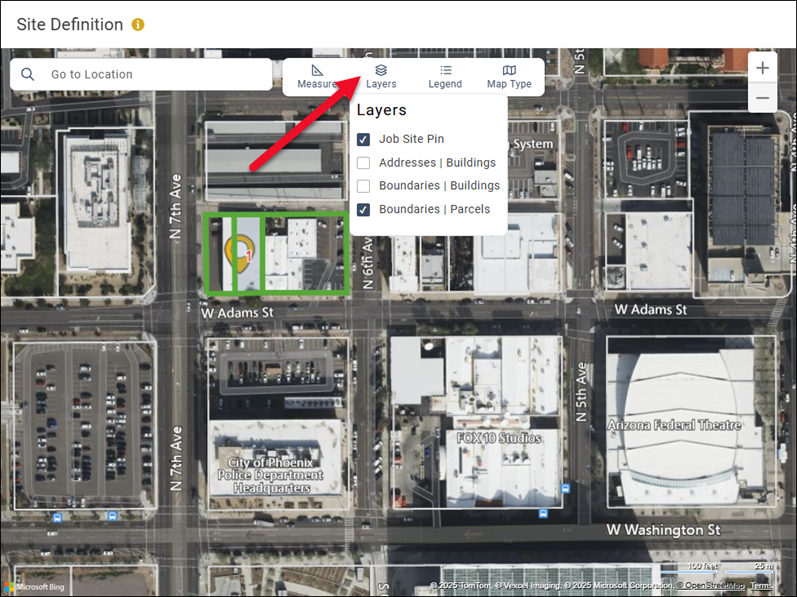
Users are provided with map layers to visualize data attributes. Click Layers and check/uncheck boxes to display/hide layers.
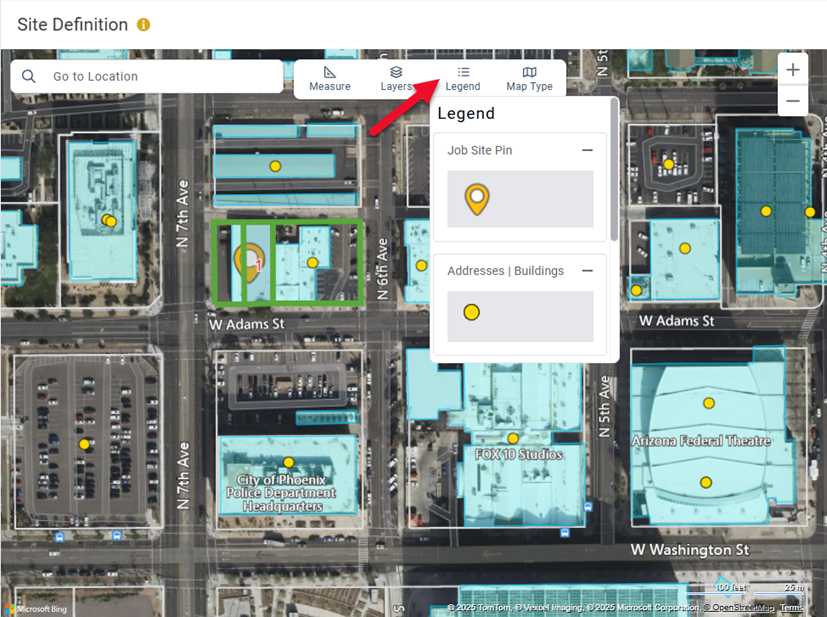
Legend
Users are provided with layer legends for contextualization. Click Legend to view the legend for the selected exhibit. Note: The Legend menu is longer when more layers are displayed on the map.
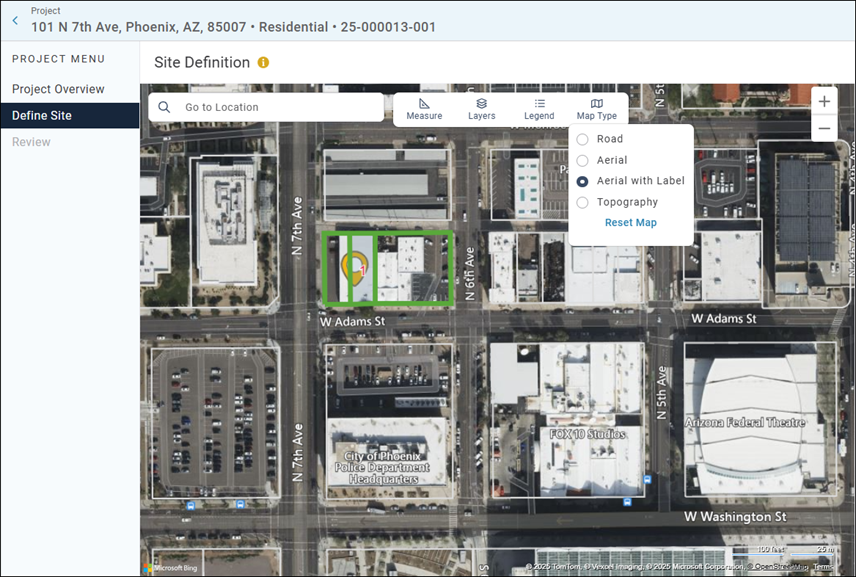
Map Type
Users can choose what type of map to display. Options include Road, Aerial, Aerial with Label, and Topography. The example below is the Aerial with Label Map Type.
Define the Site
Click the Define Site button in the bottom right corner of the page to begin the process of locking in the property details.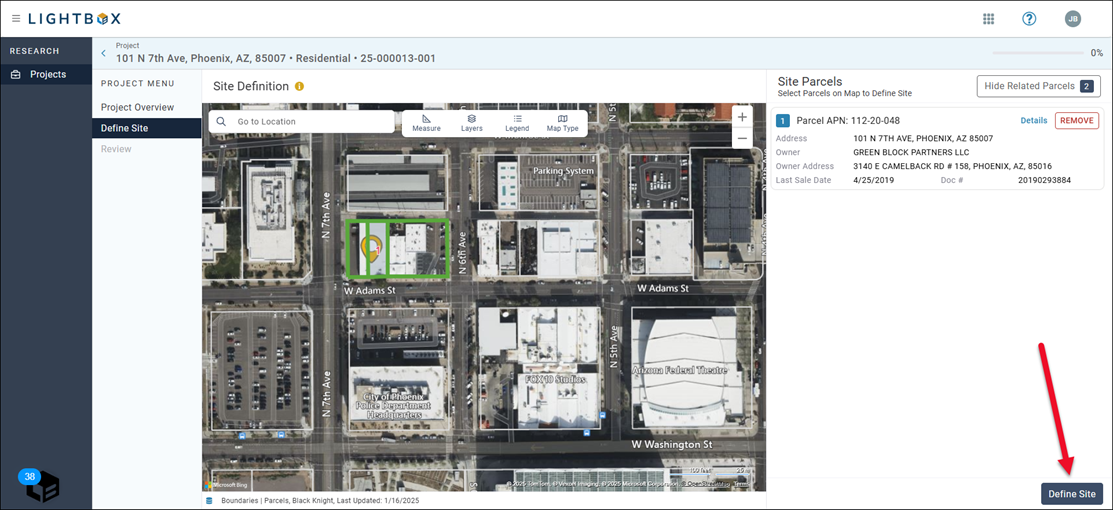
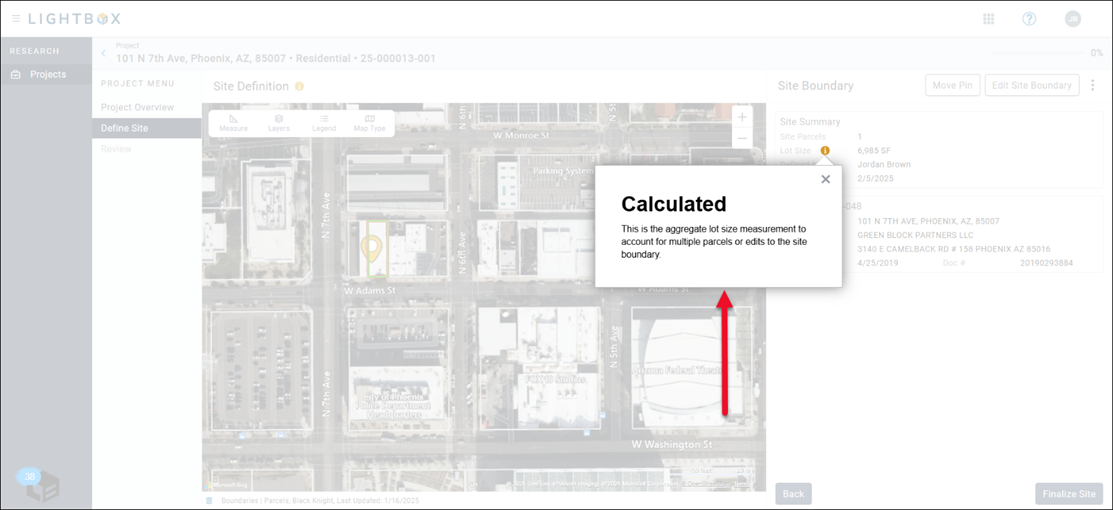
If there are multiple parcels, or if additional parcels have been manually added, a pop-up notification will appear. Click the X in the upper right corner of the pop-up to close it.
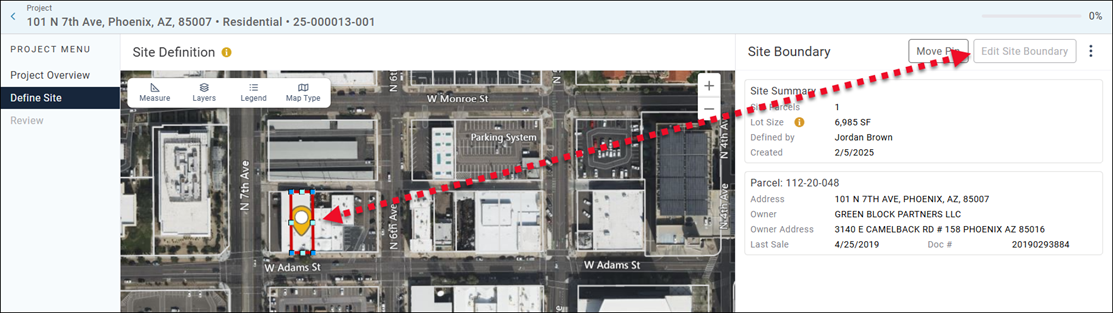
Two new buttons are available: Move Pin and Edit Site Boundary.

To move the site pin, click Move Pin. Click and drag the pin to the desired location on the map. After the site has been finalized, the Latitude and Longitude values will update to reflect the new pin position.
Click Edit Site Boundary to manually edit the site perimeter. Grab a vertex on the map and move the point or points to the desired location.
Click elsewhere on the map to end the action. The Lot Size will update to reflect the new square footage.
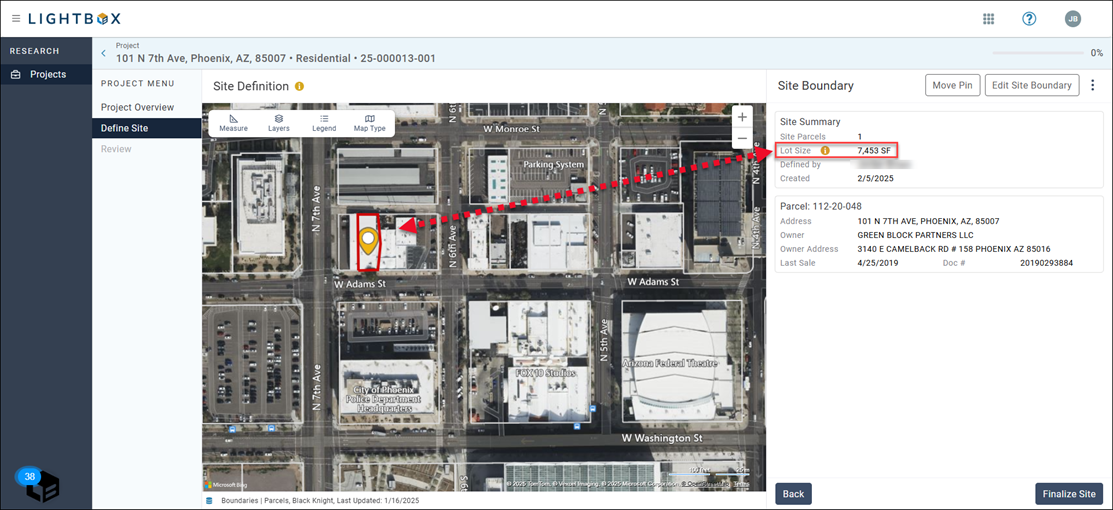
Click the Finalize Site button in the bottom right corner of the page to finalize the site boundaries.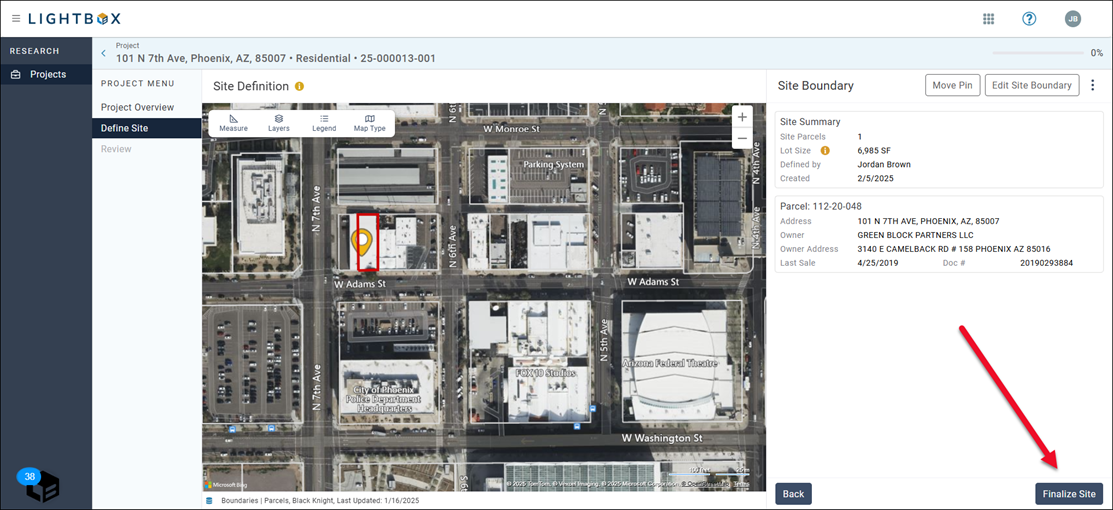
The Review page loads the Property Research Report, which includes the map as a PDF. Click the download icon in the upper right corner to download a copy to your local computer. 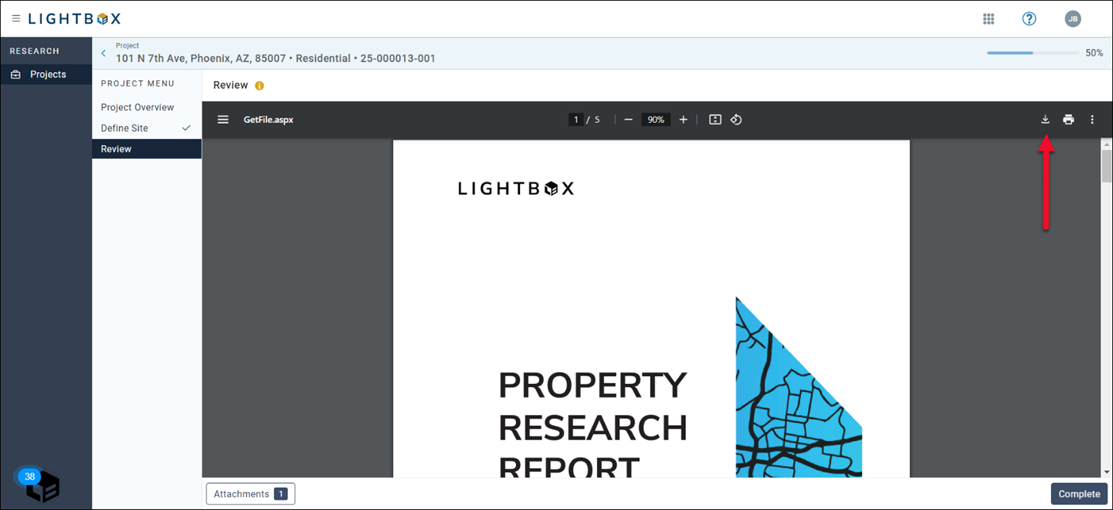
This file can be uploaded to the loan file in Collateral360. See the File Manager documentation for more information about uploading files.
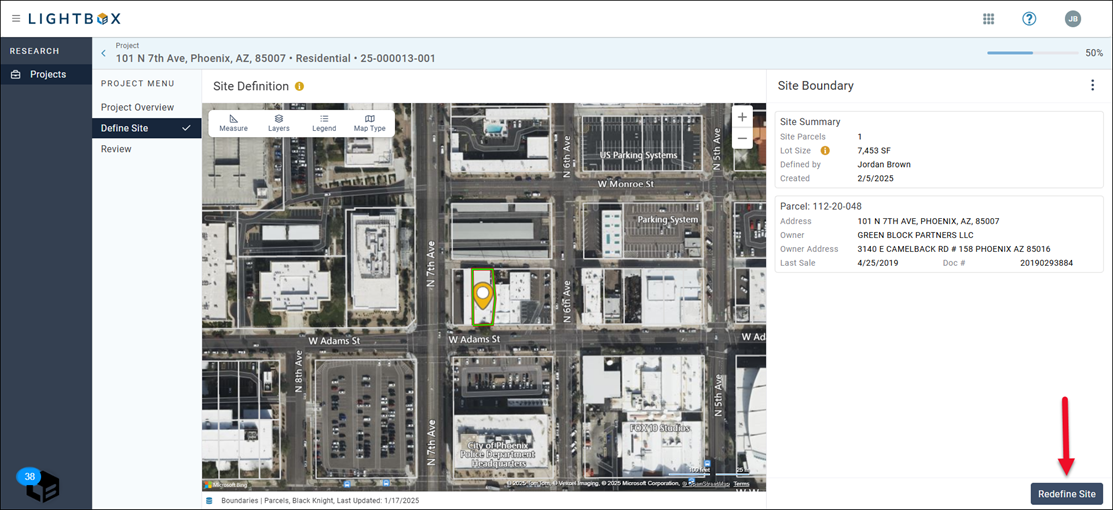
If you need to modify the site boundaries, click Define Site on the left, then click Redefine Site in the bottom right corner of the Define Site page. This will make the Move Pin and Edit Site Boundary buttons active again.
On the Review page, click the Complete button in the lower right corner to finish the process and load the Export page.

Export
The Export page contains three download links:
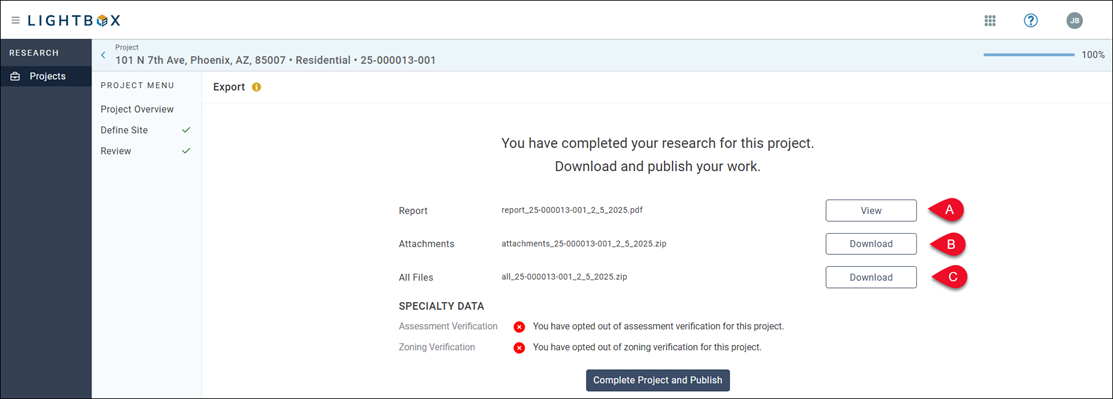
A. View: Click the View button to open the Property Research Report PDF.
B. Attachments: Click the Download button to the right of the Attachments line to download a zip file containing the Property Research Report.
C. All Files: Click the Download button to the right of All Files to download a zip file containing the Property Research Report PDF, map images, and spreads containing additional data related to crime, demographics, etc.
Was this article helpful?